00196497-07_SM_SXDX12_en.pdf - 第99页
Service Work Conveyor 3.4.13 Replacing the Y Axis Sensor Module [03064608-xx] Gantries Service Manual SIPLACE SX1/SX2/DX1/DX2 FS02 99 3.4.13 3 . 4 . 1 3 R e p la c in g t h e Y A x is S e n s o r M o d u le [ 0 3 0 6 4 6…
Service Work Conveyor
Gantries 3.4.12 Replacing the X Axis Sensor Module [03068500-xx]
98 Service Manual SIPLACE SX1/SX2/DX1/DX2 FS02
3.4.12
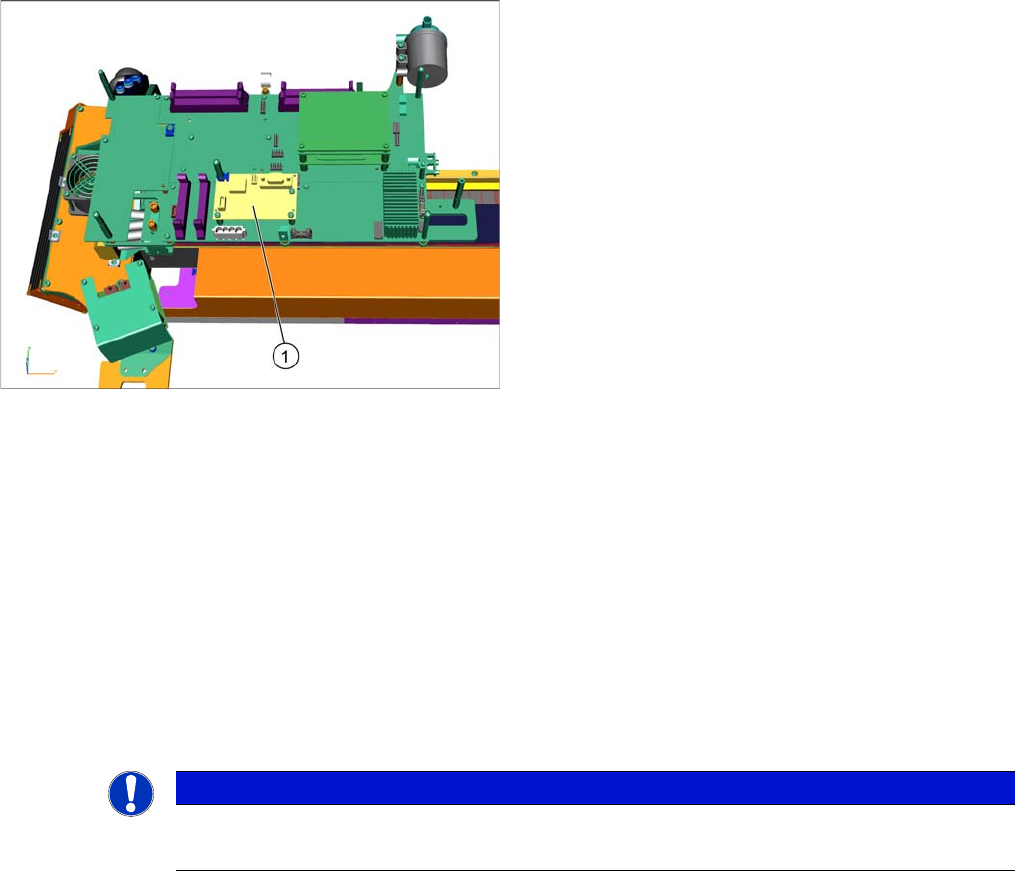
3.4.12 Replacing the X Axis Sensor Module [03068500-xx]
Replacing the X Axis Sensor Module [03068500-xx]
Parts, Equipment and Tools
▪ Sensor module X axis [03068500-xx]
Overview
Removal
► Switch off the machine, disconnect it from the power supply and secure it to prevent unauthorized
reactivation. Observe the instructions in section "1.2 Preparatory Work..." [ ➙ 13].
► If there is a cover above the boards, dismantle it.
► Unplug all electrical connections to the X axis sensor module. You may want to mark their positions,
to make clear assignment easier later on.
► Undo the screws/bolts fastening the sensor module and then remove the sensor module.
Installation
► Follow the removal instructions in reverse order for installation. Also observe the following instruc-
tions:
1. Sensor module X axis [03068500-xx]
NOTICE
Installation instructions
► Replace any opened cable ties, if needed.

Service Work Conveyor
3.4.13 Replacing the Y Axis Sensor Module [03064608-xx] Gantries
Service Manual SIPLACE SX1/SX2/DX1/DX2 FS02 99
3.4.13
3.4.13 Replacing the Y Axis Sensor Module [03064608-xx]
Replacing the Y Axis Sensor Module [03064608-xx]
Parts, Equipment and Tools
▪ Sensor module Y axis [03064608-xx]
Overview
Removal
► Switch off the machine, disconnect it from the power supply and secure it to prevent unauthorized
reactivation. Observe the instructions in section "1.2 Preparatory Work..." [ ➙ 13].
► Undo the four screws fastening the cover on the sensor module and remove the cover.
► Unplug all electrical connections to the Y axis sensor module. Mark their positions, to make clear
assignment easier later on.
► Undo the four screws/bolts fastening the sensor module and then remove the sensor module.
NOTICE
SW707 / SW706
Check if one of the following conditions applies:
➢ The sensor module from a machine with SW707 is reused in a machine with SW706.
➢ On a machine with SW706, either a gantry is replaced or an additional gantry is installed
into the machine.
➢ The following error message is issued "FM30491: Communication problem with axis con-
trol processor."
➢ The following error message is issued "FM30328: Error on downloading machine data.
Could not validate data after download."
► If one of these conditions applies, read the Technical Information "Replacement of Y axis
sensor module [03064608-xx]" [DE: TI2014-07D09] [EN: TI2014-07E09].
NOTICE
From SW706.1 SP2 HF2 and SW707.0
The Y axis sensor module can be replaced by the customer from SW706.1 SP2 HF2 and
SW707.0.
► Please contact the SIPLACE Service team for all older SW versions.
1. Sensor module Y axis [03064608-xx]

Service Work Conveyor
Gantries 3.4.13 Replacing the Y Axis Sensor Module [03064608-xx]
100 Service Manual SIPLACE SX1/SX2/DX1/DX2 FS02
Installation
► Follow the removal instructions in reverse order for installation. Also observe the following instruc-
tions:
Transferring the gantry data
On the Y axis sensor module, there is an EEPROM in which the gantry data is stored. These are gantry-
specific and enable you to exchange gantries between the various SX machines (gantry modularity).
After exchanging the Y axis sensor module, these data, which are also stored in the station computer,
must be transferred back to the Y axis sensor module.
Proceed as follows:
CAUTION
Installation instructions
► When inserting the connector, pay attention to its correct position. Although the connectors
are encoded, you could still insert the connectors in the wrong row. This could then damage
the sensor module when it is switched on.
► Replace any opened cable ties, if needed.
► Transfer the gantry data (see below).
► Switch the machine on.
► Click on the button.
⇨ The adjacent error messages will appear.