TRS Advanced WB Intel Issue 02.pdf - 第35页
Issue 2, Nov 14 TRS Advanced Maintenance 35 6. Tighten the 6 guide rods locking screws equally (3 for each side of the rail cap) to lock the guide rods into the position. NOTE Ensure there is an even gap between clamping…
TRS Advanced Maintenance
34
Issue 2, Nov 14
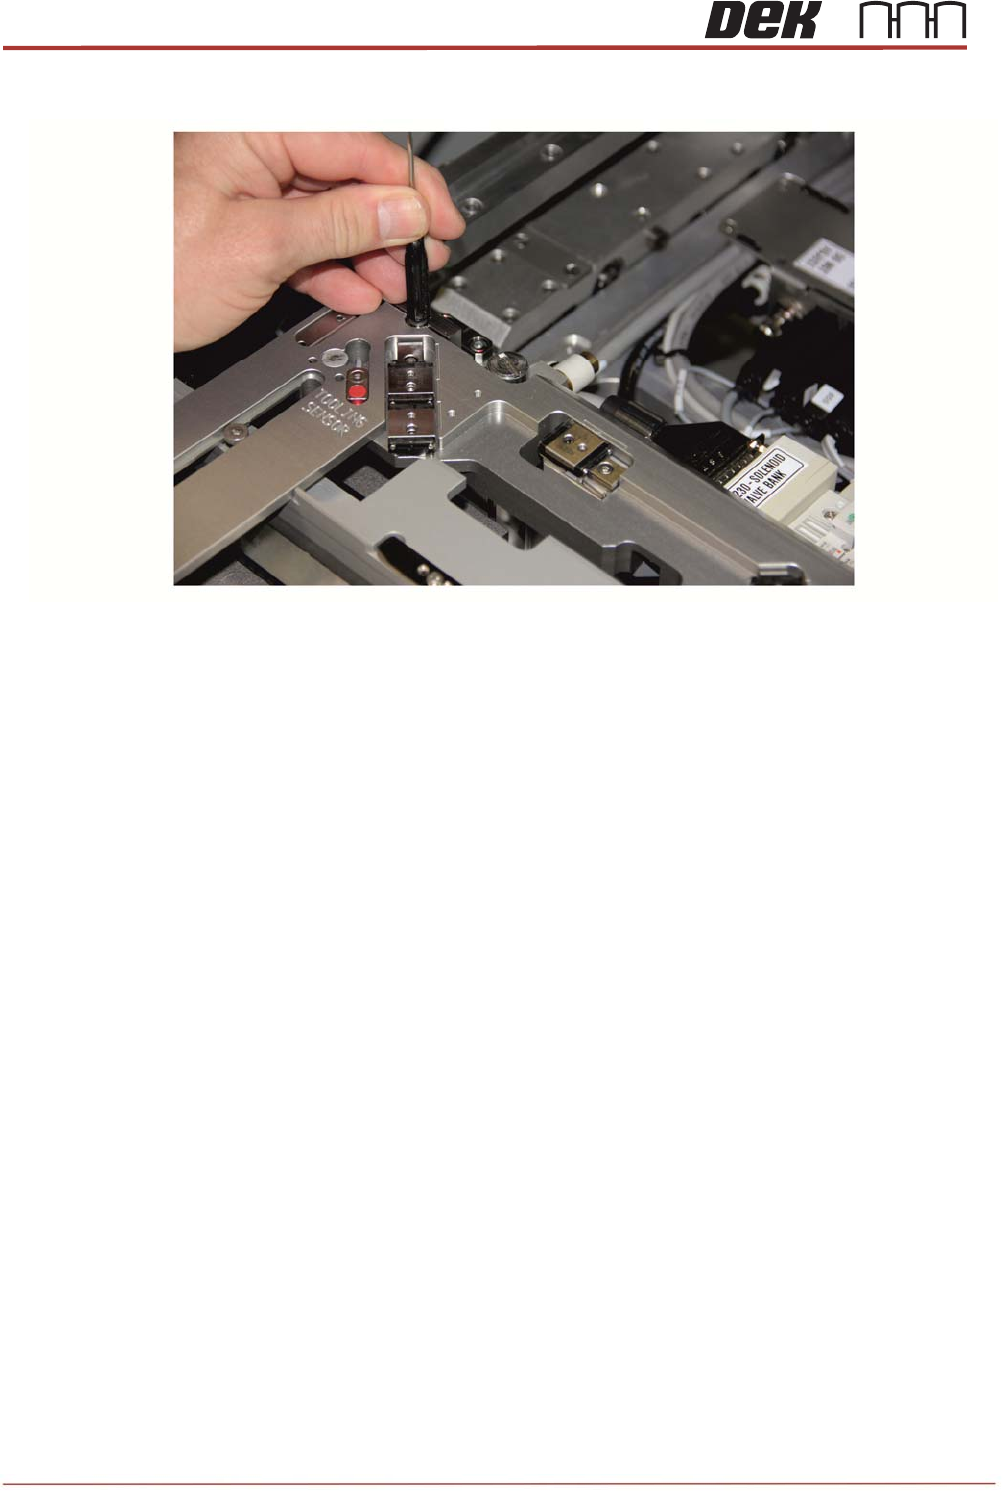
5. Gently tap down each guide rods until it bottoms out do not go any further.
Issue 2, Nov 14
TRS Advanced Maintenance
35
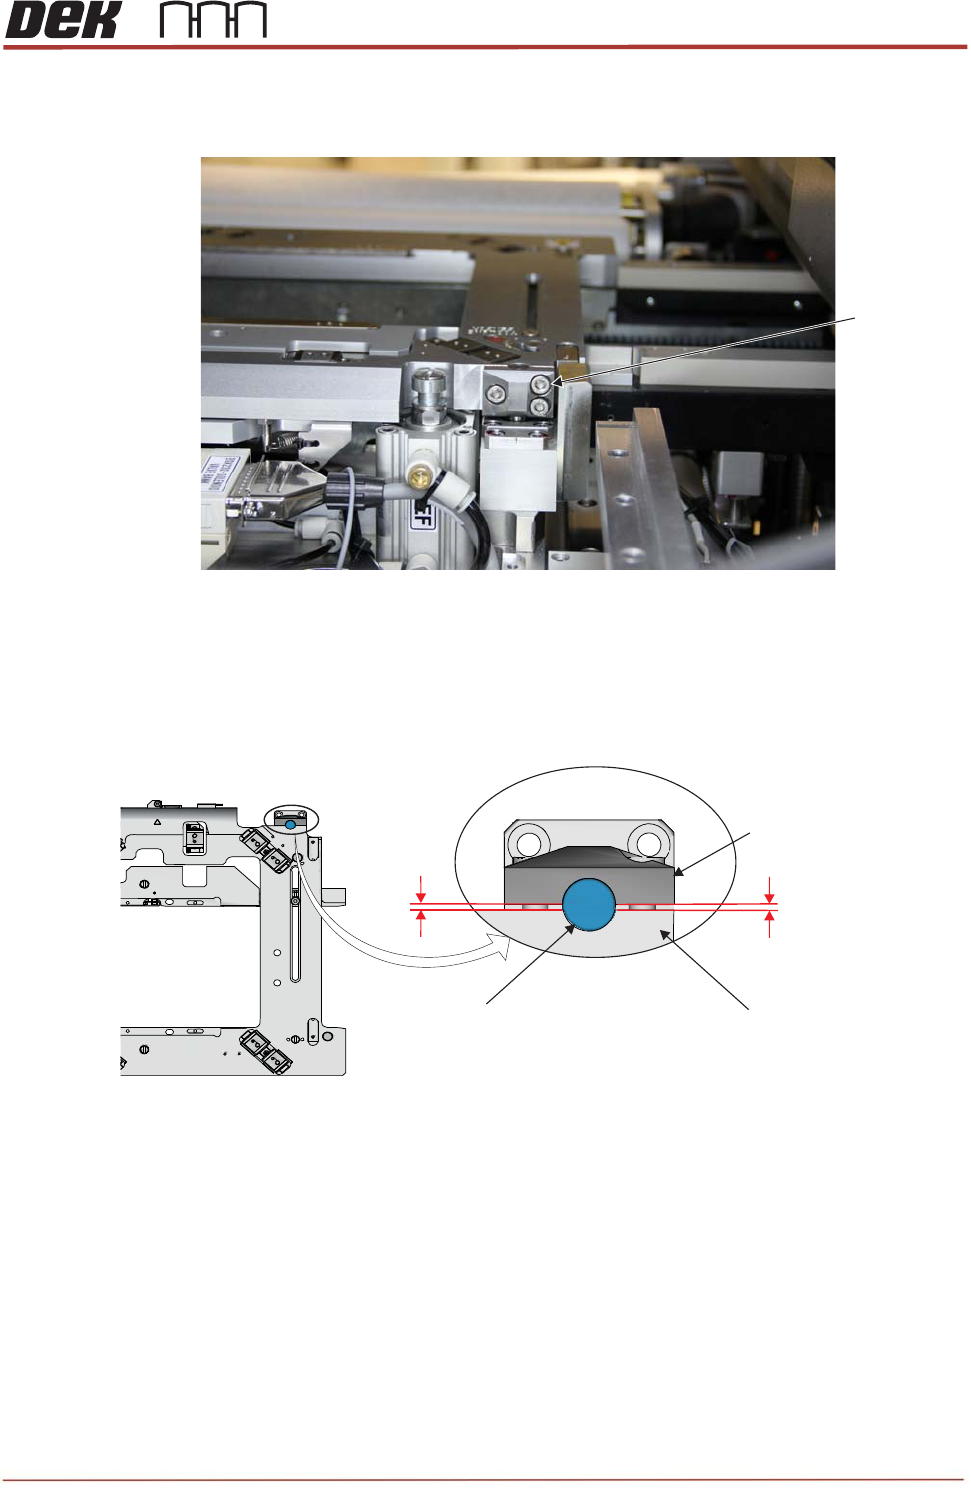
6. Tighten the 6 guide rods locking screws equally (3 for each side of the rail cap) to lock
the guide rods into the position.
NOTE
Ensure there is an even gap between clamping block and the rail cap as shown below.
M5x16 Cap
Head screws
Viewed from the Rear of the Machine
Partial View on Rail Cap Assembly
Clamping Block
Rail Cap
Alignment Bearing
Guide Rod
Gap
Gap
TRS Advanced Maintenance
36
Issue 2, Nov 14
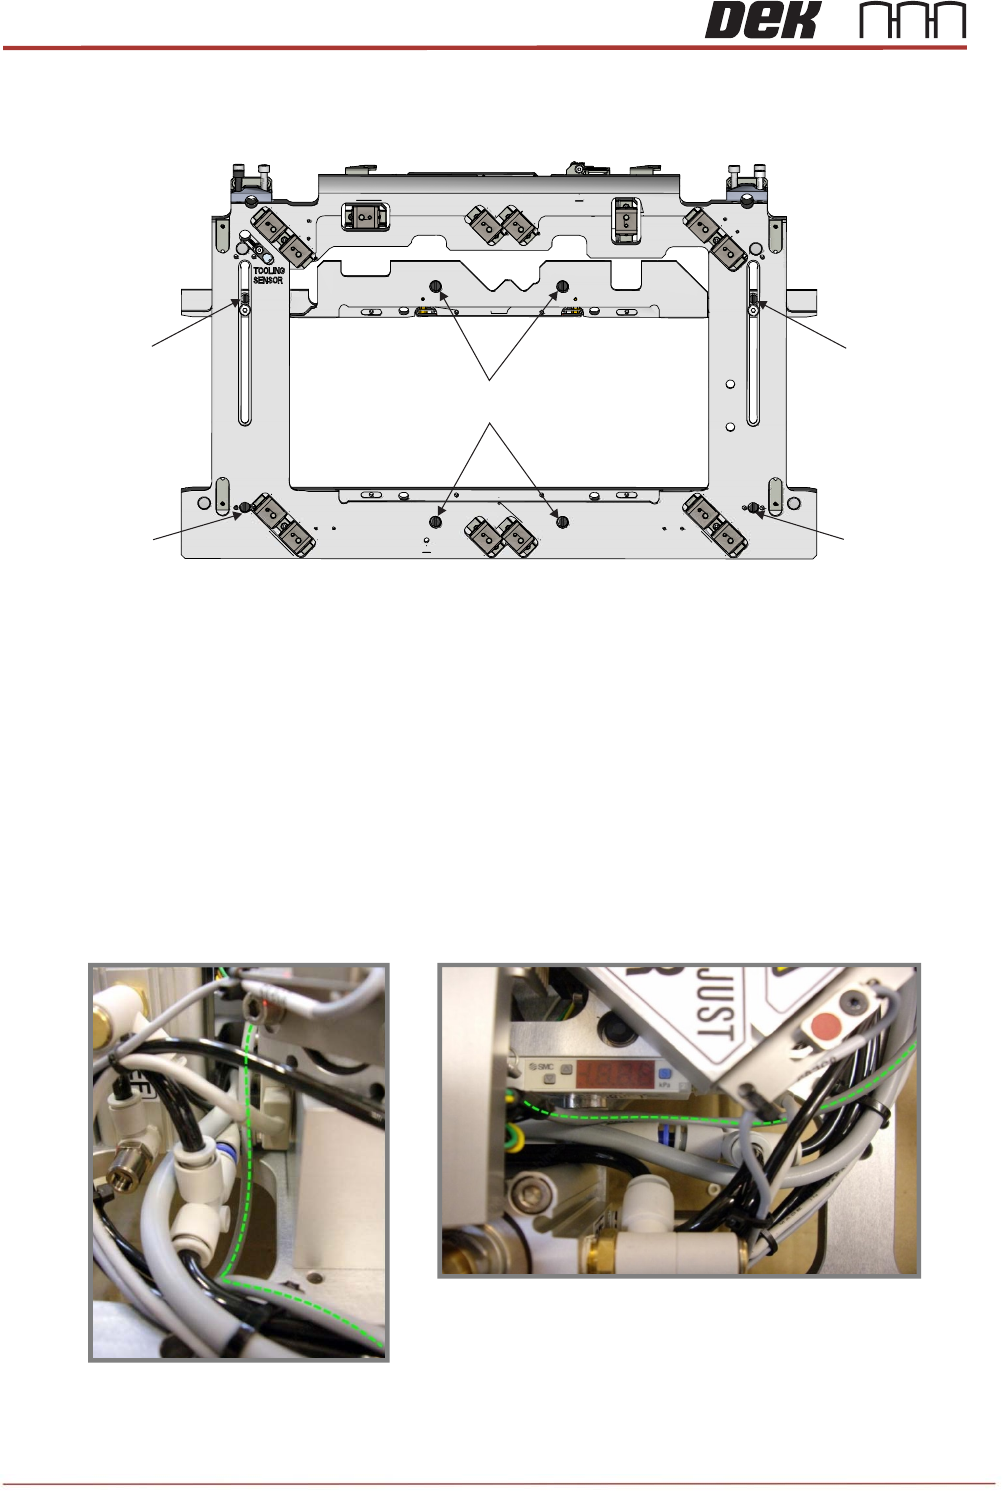
7. Tighten all 8 rail cap fasteners equally, as shown below.
8. Blue Loctite 6 off M5x16 clamping block screws, torque to 4.9Nm.
9. Connect 2 rail cap looms previously removed and neat them tightly by using cable ties as
shown below.
NOTE
The loom must sit between the pneumatic pipes and the sensor mount, ensure that the
cable is free to move up and down with the rail cap.
M4x8 Countersunk
Screws
M4x8 Countersunk
Screws
M4x25 Pan Head Screws
(4 Positions)
M4x16 Pan
Head Screws
M4x16 Pan
Head Screws
View on Rail Cap Assembly