TRS Advanced WB Intel Issue 02.pdf - 第47页
Issue 2, Nov 14 TRS Advanced Maintenance 47 16. Check that the gaps between the 4 rail bear ing tracks and their associated locating dowels by using 0.05mm feeler gauge as a NOGO . 17. If 0.05mm feeler is GO, loosen the …
TRS Advanced Maintenance
46
Issue 2, Nov 14
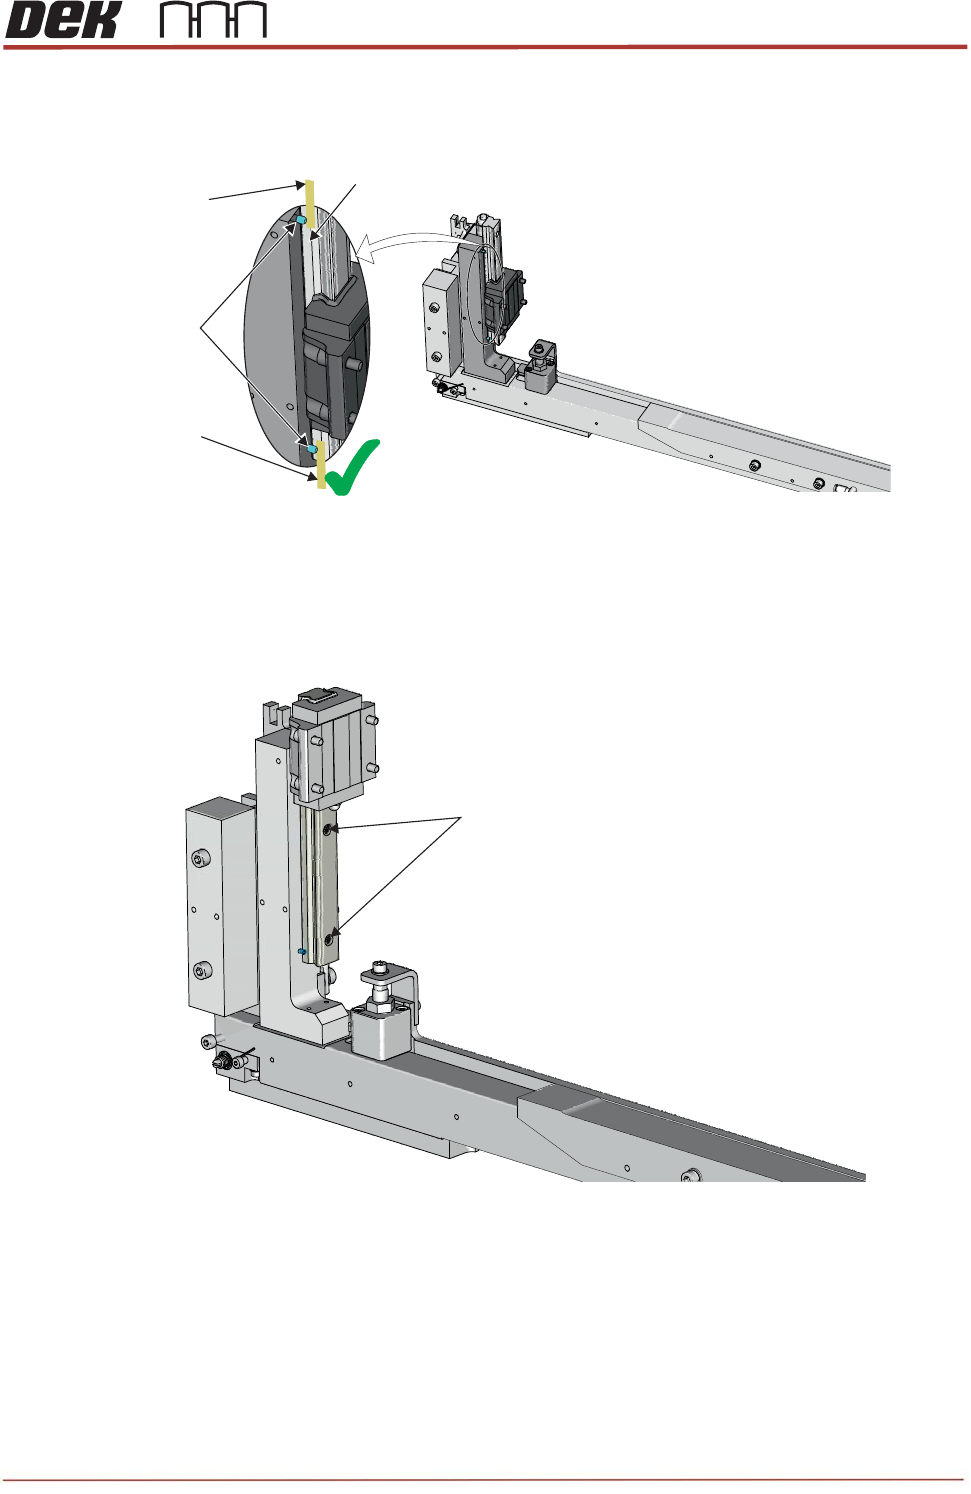
15. Re-align the plastic belt guides (2 front, 2 rear) with the belt support as shown below.
Issue 2, Nov 14
TRS Advanced Maintenance
47
16. Check that the gaps between the 4 rail bearing tracks and their associated locating
dowels by using 0.05mm feeler gauge as a NOGO.
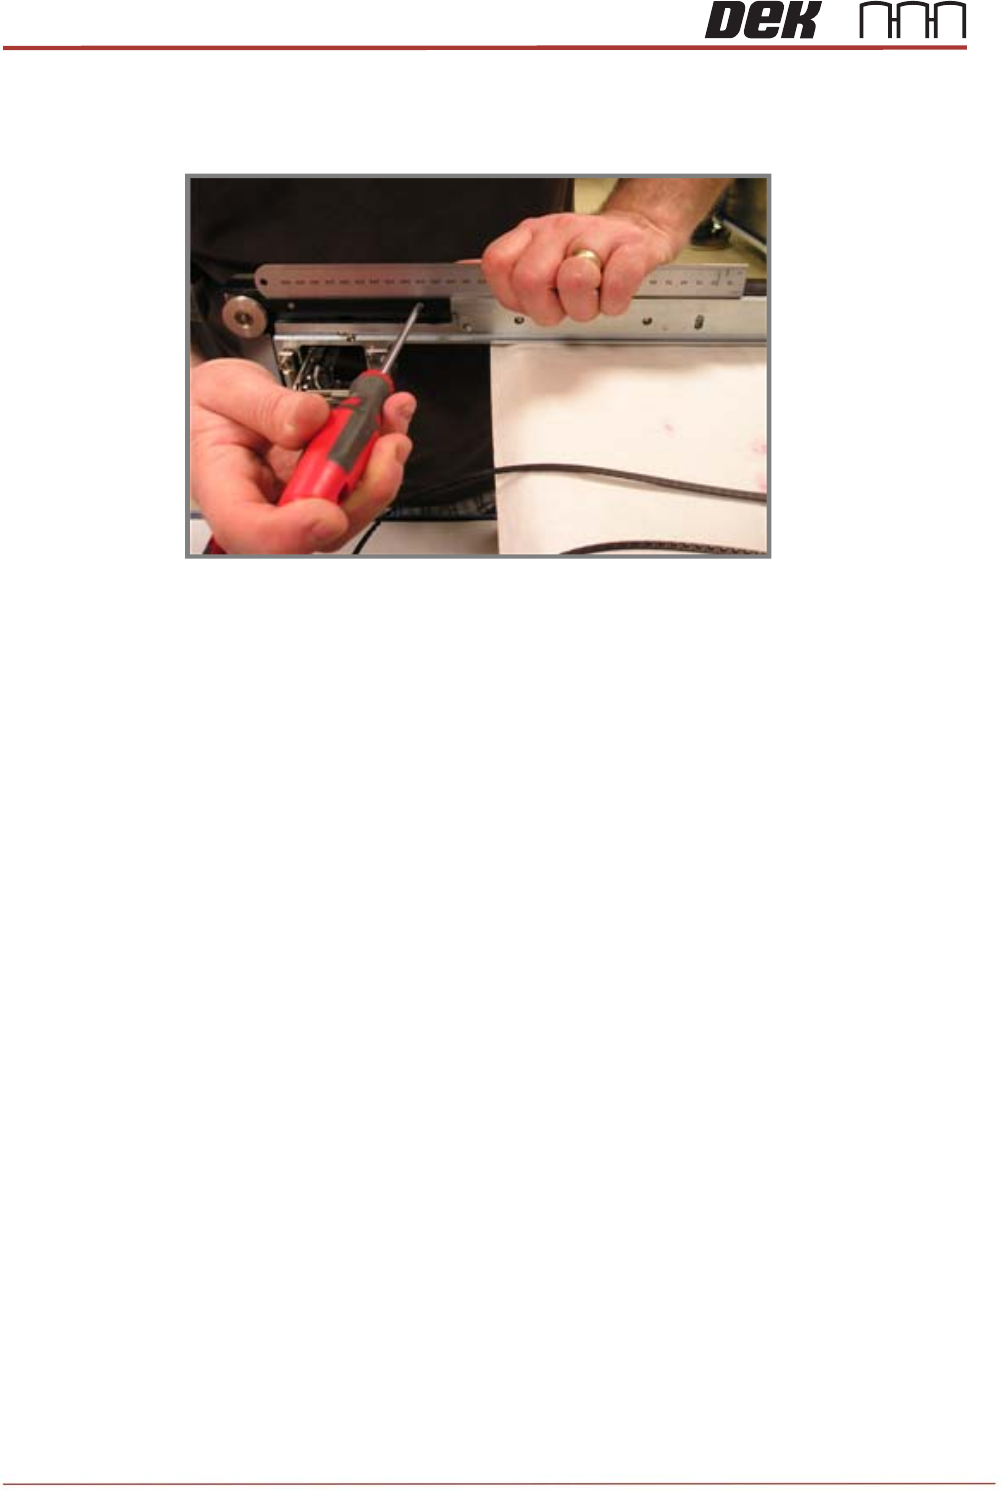
17. If 0.05mm feeler is GO, loosen the bearing rail fasteners, push the datum edge of the
bearing against the locating dowels, apply Pink Loctite to the fasteners and re-tighten,
torque to 1.5Nm.
18. Do NOT re-fit flat belts to the Centre Rail Sections at this time (store safely in work
area).
Dowel Pins
Rail Bearing Track
Partial View on Rear Rail
0.05mm
Feeler Gauge
0.05mm
Feeler Gauge
No Gap
M3 High Tensile
Cap Head Screws
TRS Advanced Maintenance
48
Issue 2, Nov 14
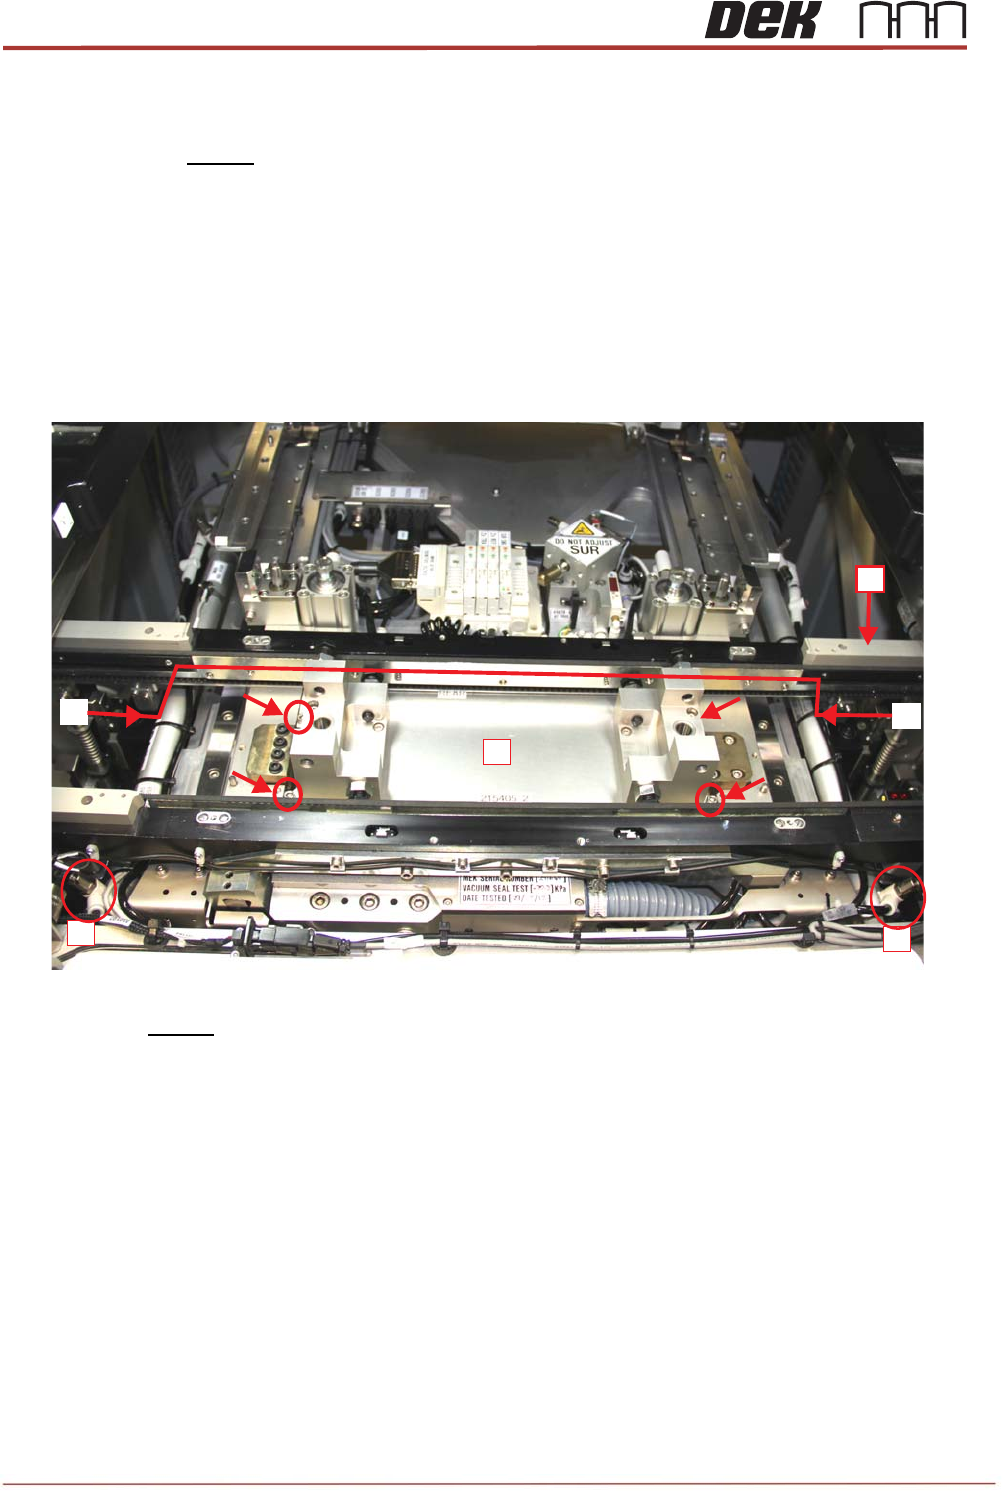
19. [B] Disconnect the pneumatic pipes to each end of the LH TRA Cylinder.
20. [D] Re-fit the REAR Centre Rail Section onto its associated bearing carriage ensuring it
clears any MEK components.
21. [E] Tweak the Rear Rail position (using the Rail Width Drive Belts again) so that the
Board Clamp Plate is slightly rearward of the vacuum aperture in the MEK base.
22. [F] Fit the 215405 Rail Alignment Jig (RAJ) into the MEK base. Screw down (using 4x
700116 / 700603), making sure the Jig is located on the diamond reference pins & is fully
flat to the base.
23. Re-fit the front center rail section onto its associated bearing carriage.
24. Move the under screen cleaner to its home position at the front of the machine.
25. Carry out a visual collision check prior to re-connecting mains power and compressed air
services to the machine.
D
B
B
B
B
F
E
E