TRS Advanced WB Intel Issue 02.pdf - 第50页
TRS Advanced Maintenance 50 Issue 2, Nov 14 RAIL CAP FITTING : 32. Undo (but do not remove) the 6 off M5x16 c ap head screws at the rear of the rail cap as shown picture below. 33. Carefully fit the Rail Cap assembly ove…
Issue 2, Nov 14
TRS Advanced Maintenance
49
26. Power up the printer by turning the main isolator ON and pressing the green start button
(RH side).
27. Enter diagnostics mode, when prompted to press the blue button.
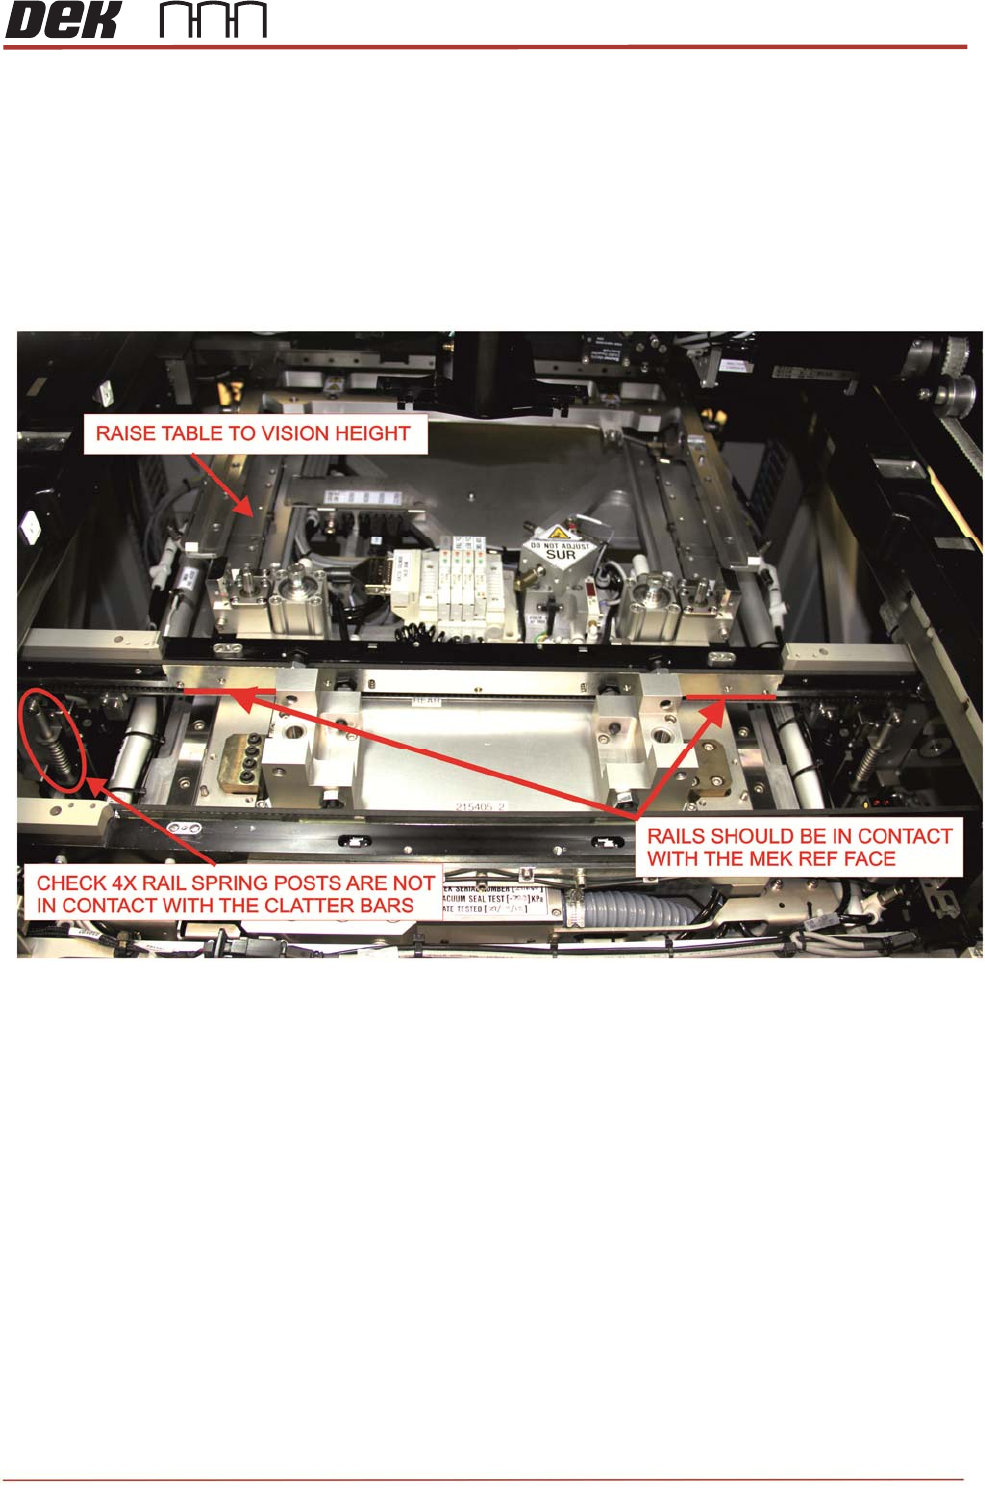
28. Home the rising table.
29. Bring the rising table up to “vision height”.
30. Check that both front and rear rails are resting on the MEK and not on the clatter bars.
If required, adjust clatter bars equally to a lower height.
31. Power off the printer and disconnect mains power and compressed air.
TRS Advanced Maintenance
50
Issue 2, Nov 14
RAIL CAP FITTING:
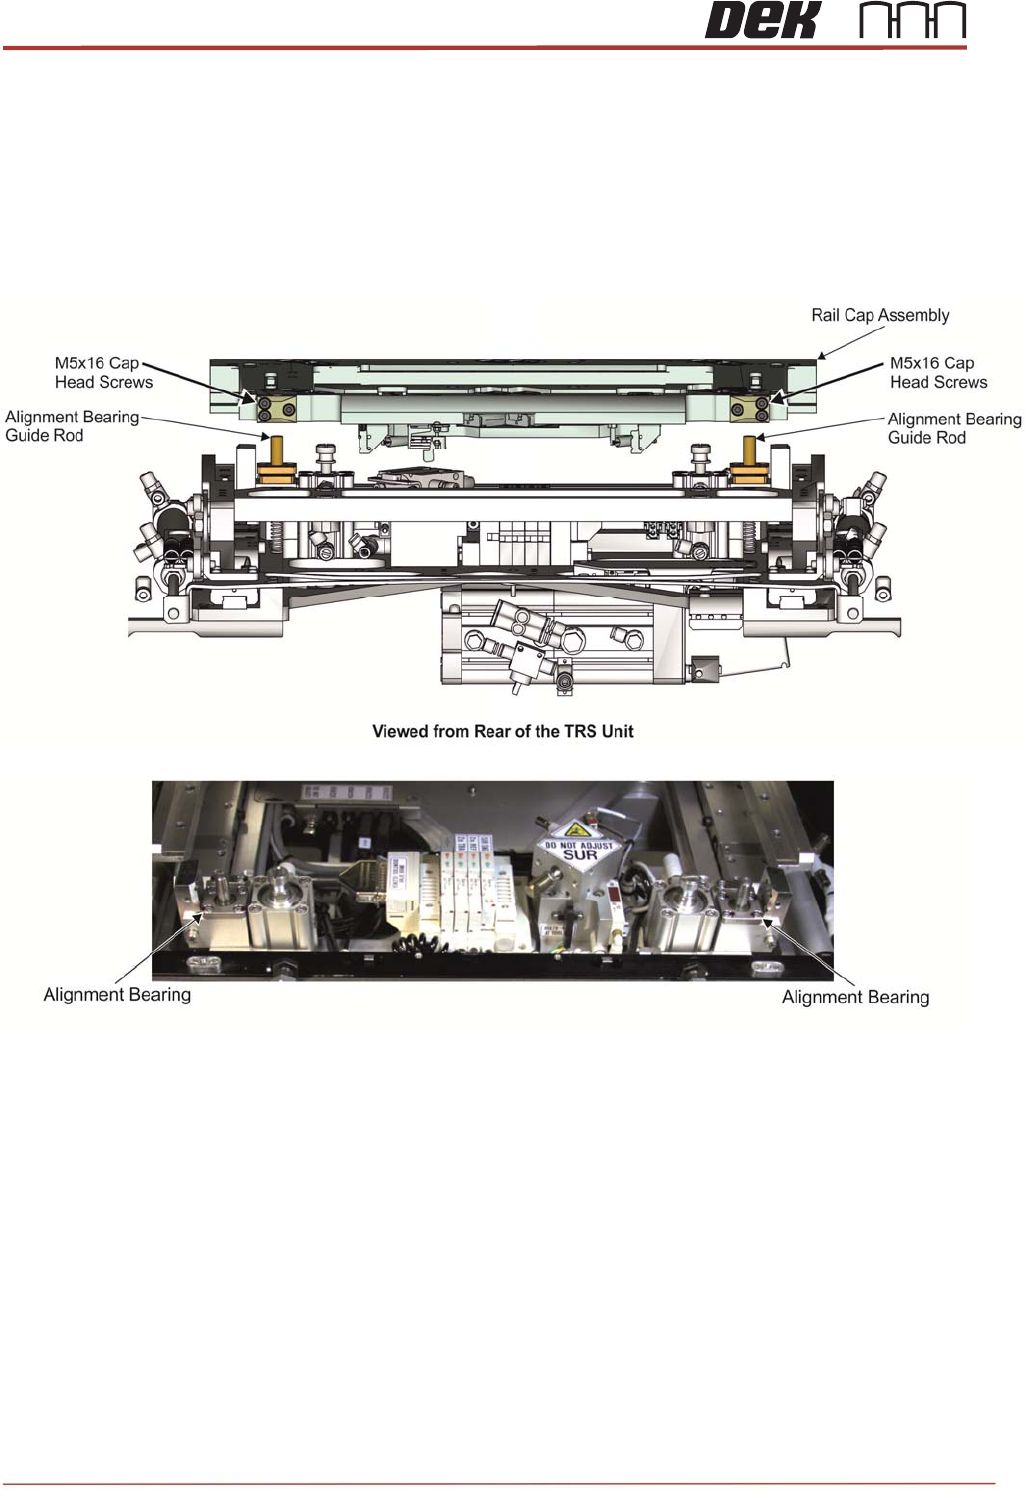
32. Undo (but do not remove) the 6 off M5x16 cap head screws at the rear of the rail cap as
shown picture below.
33. Carefully fit the Rail Cap assembly over the rails and locate the guide rod clamps at the
rear of the Rail Cap over the guide rods.
34. Lightly shake the rail cap to locate the locating plates.
Issue 2, Nov 14
TRS Advanced Maintenance
51
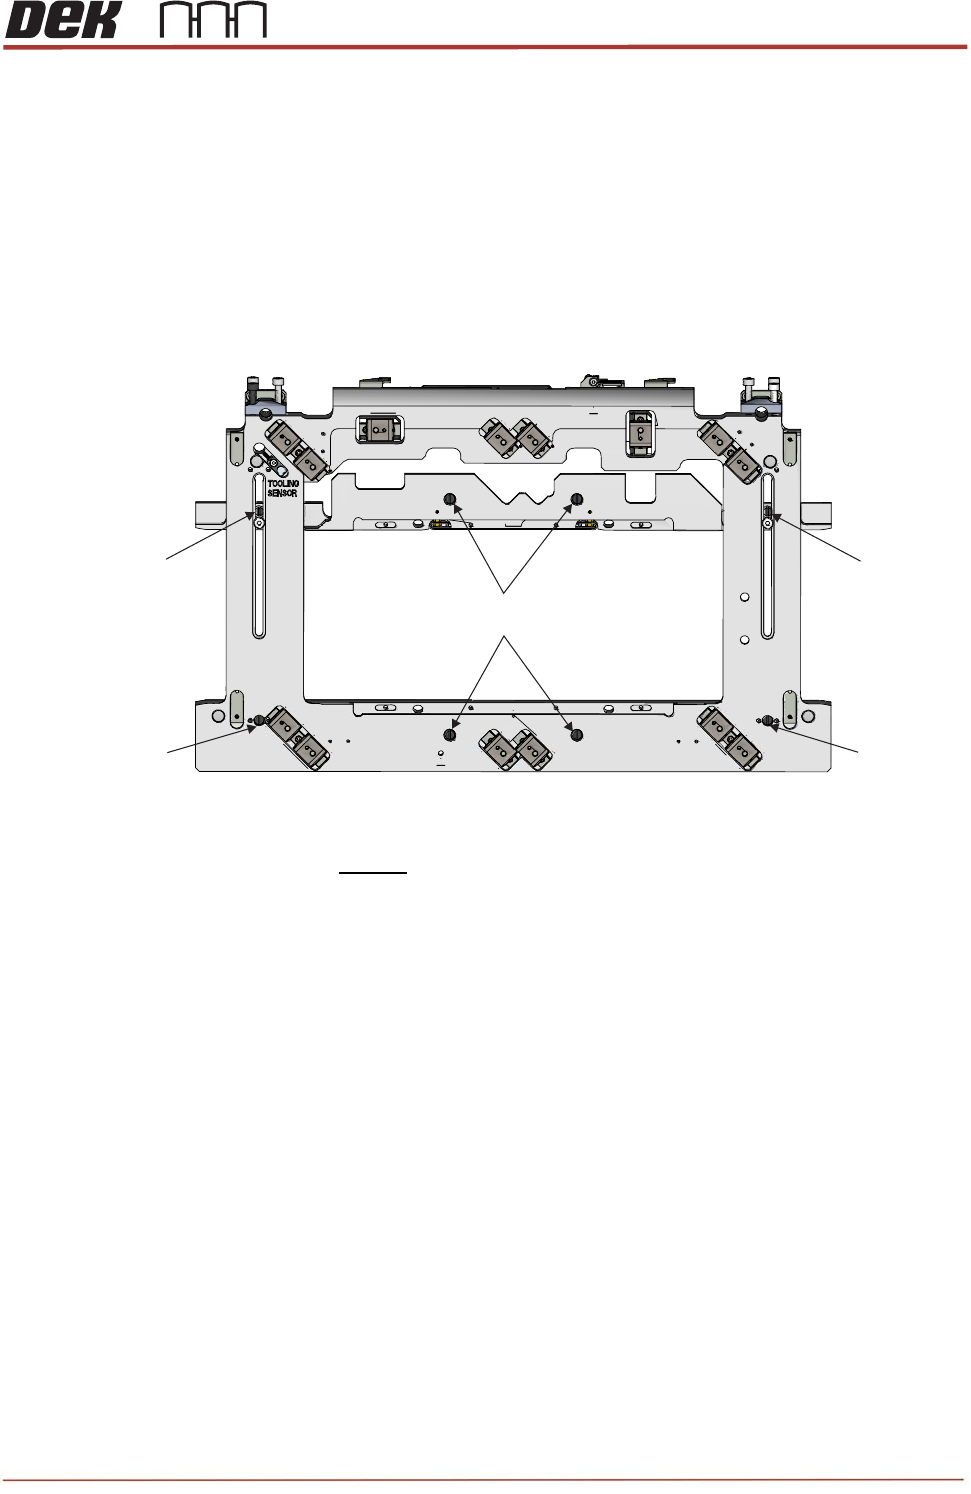
35. Press the rail cap flat and tighten the 6 off M5x16 cap head clamping block screws to
lock alignment bearing guide rods into position as shown below.
36. Press the Rail Cap flat and secure in the locations shown below using:
• 4off M4 x 25 Pan hd screws (700075)
• 2off M4 x 8 Sltd C/snk screws (700405)
• 2off M4 x 16 Pan hd screws (700045)
• 6off M4 crinkle washers (700610)
37. Fully tighten the fasteners before loosening them all by ½ turn.
M4x8 Countersunk
Screws
M4x8 Countersunk
Screws
M4x25 Pan Head Screws
(4 Positions)
M4x16 Pan
Head Screws
M4x16 Pan
Head Screws
View on Rail Cap Assembly