00198243-01_AI_BulkFeederX_XS-SX_DE+EN.pdf - 第113页
4 Retrofit kit for X-Series S 4.2 Preparatory steps Assembly Instructions / Montageanleitung SIPLACE BulkFeeder X Retrofit Kit for SX Series and X Series S 07/2017 113 ► Insert the GigE card in place of the protective co…
4 Retrofit kit for X-Series S
4.2 Preparatory steps
112 Assembly Instructions / Montageanleitung SIPLACE BulkFeeder X Retrofit Kit for SX Series and X Series S 07/2017
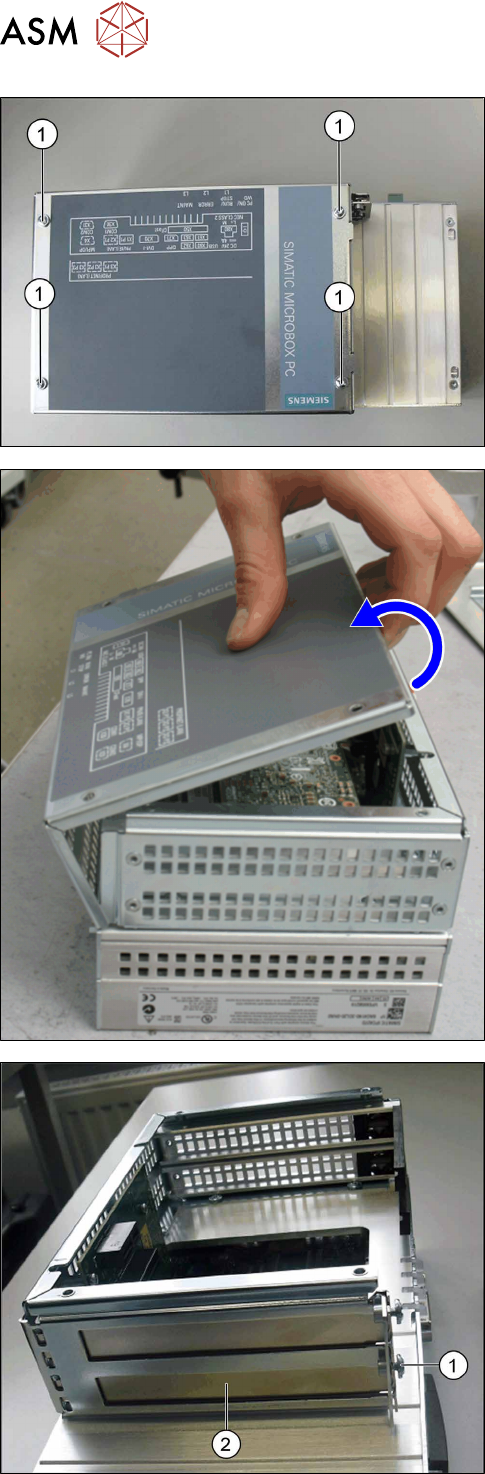
► Remove the screws (1) on the housing cover.
► Swing open the housing cover; it is held on the
folding edge by two hinges.
► Open the cover and lift it off the hinges.
► Place the cover to one side.
► Remove the screw (1) fastening the lower pro-
tective cover (2).
► Pull the protective cover off its fixtures.
► Keep the fastening screw (1). The protective
cover (2) is no longer needed.
4 Retrofit kit for X-Series S
4.2 Preparatory steps
Assembly Instructions / Montageanleitung SIPLACE BulkFeeder X Retrofit Kit for SX Series and X Series S 07/2017 113
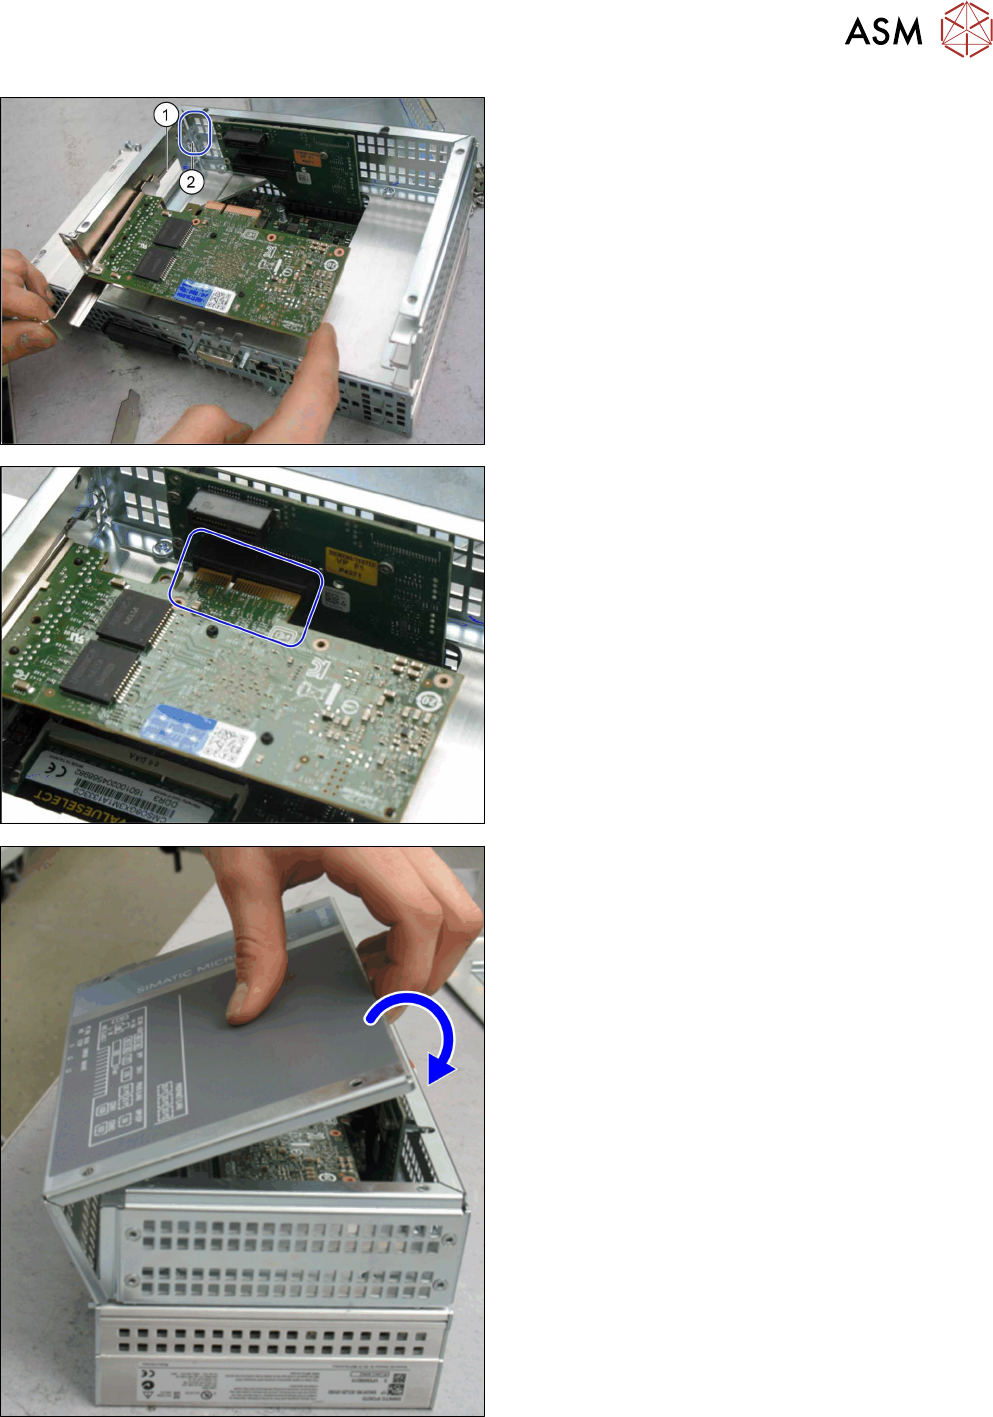
► Insert the GigE card in place of the protective
cover. Make sure that the "nib" on the guide rail
(1) correctly engages at the point where it is in-
serted (2).
► The card has a press-fit connection at the head
end. When inserting the GigE card, make sure
that this press-fit connection engages correctly
with the point opposite into which it is inserted.
► Use the fastening screw previously removed to
screw the GigE card tight.
► Close the computer: place the housing cover
back onto the hinges at the side.
► Swing the cover closed, until it engages in the
computer frame.
► Use the screws to fasten the cover.
4 Retrofit kit for X-Series S
4.2 Preparatory steps
114 Assembly Instructions / Montageanleitung SIPLACE BulkFeeder X Retrofit Kit for SX Series and X Series S 07/2017
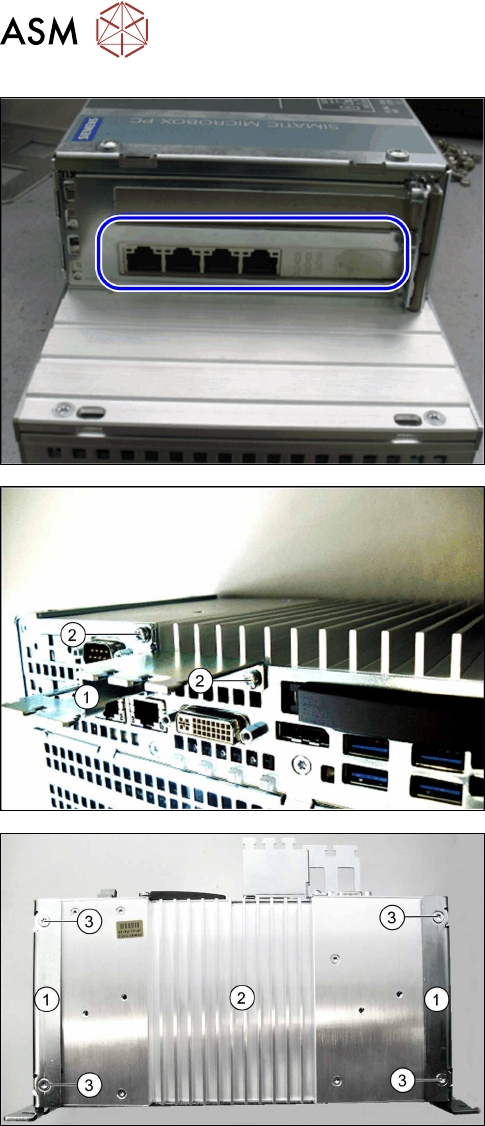
► The retrofitted computer is now ready. There are
four LAN ports for connection of the BulkFeeder
X LAN cable.
► Connection of the cable is described in the cable
instructions and in section 4.6 "Connecting the
cable" [}128].
► At the side, fit the Profibus (1) for strain relief and
the cable guidance with fastening screws (2).
► Position the two book holders (1) onto the Bulk-
Feeder X computer (2) and fasten these with the
screws provided (3) to the rear side. This allows
you to fit the BulkFeeder X computer later into
the additional holder, next to the pneumatic unit
at location 4.