00198243-01_AI_BulkFeederX_XS-SX_DE+EN.pdf - 第121页
4 Retrofit kit for X-Series S 4.4 Inserting the cable into the machine Assembly Instructions / Montageanleitung SIPLACE BulkFeeder X Retrofit Kit for SX Series and X Series S 07/2017 121 4.4.2 Location 2 and 3 Insert the…
4 Retrofit kit for X-Series S
4.4 Inserting the cable into the machine
120 Assembly Instructions / Montageanleitung SIPLACE BulkFeeder X Retrofit Kit for SX Series and X Series S 07/2017
4.4 Inserting the cable into the machine
One BulkFeeder X can be connected at each location.
●
At location 4, you can connect the BulkFeeder X directly to the BulkFeeder X computer with
the cable [03151338-xx] (length 2 m).
●
To connect the Bulkfeeder X to locations 1, 2 and 3, you first need to insert the cable into the
machine.
NOTICE!
When inserting the cable, pay attention to the labeling on the cable ends to make sure
you connect correctly: "* BF *" for the BulkFeeder X; "* GigE *" for the BulkFeeder X
computer
.
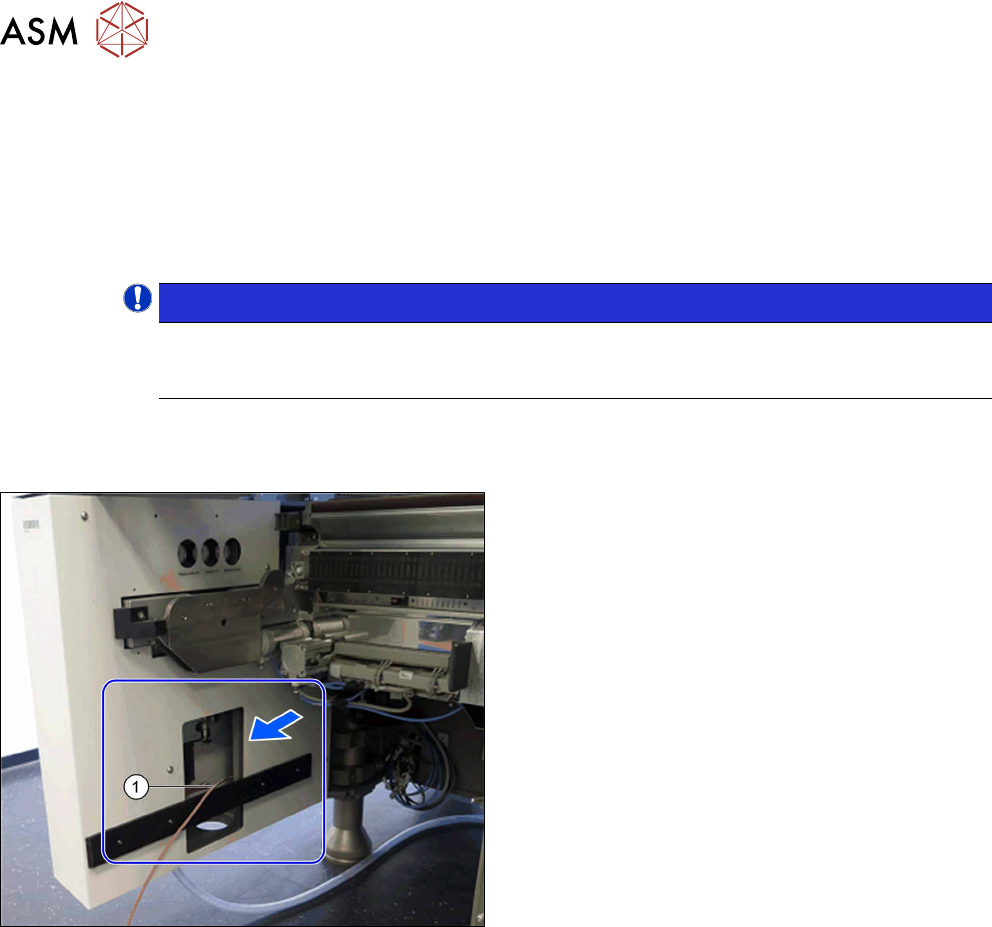
4.4.1 Location 1
Insert the cable [0312556-xx] (length 4 m) for connecting the BulkFeeder X at location 1 as follows:
► Pull the cable (1) from location 4 via the conveyor
side to location 1.
4 Retrofit kit for X-Series S
4.4 Inserting the cable into the machine
Assembly Instructions / Montageanleitung SIPLACE BulkFeeder X Retrofit Kit for SX Series and X Series S 07/2017 121
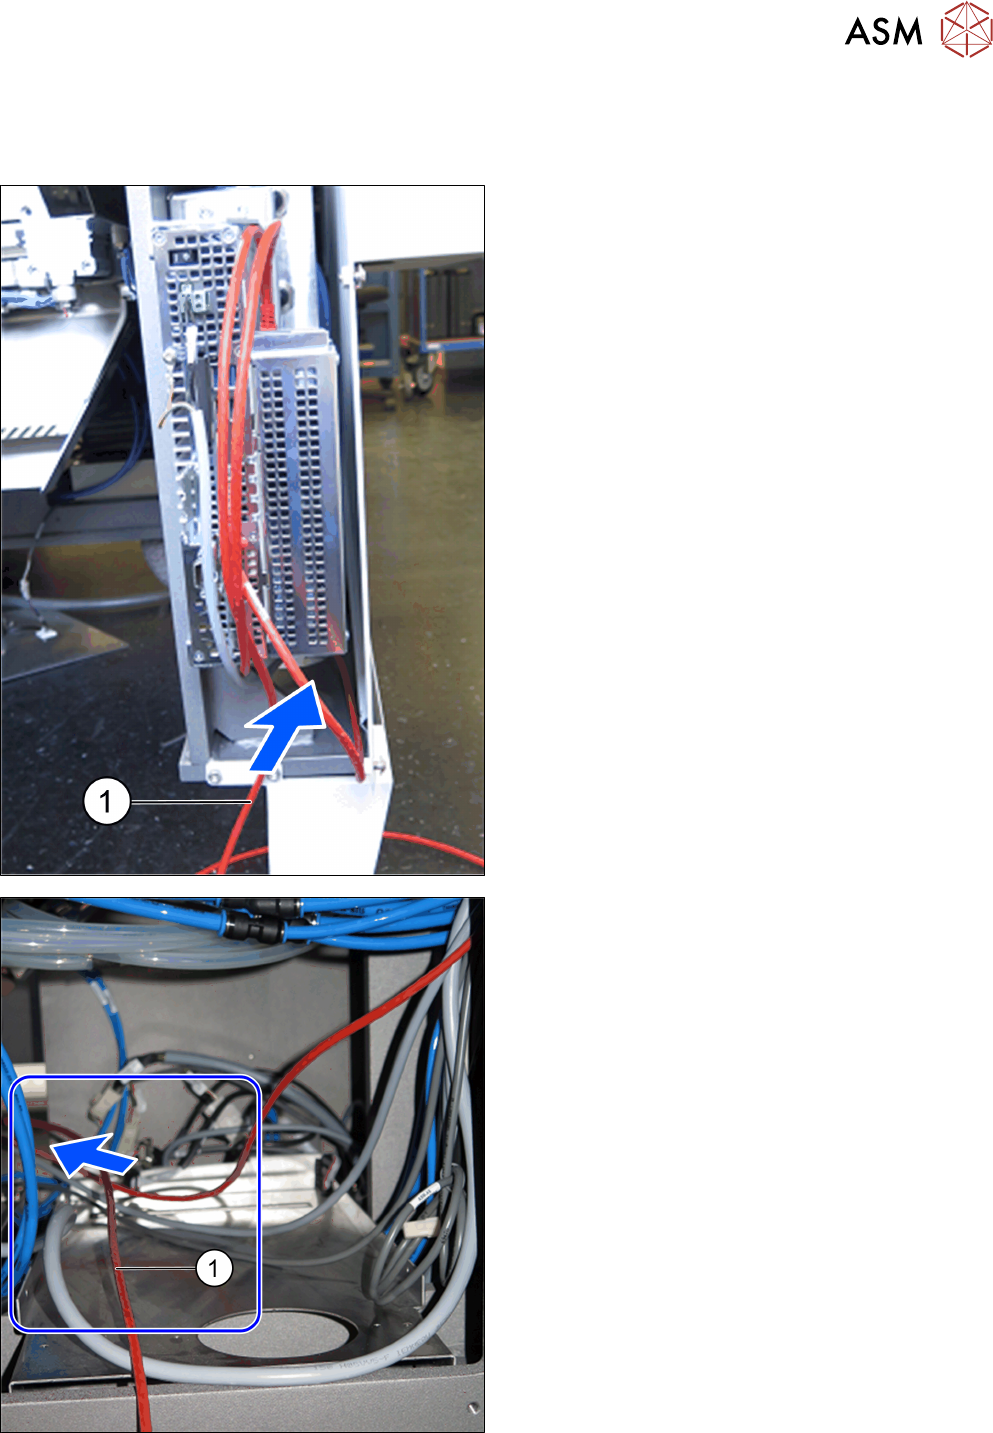
4.4.2 Location 2 and 3
Insert the cable [03159498-xx] (length 7.5 m) for connecting the BulkFeeder X at location 2 or 3 as
follows:
► Pull the cable (1) at location 4 under the fitted
Bulkfeeder X computer through the conveyor side
and towards the back.
► Run the cable to the left under the machine base,
through the bottom of the machine and to loca-
tion 1.
4 Retrofit kit for X-Series S
4.4 Inserting the cable into the machine
122 Assembly Instructions / Montageanleitung SIPLACE BulkFeeder X Retrofit Kit for SX Series and X Series S 07/2017
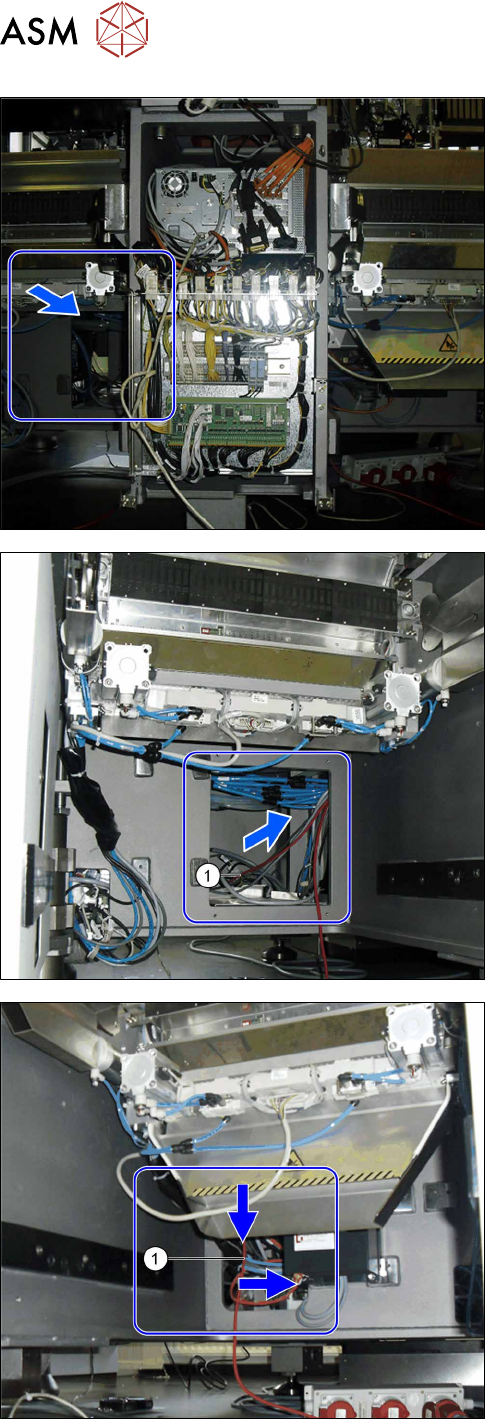
► Use the opening in the bottom of the machine to
pull the cable.
► Run the cable (1) from location 1 via the machine
base to placement area 2.
► Run the cable (1) at location 2 or 3 through the
opening in the machine base to the conveyor
side.