00198243-01_AI_BulkFeederX_XS-SX_DE+EN.pdf - 第123页
4 Retrofit kit for X-Series S 4.4 Inserting the cable into the machine Assembly Instructions / Montageanleitung SIPLACE BulkFeeder X Retrofit Kit for SX Series and X Series S 07/2017 123 ► Run the cable (1) at the convey…
4 Retrofit kit for X-Series S
4.4 Inserting the cable into the machine
122 Assembly Instructions / Montageanleitung SIPLACE BulkFeeder X Retrofit Kit for SX Series and X Series S 07/2017
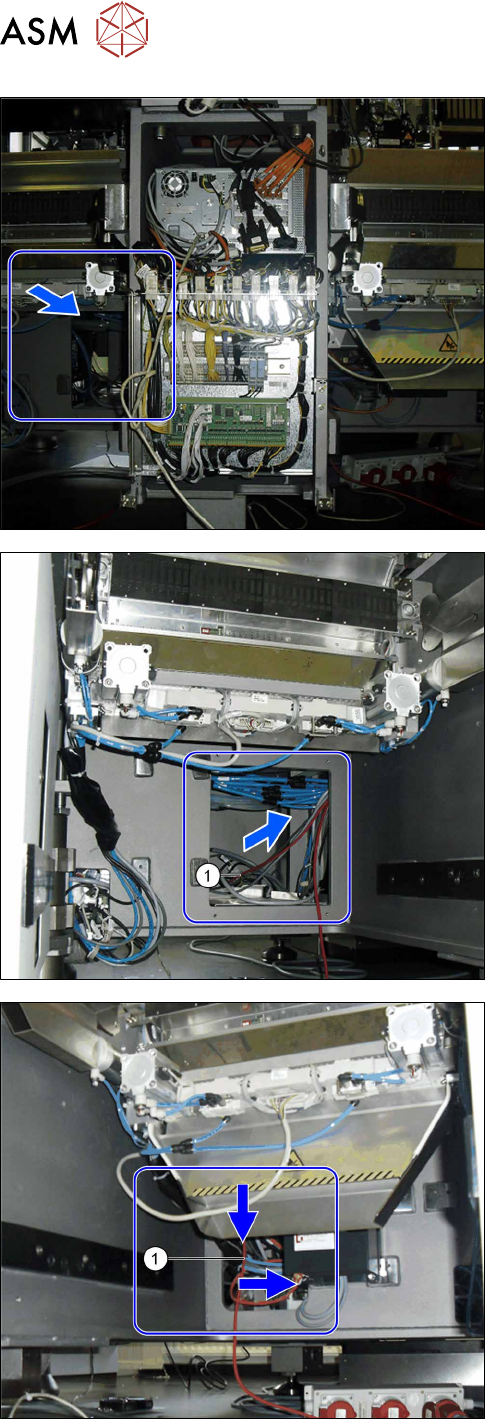
► Use the opening in the bottom of the machine to
pull the cable.
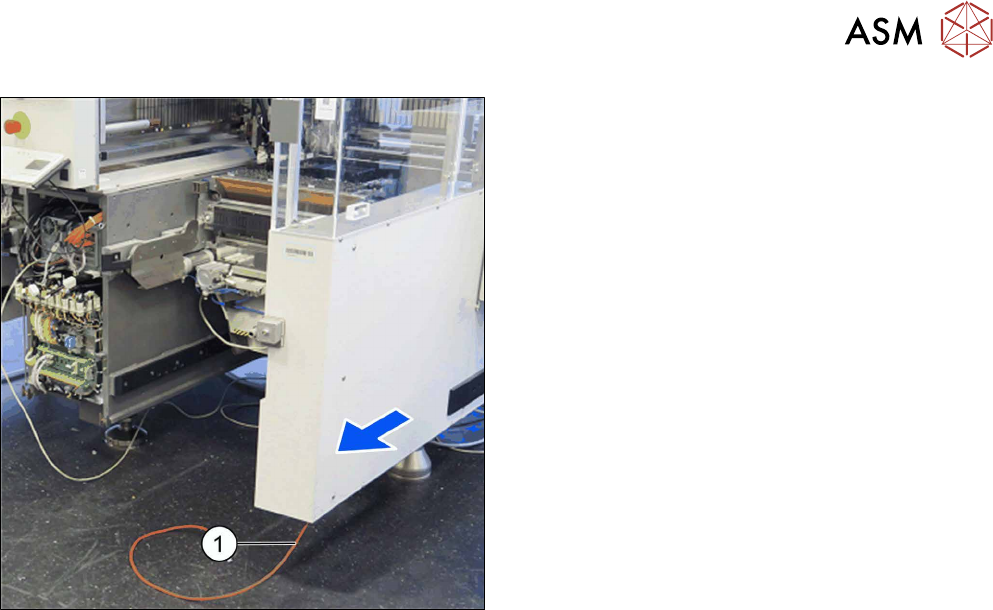
► Run the cable (1) from location 1 via the machine
base to placement area 2.
► Run the cable (1) at location 2 or 3 through the
opening in the machine base to the conveyor
side.
4 Retrofit kit for X-Series S
4.4 Inserting the cable into the machine
Assembly Instructions / Montageanleitung SIPLACE BulkFeeder X Retrofit Kit for SX Series and X Series S 07/2017 123
► Run the cable (1) at the conveyor side, from loca-
tion 2 or 3 through to the opening.
4 Retrofit kit for X-Series S
4.5 Connecting the BulkFeeder X computer to the station computer
124 Assembly Instructions / Montageanleitung SIPLACE BulkFeeder X Retrofit Kit for SX Series and X Series S 07/2017
4.5 Connecting the BulkFeeder X computer to the station
computer
4.5.1 Removing the station computer
To prepare the station computer for connection of the BulkFeeder X computer, you need to remove
the station computer. To do so, proceed as follows:
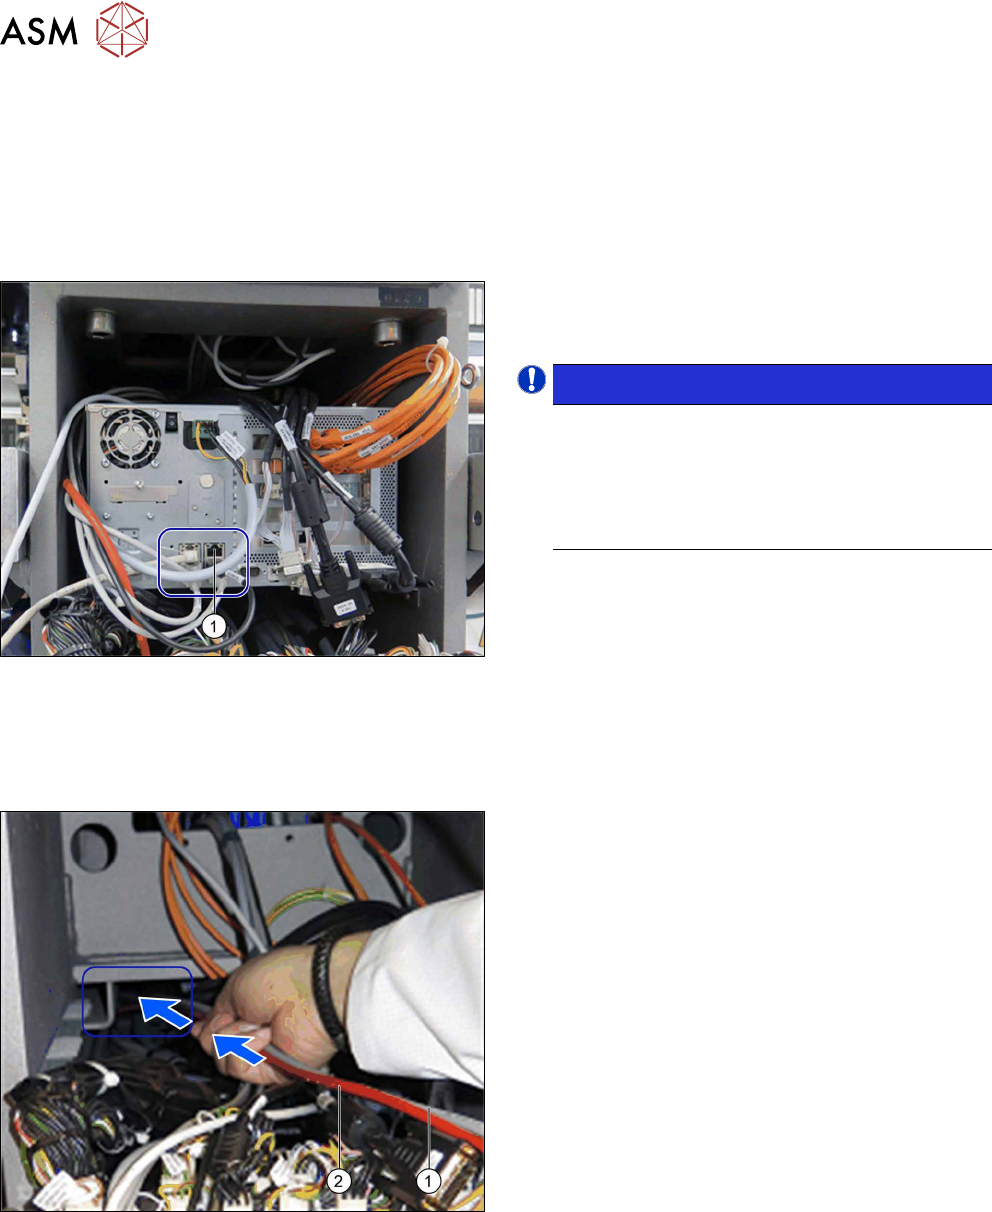
► Unplug all press-fit connections to the station
computer. Mark their positions, to make clear as-
signment easier later on.
NOTICE!
For machines with serial number > H001: the
connection (1) should be empty so that the
BulkFeeder X computer can be connected
there later. If the connection is occupied, you
will need to fit an additional LAN card in the
station computer.
.
► The station computer is fitted using velcro! Re-
move the station computer.
4.5.2 Inserting the cable for the power supply and LAN connection to the
BulkFeeder X computer
The cable for the power supply and the LAN connection must be inserted into the machine. To do
so, proceed as follows:
► Run the power supply cable (1) and the LAN
cable (2) via the empty installation place, from
the station computer, through the opening in the
bottom of the machine.