00196602-05_SM_SIPLACE_X-Feeder_EN.pdf - 第35页
6 Repairing the X Feeder modules 6.4 Tape Drive Service Manual SIPLACE X-Feeder 4 - 88 mm 11/2017 35 ► Hold the screw with a pair of tweezers in the front hole. ► Fasten the front screw marked in the diagram. ► Fit the l…
6 Repairing the X Feeder modules
6.4 Tape Drive
34 Service Manual SIPLACE X-Feeder 4 - 88 mm 11/2017
6.4.2.4 Fitting the Splice Sensor (16 - 88 mm)
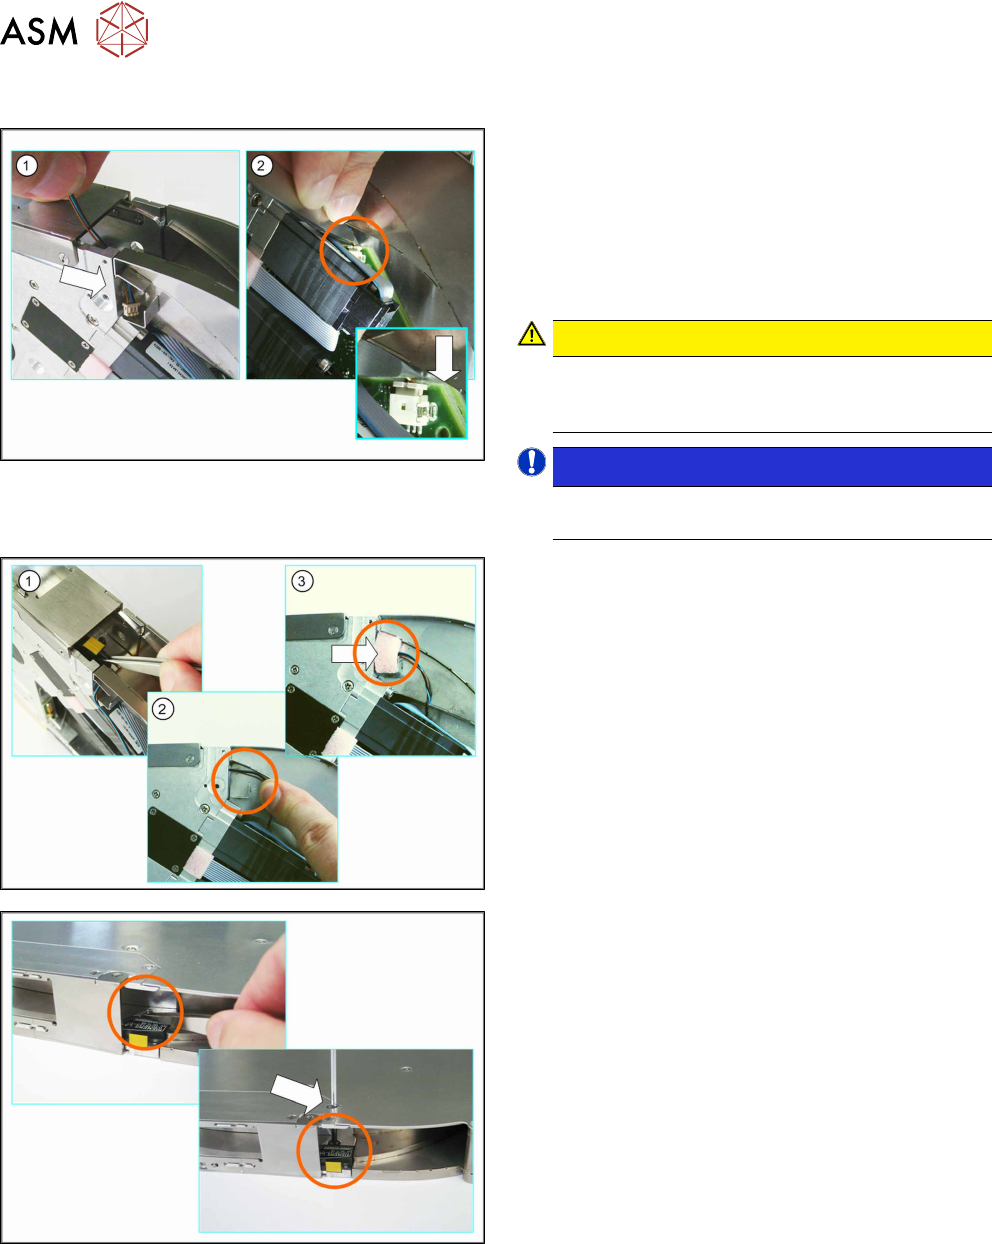
► (1) Insert the splice sensor connector through the
opening in the tape duct.
► Make sure that the smooth side of the connector
is at the top.
► (2) Use a pair of tweezers or something similar to
carefully push the connector as far as the end
stop into the marked connection on the board.
CAUTION!
Do not push the connector with force into the
connection, otherwise individual pins may break
off or be distorted.
.
NOTICE!
Take great care when connecting the connector.
Take your time.
.
► (1) Position the splice sensor in the tape duct.
Gently tug on the splice sensor cable in the re-
cess on the feeder module side panel.
Make sure that none of the cable is in the tape
duct.
► (2) Run the cable as marked in the diagram.
► (3) Close the opening to the tape duct with the
foam rubber.
► Position the splice sensor in the tape duct.
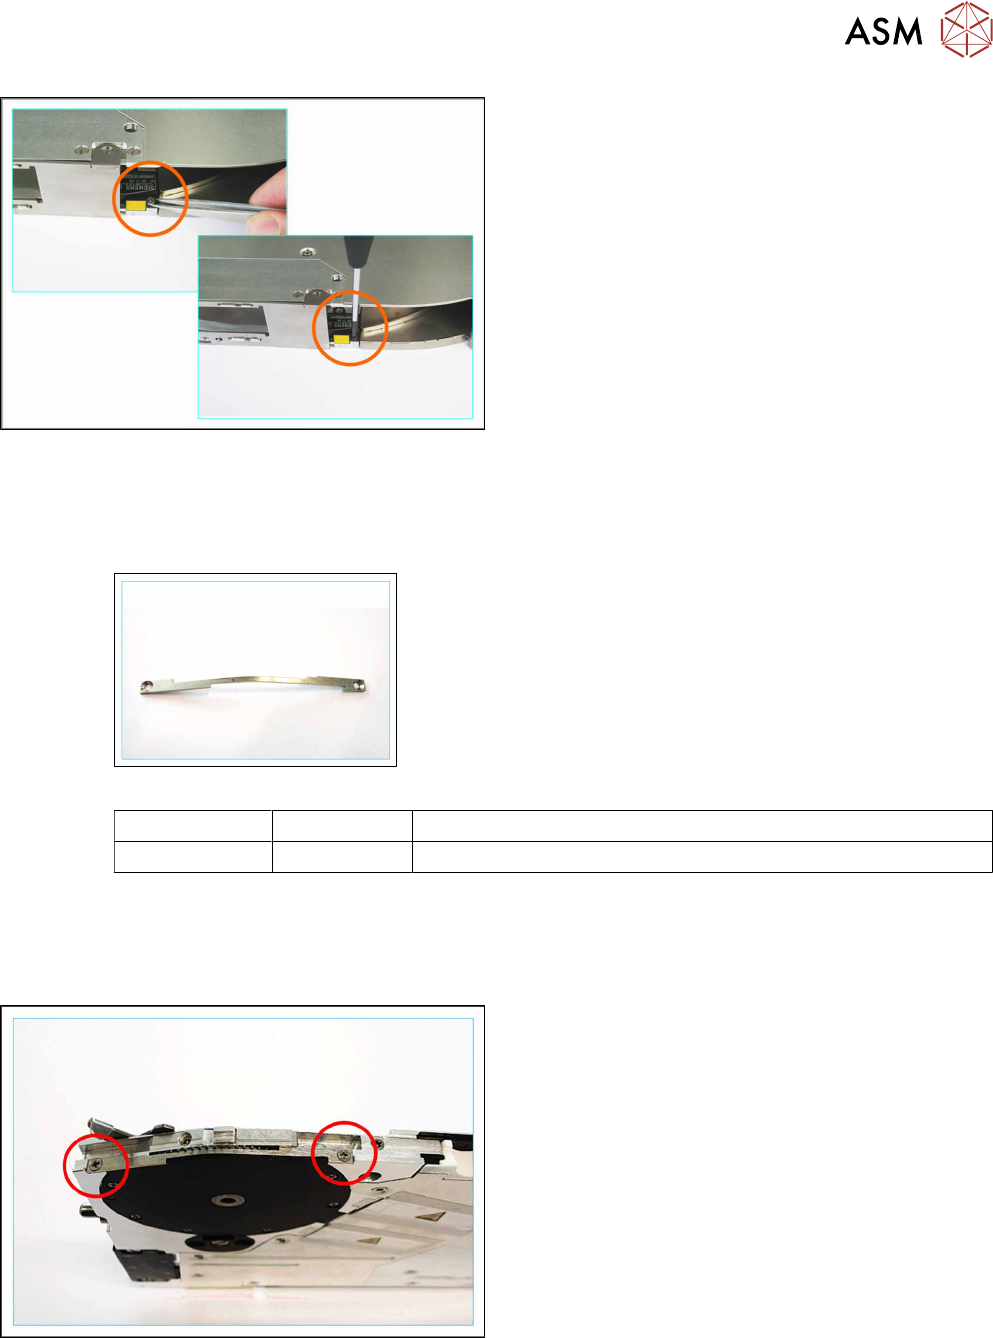
► Hold the screw with a pair of tweezers in the rear
hole.
► Insert the Phillips screwdriver through the marked
opening in the side cover.
► Fasten the back screw marked in the diagram.
6 Repairing the X Feeder modules
6.4 Tape Drive
Service Manual SIPLACE X-Feeder 4 - 88 mm 11/2017 35
► Hold the screw with a pair of tweezers in the front
hole.
► Fasten the front screw marked in the diagram.
► Fit the left side cover into place (see section 6.3.2 "Fitting the Left Side Cover" [}24]).
6.4.3 Magnetic Shield (4mmX Only)
Required spare parts
Magnetic shield X4
Feeder module Item no. Designation
4 mm 03087341-Sxx Magnetic shield X4
Required tools
●
Phillips screwdriver
6.4.3.1 Removing the Magnetic Shield
► Remove the pickup window 6.4.1.1 "Removing
the Pickup Window (4 - 12 mm)" [}27]).
► Remove the two screws marked in the diagram.
Use a Phillips screwdriver for this.
► Remove the magnetic shield.
6 Repairing the X Feeder modules
6.4 Tape Drive
36 Service Manual SIPLACE X-Feeder 4 - 88 mm 11/2017
6.4.3.2 Fitting the Magnetic Shield
► Place the magnetic shield on the tape drive as in-
dicated.
Make sure that the recesses on the magnetic
shield are positioned in a way to allow the cog of
the tape drive to move freely.
► Fasten the magnetic shield using the two marked
screws. Use a Phillips screwdriver for this.
► Fasten the pickup window (see 6.4.1.2 "Fitting
the Pickup Window (4 - 12 mm)" [}28]).