00197961-01_UM_JTF-MW_on_SIPLACE_E_en_FINAL - 第33页
Setting up and Commissioning Installation and Commissioning the SILPACE E User Manual JTF-MW on SIPLACE E 33 Installing the Frame Kit The frame kit acts as a stop and prevents the JTF-MW from tilti ng. 4.6 4 . 6 I n s t …
Setting up and Commissioning
Preparatory Work
32 User Manual JTF-MW on SIPLACE E
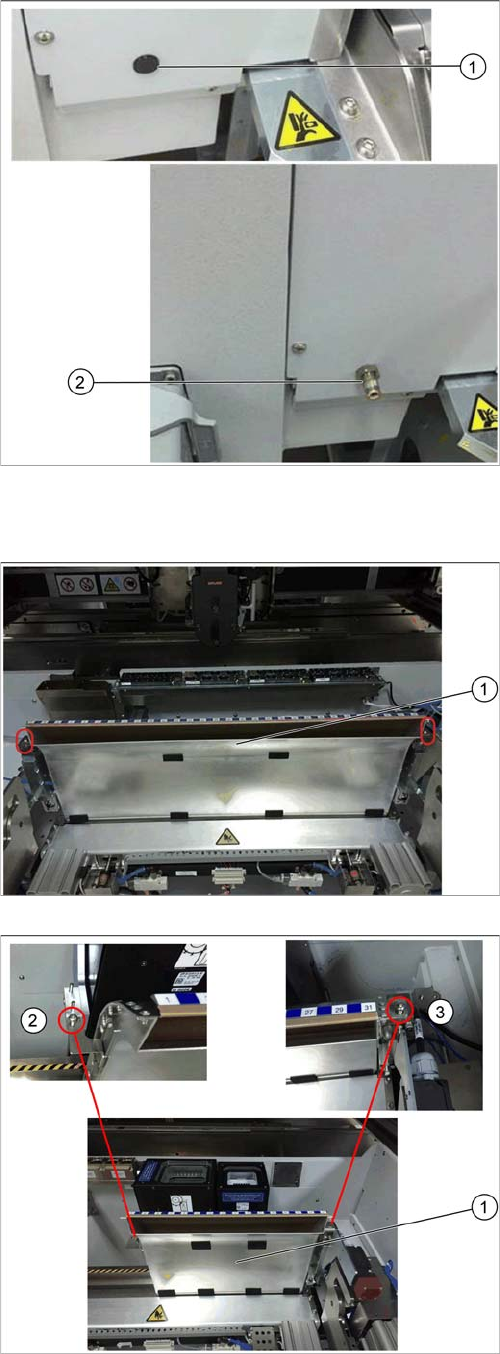
Replacing the Empty Tape Duct
► Remove the plug at the front cover (1).
► Push the coupling through the opening in the front
cover (2).
► Fix it with a nut.
► Close the side cover inside the machine and fix it with
the three screws that you previously removed.
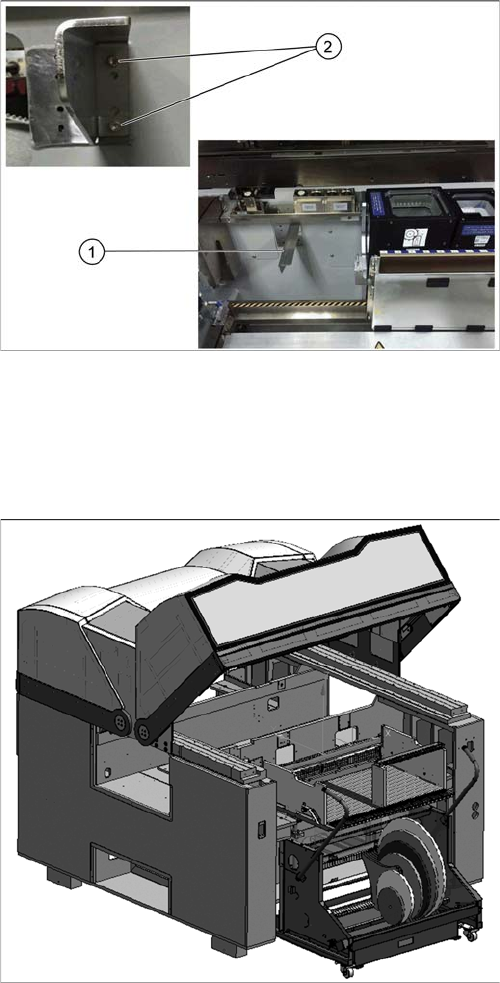
In the original state, the SIPLACE E machine is equipped
with a long empty tape duct (1).
► Remove the fastening screws on the left side and on
the right side of original empty tape duct.
► Lift the empty tape duct out of the machine.
► Install the empty tape duct 25 mm right (1).
► Fix the empty tape duct with two M5x10 screws on
the left (2) side and on the right side (3).
Setting up and Commissioning
Installation and Commissioning the SILPACE E
User Manual JTF-MW on SIPLACE E 33
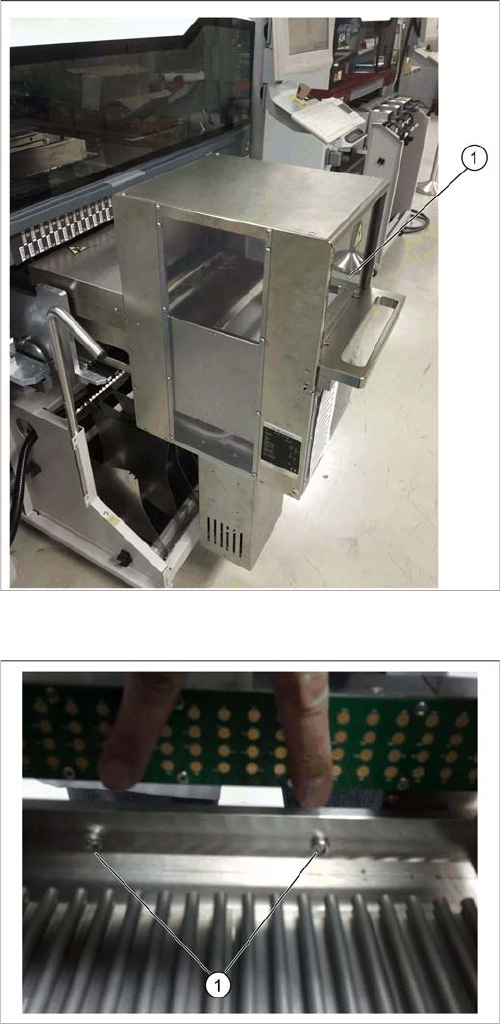
Installing the Frame Kit
The frame kit acts as a stop and prevents the JTF-MW from tilting.
4.6
4.6 Installation and Commissioning the SILPACE E
Installation and Commissioning the SILPACE E
4.6.1
4.6.1 Installing the JTF-MW in the Machine
Installing the JTF-MW in the Machine
► Install the frame kit (1) at its installation position on
the left of the empty tape duct.
► Fix it at the two fixation points (2).
COT in loading position
► Move the COT table to the loading position so that the
table is in a fixed position when installing the
JTF-MW.
Setting up and Commissioning
Installation and Commissioning the SILPACE E
34 User Manual JTF-MW on SIPLACE E
JTF-MW in SIPLACE E machine
► Remove all JEDEC trays from JTF-MW to reduce the
weight.
► Together with a second person, lift the JTF-MW by its
handle and carry it to the machine.
► Position the JTF-MW on tracks 1 to 30.
► Slide the JTF-MW into the machine (1) until the stop
at the frame kit.
JTF-MW fixed at COT
► Fix the JTF-MW at the indicated positions to the COT
using two washers (ISO 7092 5) and two M5x20
screws (ISO 4762).