M3plus_OperationManual_e.pdf - 第161页
4 - 26 7. Fixed board matching 4 Using the adv anced functions 3 Open the Setting window. Press the [Software Setting] button on the Setup screen to open the Setting window. 4 Open the Fixed Board Matching dialog box. Pr…
4 -25
7. Fixed board matching
4
Using the advanced functions
7.1 How to set up the fixed board matching function
1
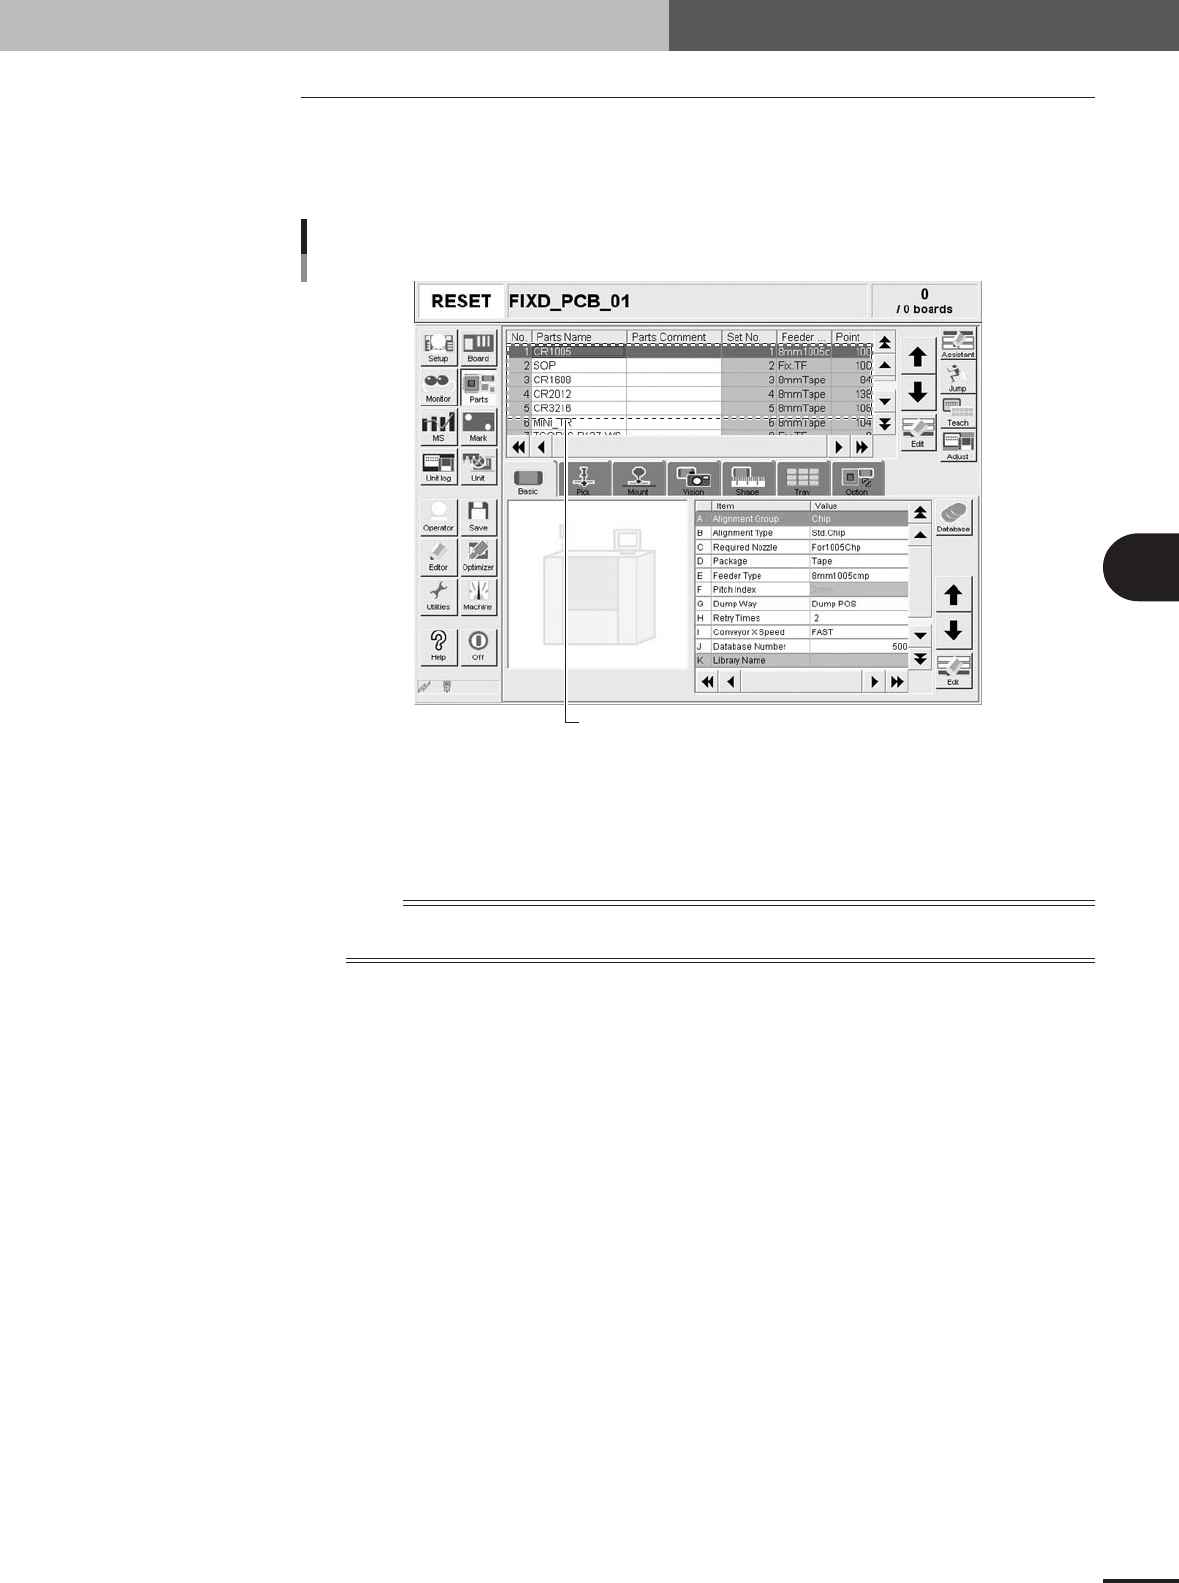
Prepare the board data to register.
Before starting, prepare the board data to register as fixed board data. (You can
register up to a maximum of 5 types of board data.)
Components to be registered in fixed board data
Setup screen showing components for fixed board data
27488-5E-20
2
Store the fixed board data in a designated location.
The fixed board data you prepared in step 1 must be stored in a folder in the specified
location. Store the fixed board data in "D:\Machine\No.1" when the "Machine"
folder is created in drive D.
n
NOTE
Those customers with board data managed via a network should store the fixed board data in the specified
location in the host server.
4 -26
7. Fixed board matching
4
Using the advanced functions
3
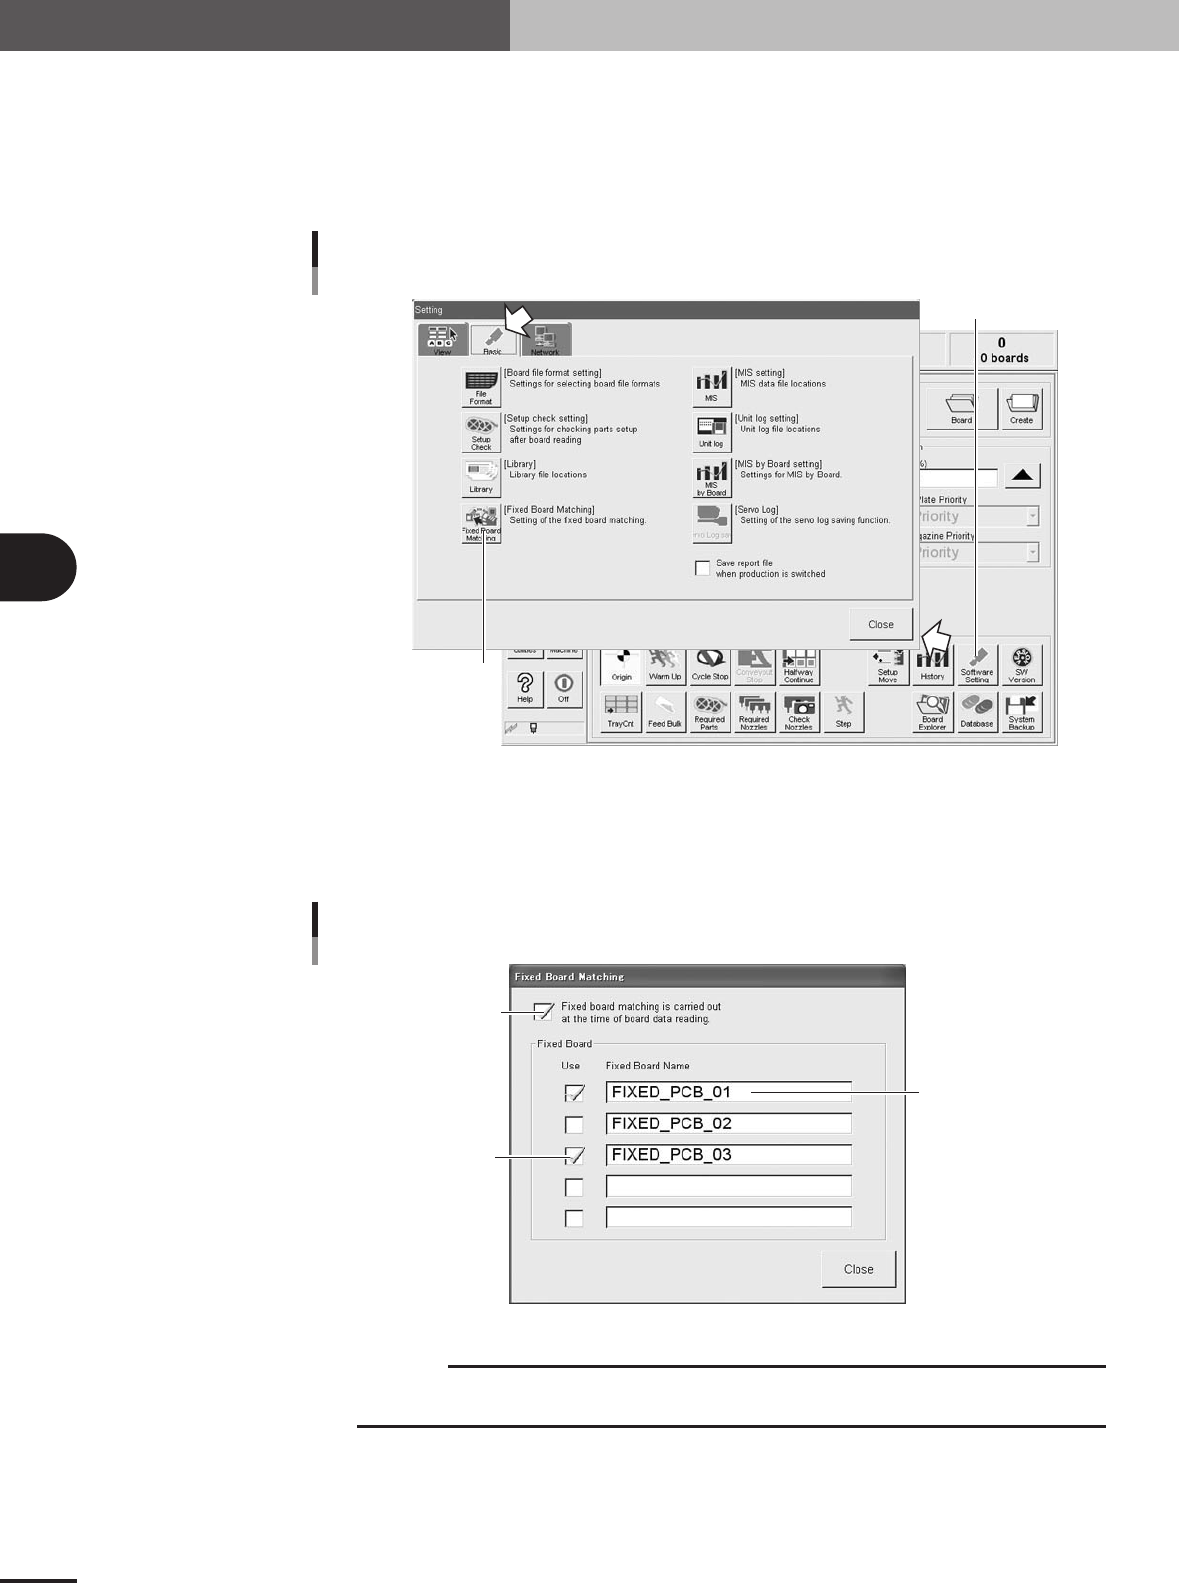
Open the Setting window.
Press the [Software Setting] button on the Setup screen to open the Setting window.
4
Open the Fixed Board Matching dialog box.
Press the [Fixed Board Matching] button under the [Basic] tab in the Setting window.
The Fixed Board Matching dialog box then appears.
Press this button.
[Software Setting] button
[Fixed PCB Matching] button
27489-5E-20
5
Register the name of the fixed board data.
In the "Fixed Board Name" text box, enter the fixed board name you want to register.
Name is not case-sensitive (uses either large or small letters). Place a check mark in
the "Use" check box for the fixed board data you want to use.
Place a check mark here.
Check the board to use.
Fixed board data
Registering the fixed board matching data
27490-5E-20
c
CAUTION
Fixed board matching will not function unless you place a check mark in the "Fixed board
matching is carried out at the time of board data reading" check box.
4 -27
7. Fixed board matching
4
Using the advanced functions
6
End the setup.
When finished making the setup, press the [Close] button. The fixed board matching
setup is now complete.
7
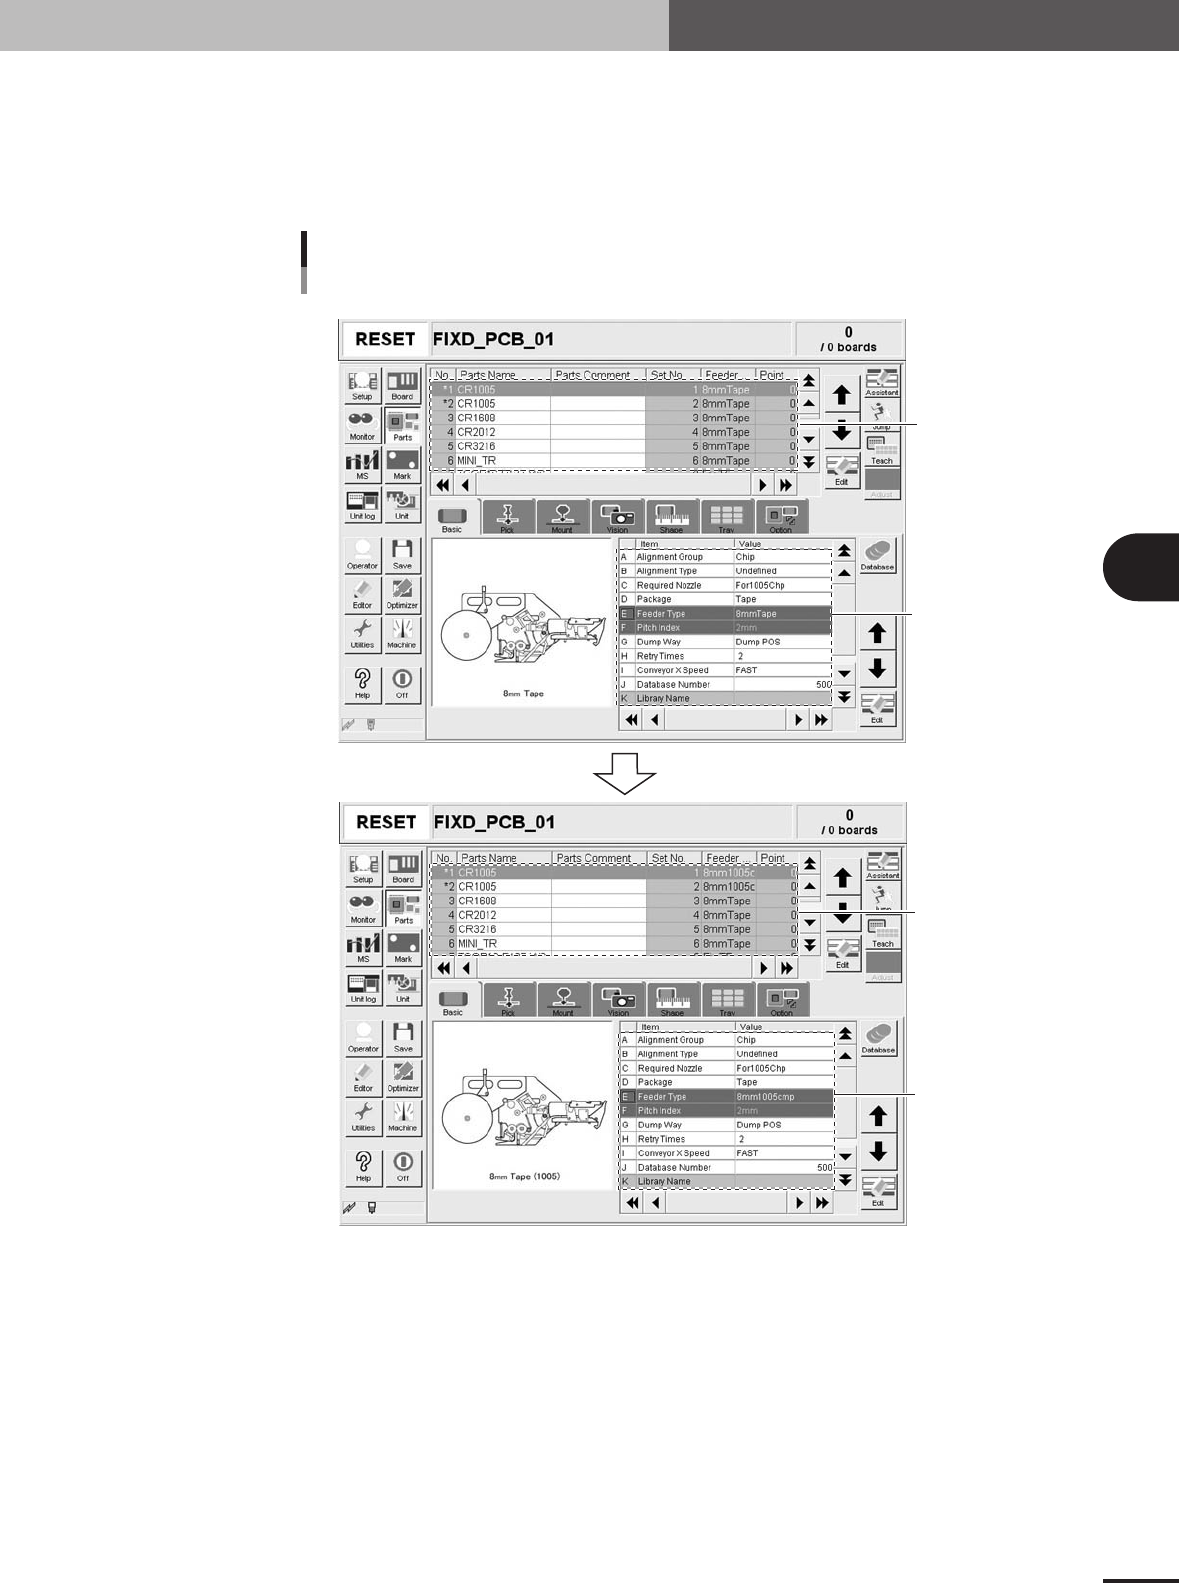
Check the operation.
Load PCB data, and check that the fixed board data is copied.
Enter just the component
name and feeder type.
Default value
Fixed board data is copied
Checking the fixed board matching
Copied items and data
Before loading
After loading
Loading PCB data
27491-5E-20