M3plus_OperationManual_e.pdf - 第18页
xi 3. Contents of each chapter This manual is comprised of the following chapters. Chapter 1 Part names and functions This chapter explains major part names and functions of the machine which you should know before attem…

x
2. Warranty
The machine you have purchased is warranted against malfunctions as described below.
■ Warranty Coverage
If any failure or defects are found in this machine due to poor workmanship within the warranty
period (one year or 2400 hours of operation whichever comes first), we will repair or replace the
defective parts free of charge.
■ Warranty Period
The warranty period ends when any of the following applies:
1. After one year has elapsed from the time of installation of the machine.
2. After 2400 hours of operation.
■ Items not covered by the warranty
The warranty does not cover any of the following conditions:
1. Defects or trouble as a result of deterioration due to age or wear
Example: Normal discoloration of painted or plated surfaces, wear of consumable parts, etc.
2. Incidents associated with sensory perceptions which have no bearing on the quality or function of
the machine
Example: Signal sounds emitted by the controller, rotating sounds of the motor, etc.
3. Damage as a result of user environment
Example: Impurities in the air supply, dust, debris and oil mist in the machine
■ Exception to warranty repairs
Warranty repairs shall not apply if failure or defects are caused by the following:
1. Earthquakes, typhoons, floods, lightning, accidents or fires and other natural or man-made
disasters.
2. Modifications not approved by i-PULSE or its distributors.
3. Use of non-genuine parts, greases or lubricants.
4. Lack of proper maintenance and inspection procedures.
5. Maintenance handled by someone other than the approved distributors.
6. Change of the machine installation level due to poor foundations or harsh environment.
7. Machine was moved to another location after installation or modified to change specifications.
8. Defective parts replaced free of charge were not returned to the specified destination within 30
days.
■ Note on network connections
A precondition for machine network connections is that such connections will be used in closed
networks comprised of a machine and an off-line PC. The customer must take responsibility for
connections to company in-house networks and to external networks. Please acknowledge that i-
PULSE can bear absolutely no responsibility for networks configured by other than just a machine
and off-line PC nor can accept responsibility for problems occurring due to network settings and
connections.

xi
3. Contents of each chapter
This manual is comprised of the following chapters.
Chapter 1 Part names and functions
This chapter explains major part names and functions of the machine which you should know before
attempting operation.
Chapter 2 Basic operation
• Explains how to use buttons and menus displayed on the operation screen, as well as the basic
elements of a data input screen.
• Explains the basic operation for PCB production, including the conveyor unit setups.
• Explains the procedure from how to start up the machine to how to turn it off.
Chapter 3 Creating the PCB data
Chapter 3 describes the basic procedures for creating PCB data (PCB information, component
information, mark information) and also making basic settings for various parameters.
Chapter 4 Using the advanced functions
This chapter explains how to use the advanced functions that are not necessary to use in normal
operation but helpful in improving operation efficiency and accuracy.
Chapter 5 Editing the PCB data
Chapter 5 describes how to use the Editor that allows you to edit the PCB data, convert VIOS data to
XML data (or XML to VIOS) or optimize the PCB data.
Chapter 6 Managing the data
This chapter explains how to make a backup of PCB data, as well as how to make use of database
and data library.
Appendix
In the appendix, you will find major machine specifications and a helpful guide to component
parameter setting.
Index
The index at the end of this manual helps you quickly find where necessary items are explained.
xii
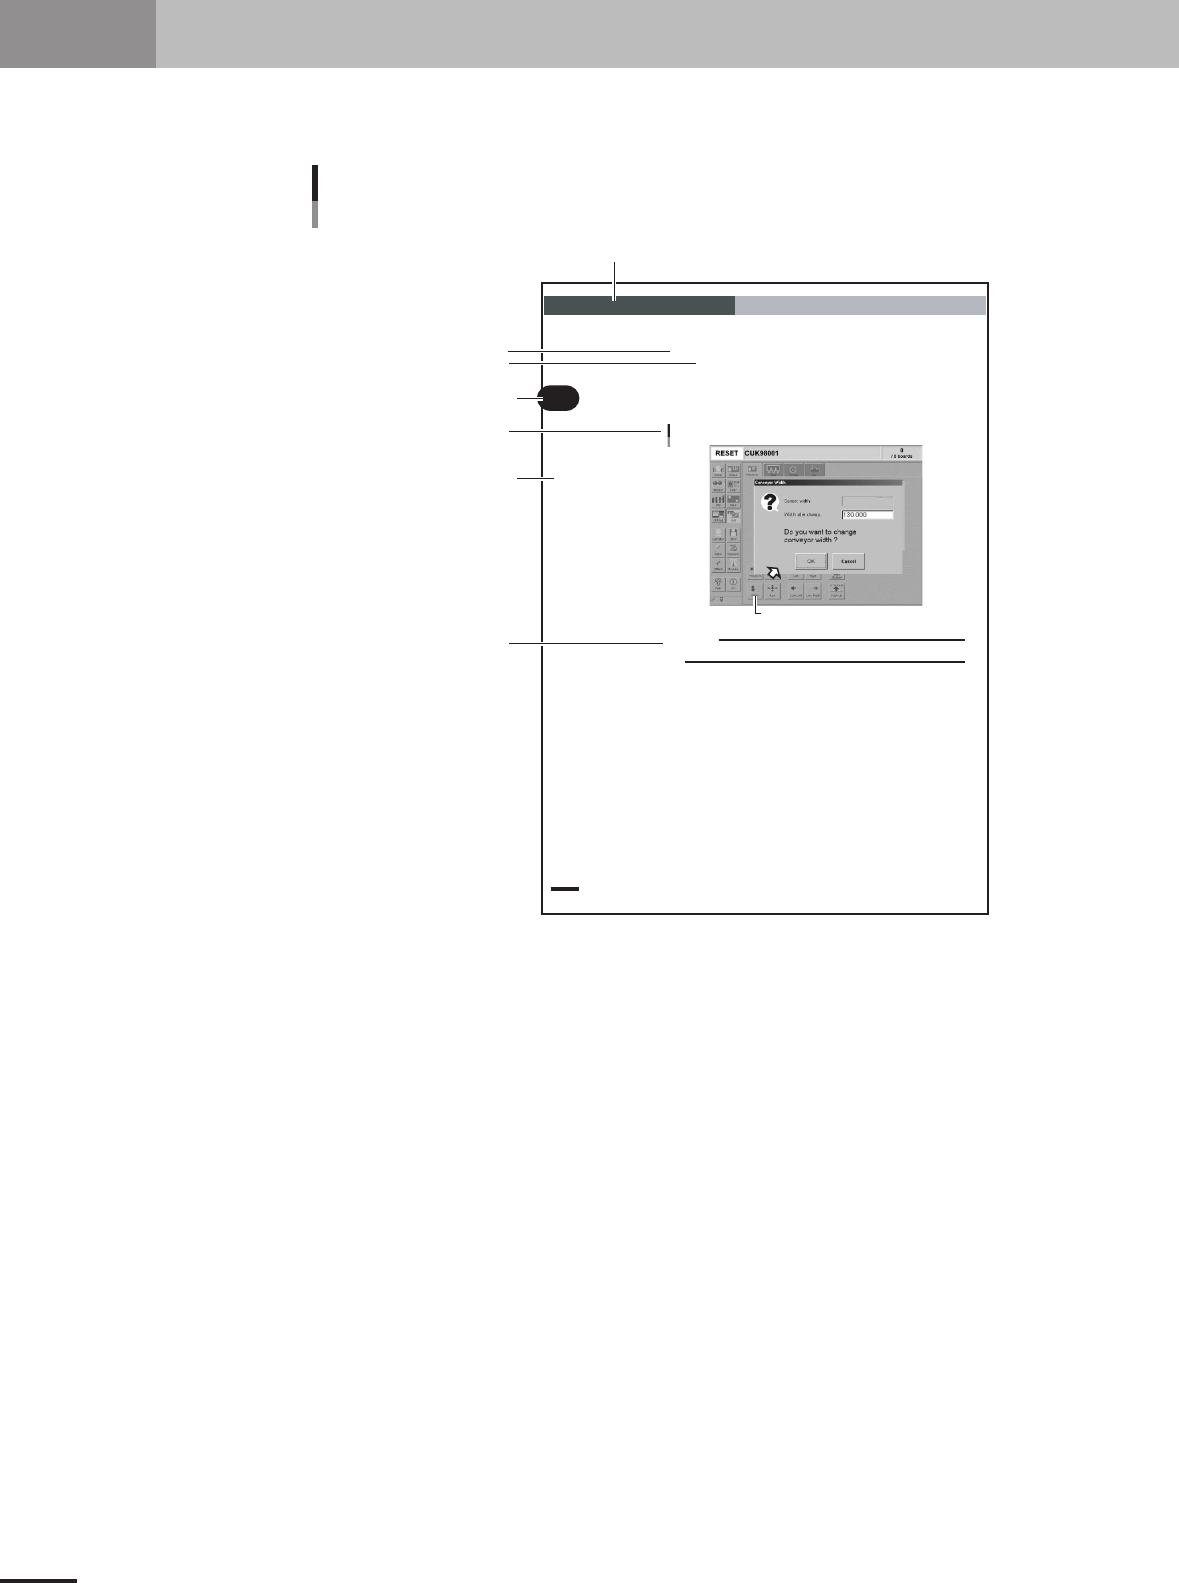
4. Page layout
The description below shows a typical page layout used in this manual.
2 -14
2
Basic oper
ation
3. Starting and stopping the machine
3.4.1 Conveyor width
First adjust the conveyor width to match the PCB width to be produced.
1
Select the PCB data.
See the description of "2.2 Selecting the PCB data" in chapter 3.
2
Open the [Unit]-[Conveyor] tab screen.
3
Press the [Width] button.
The Conveyor Width dialog box appears. Check the conveyor width and press th e
[OK] button. The conveyor rail automatically changes to the specified width.
[Width] button
Conveyor Width dialog box
27311-5E-20
c
CAUTION
When adjusting the conveyor rail width, make sure that the conveyor rails do not make contact
with push-up pins attached on the push-up plate.
Illustration or table title
Note, Caution or Warning
Section in chapter
Step
Chapter title
Chapter number
Sub step or description of step
Typical page layout
23002-5E-20
Step
This describes the procedure for each operation.
Substep or description of step
This provides detailed information on the steps in each procedure.
Illustration or table title
This is the title of the illustration or table and appears at the upper left.
Note, Caution or Warning
These are explained in the "Safety and warranty" introductory section.