M3plus_OperationManual_e.pdf - 第197页
6 - 2 6 Managing the data 1.1.1 Data backup Follow the steps below to make a data backup using the Board Explorer. 1 Insert a PCB data disk into the floppy disk drive. Insert a floppy disk formatted as a PCB data disk in…
6
Managing the data
6 -1
1. Data backup
To make a backup copy of PCB data, you need a PCB data disk specially formatted for the mounters.
This section explains how to format a PCB data disk and make a backup.
1.1 Creating a PCB data disk
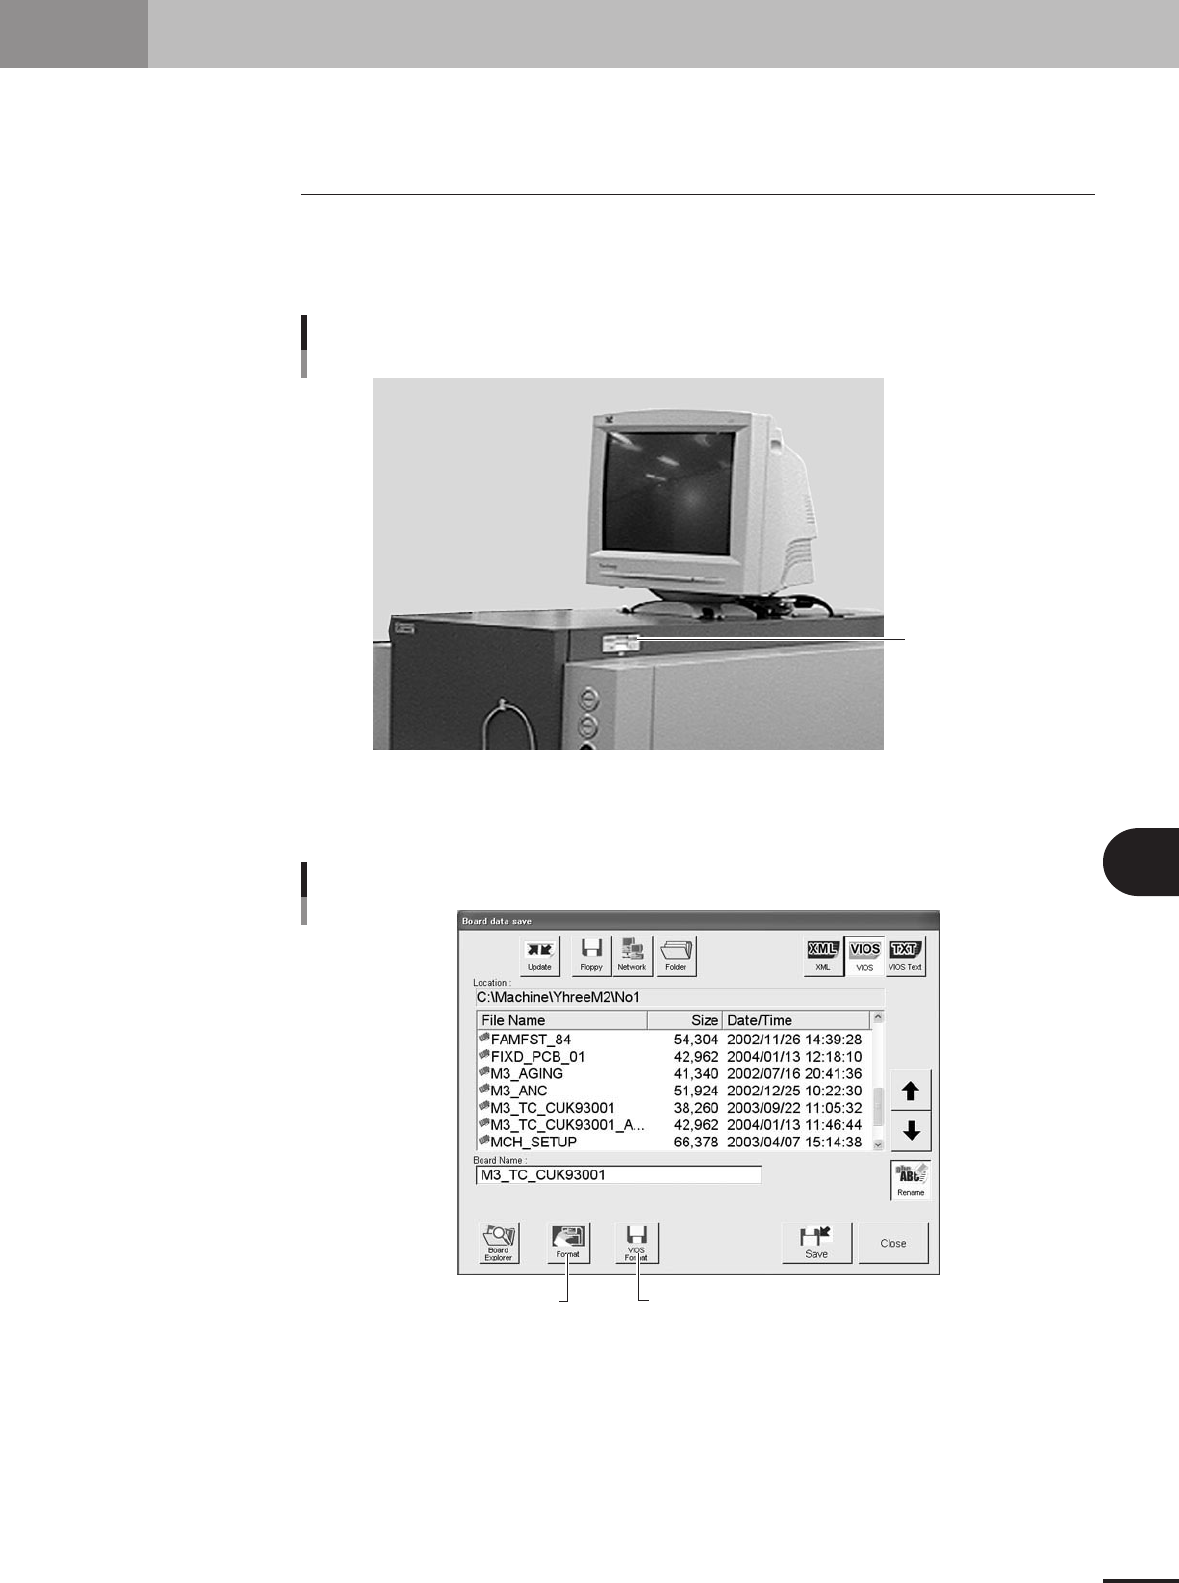
1
Insert a floppy disk into the floppy disk drive.
Insert a floppy disk (2HD) for backup into the floppy disk drive of the machine. (The
FD drive is located at the upper right of the machine.)
Insert a 3.5'' floppy disk
into the FD drive
FD drive
23447-5E-20
2
Press the [Save] button in the main menu button area.
The Save dialog box appears.
[VIOS Format] button
[Format] button
Save dialog box
27466-5E-20
3
Create a PCB data disk.
For unformatted disk:
Press the [Format] button and follow the instruction that appears on the screen.
For Windows-formatted disk:
When a floppy disk already formatted for Windows is inserted into the FD drive, press
the [VIOS Format] button.
6 -2
6
Managing the data
1.1.1 Data backup
Follow the steps below to make a data backup using the Board Explorer.
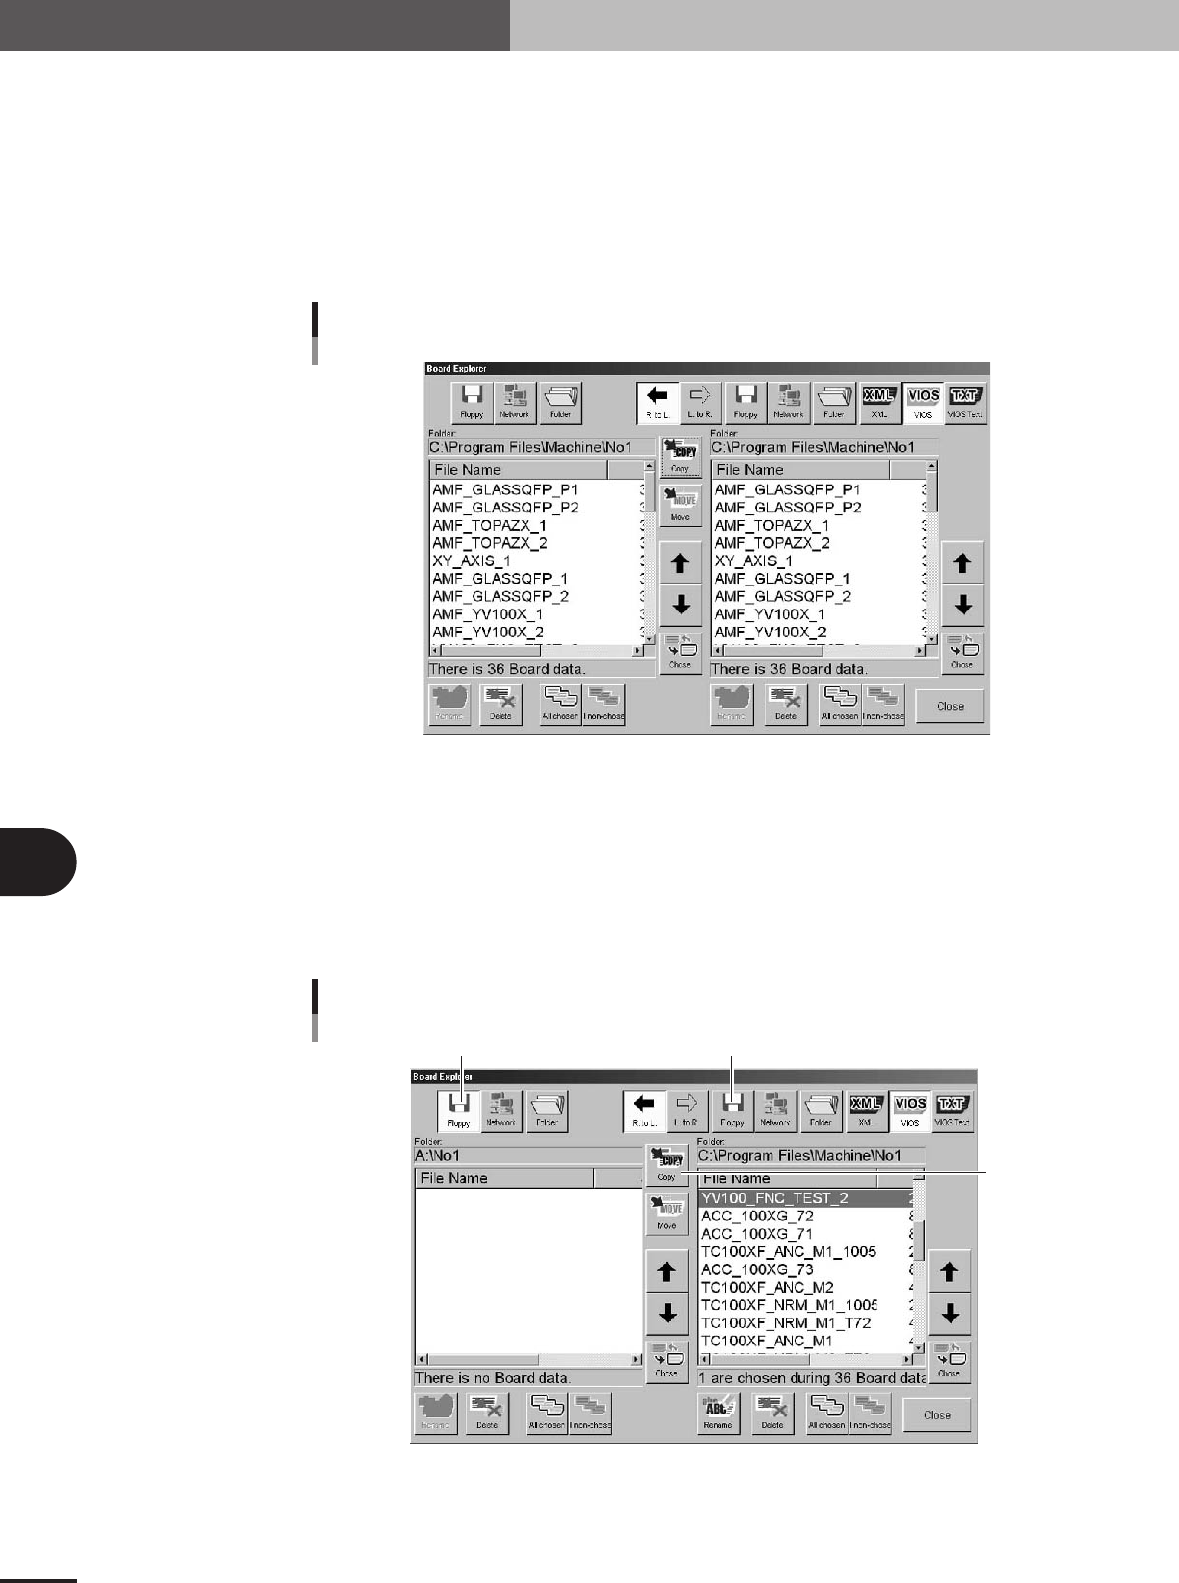
1
Insert a PCB data disk into the floppy disk drive.
Insert a floppy disk formatted as a PCB data disk into the FD drive on the front lower
right of the machine.
2
Open the Board Explorer.
Press the [Board Explorer] button on the Setup screen.
Board Explorer dialog box
27467-5E-20
3
Select the PCB data to be backed up.
Line up the cursor with the PCB data to be backed up. You can select multiple PCB
data by selecting them while holding down the [Ctrl] key or [Shift] key. When you
want to select all PCB data in the list, press the [All Chosen] button.
4
Designate the copy destination FD.
Press the [Floppy] button on the left when copying from right to left, or press the
[Floppy] button on the right when copying from left to right.
Copy from left to right
[Copy] button
Copy from right to left
Selecting the copy destination
27468-5E-20
1. Data backup
6 -3
6
Managing the data
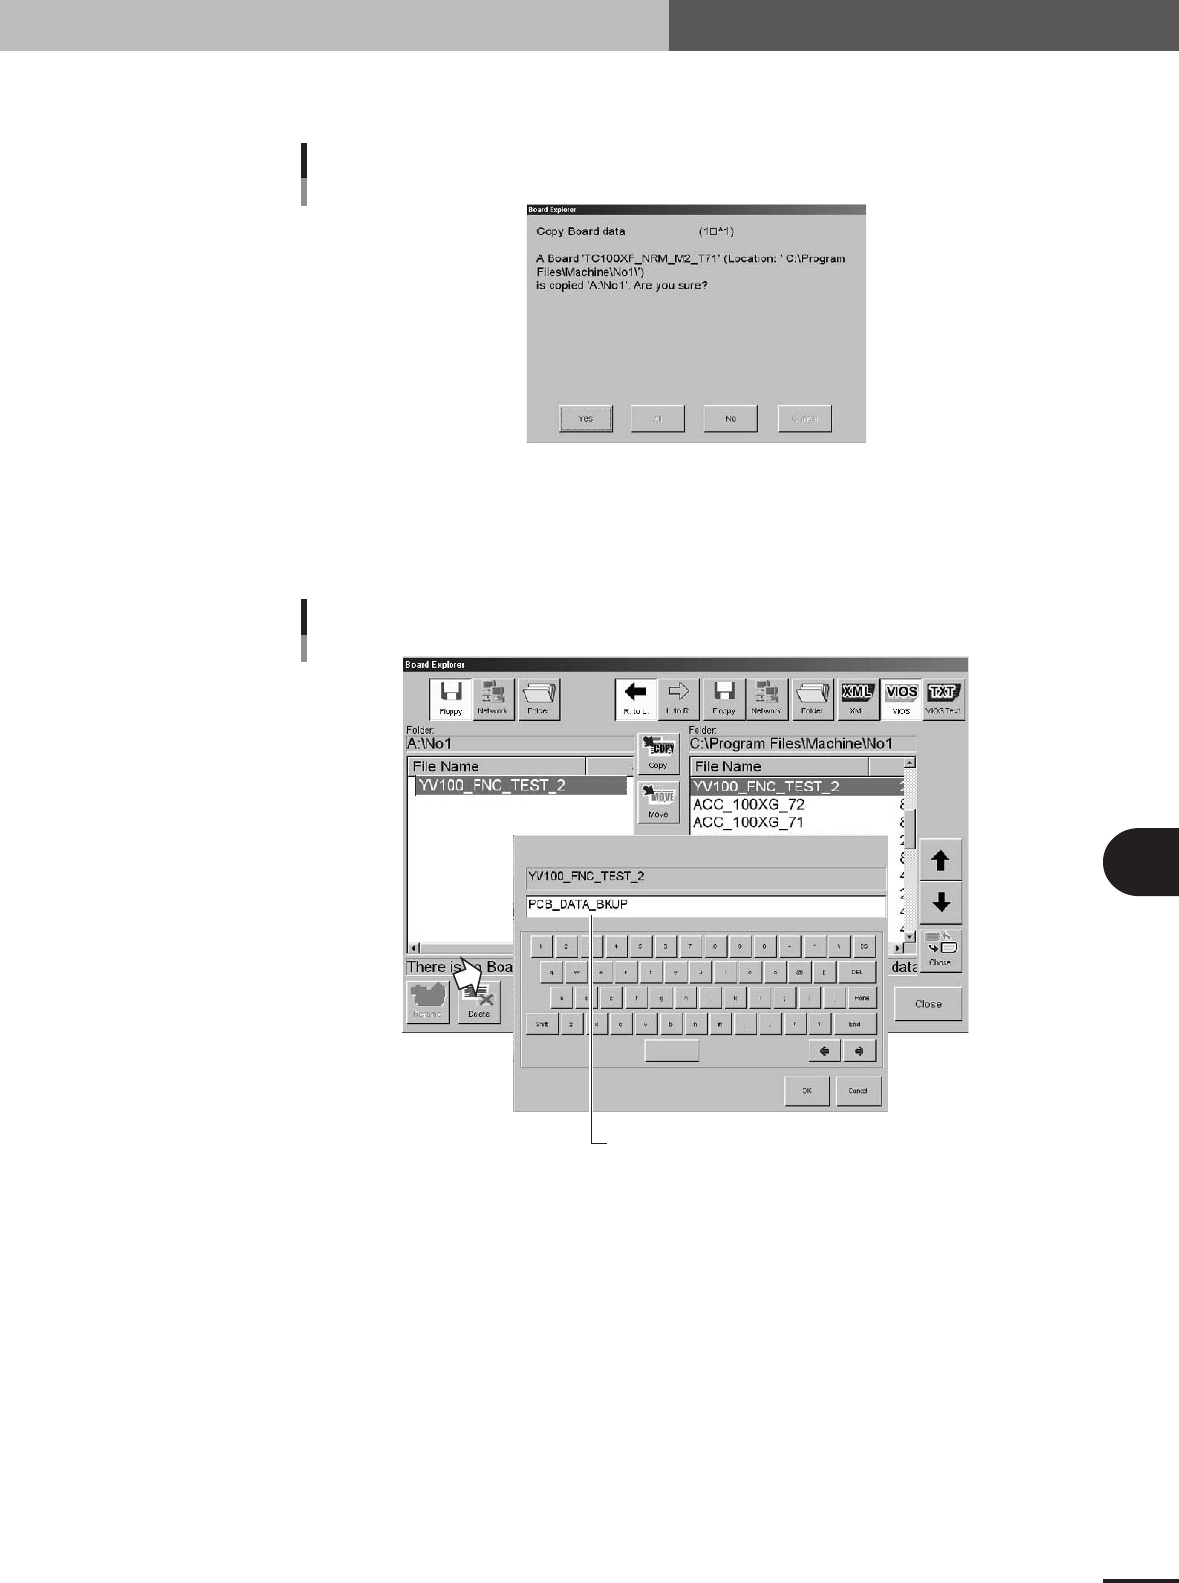
5
Press the [Copy] button.
A check dialog box appears. Press the [Yes] button to make a copy.
Copy confirmation dialog box
27469-5E-20
6
Rename the PCB data as needed.
When you want to change the PCB name so that you can easily identify it as backup
data, press the [Rename] button. The keyboard dialog box appears, so enter a new
name and press the [OK] button.
Rename
Enter a new name for backup data.
27470-5E-20
1. Data backup