M3plus_OperationManual_e.pdf - 第200页
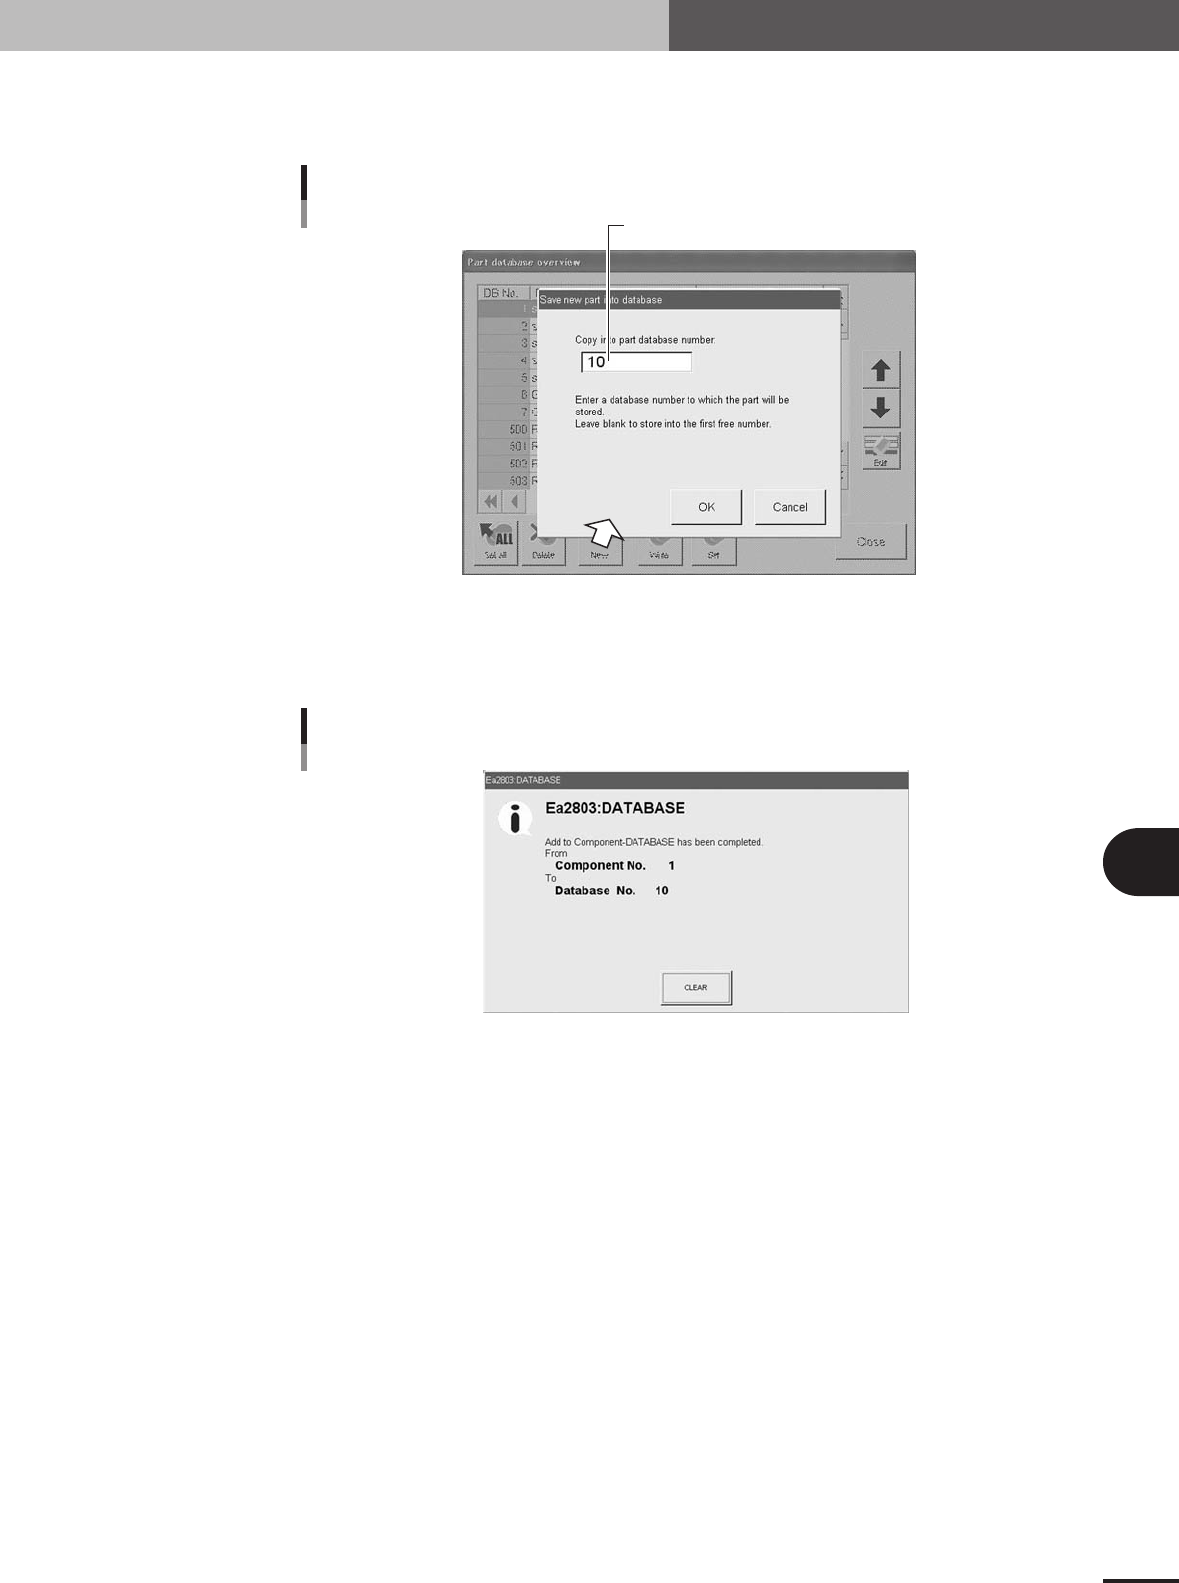
6 - 5 6 Managing the data 5 Press the [New] button and designate the database number. The database number input dialog box appears. Enter the database number under which the data will be stored. Leave blank to store the …
6
Managing the data
6-4
2. Creating the user database
Registering components (or marks) in the user database will prove convenient if they are not included
in the database or they are used very frequently.
The user database should be registered in the user area of the database. The user database area can be
from Nos. 1 to 499 for the component database and from Nos. 1 to 149 for the mark database. The
registered data in this area will be retained even if the software version is upgraded.
2.1 Copying the data into the database
To copy the component or mark data you created into the user database, follow these
steps.
1
Select the PCB name.
Press the [Board] button on the Setup screen and select the PCB name.
2
Open the Parts screen or Mark screen.
Press the [Parts] button or [Mark] button in the main menu button area.
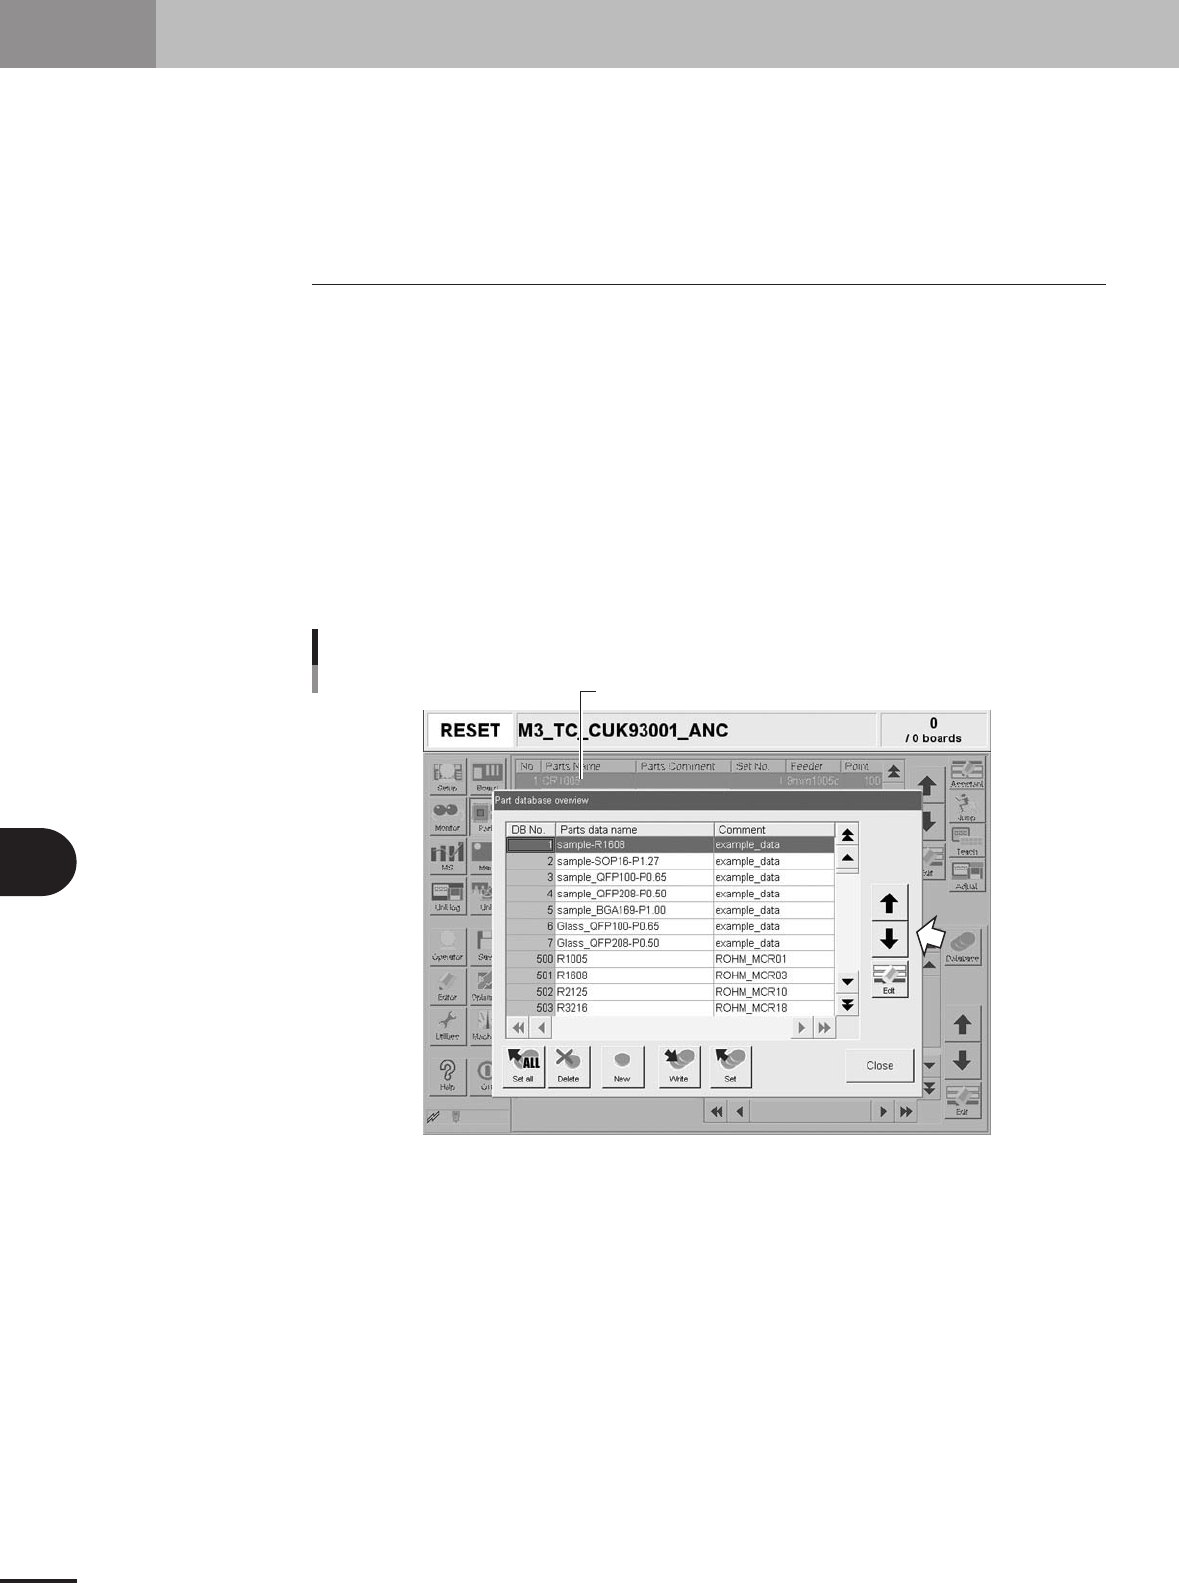
3
Select the copy source data.
Line up the cursor with the component data or mark data you want to copy from.
4
Open the database list.
Press the [Database] button on the [Basic] tab. The database list appears.
Copy source
Database list
27471-5E-20
6 -5
6
Managing the data
5
Press the [New] button and designate the database number.
The database number input dialog box appears. Enter the database number under
which the data will be stored. Leave blank to store the data in the first free number.
Enter the database number where data should be copied.
Database number input dialog box
27472-5E-20
6
Press the [OK] button to copy the data into the database.
All items of the selected data including the data name and comment will be copied.
Press the [CLEAR] button to return to the database list.
Database registration message
27473-5E-20
7
Press the [Close] button to close the database list.
If you want to copy other data into the database, repeat the above procedure.
2. Creating the user database
6
Managing the data
6-6
3. Creating XML library
This section describes the features of XML data and some cautions for handling XML data. Major
differences between XML PCB data and VIOS PCB data are that XML data can be utilized as a library
and also uses the only one file format. This allows collective management and operation of PCB data
without limitation on the number of data items, and also permits registration of differences between
machines.
3.1 Setting the library path
The following is an example for setting the library in the machine or on a PC connected
on a LAN.
1
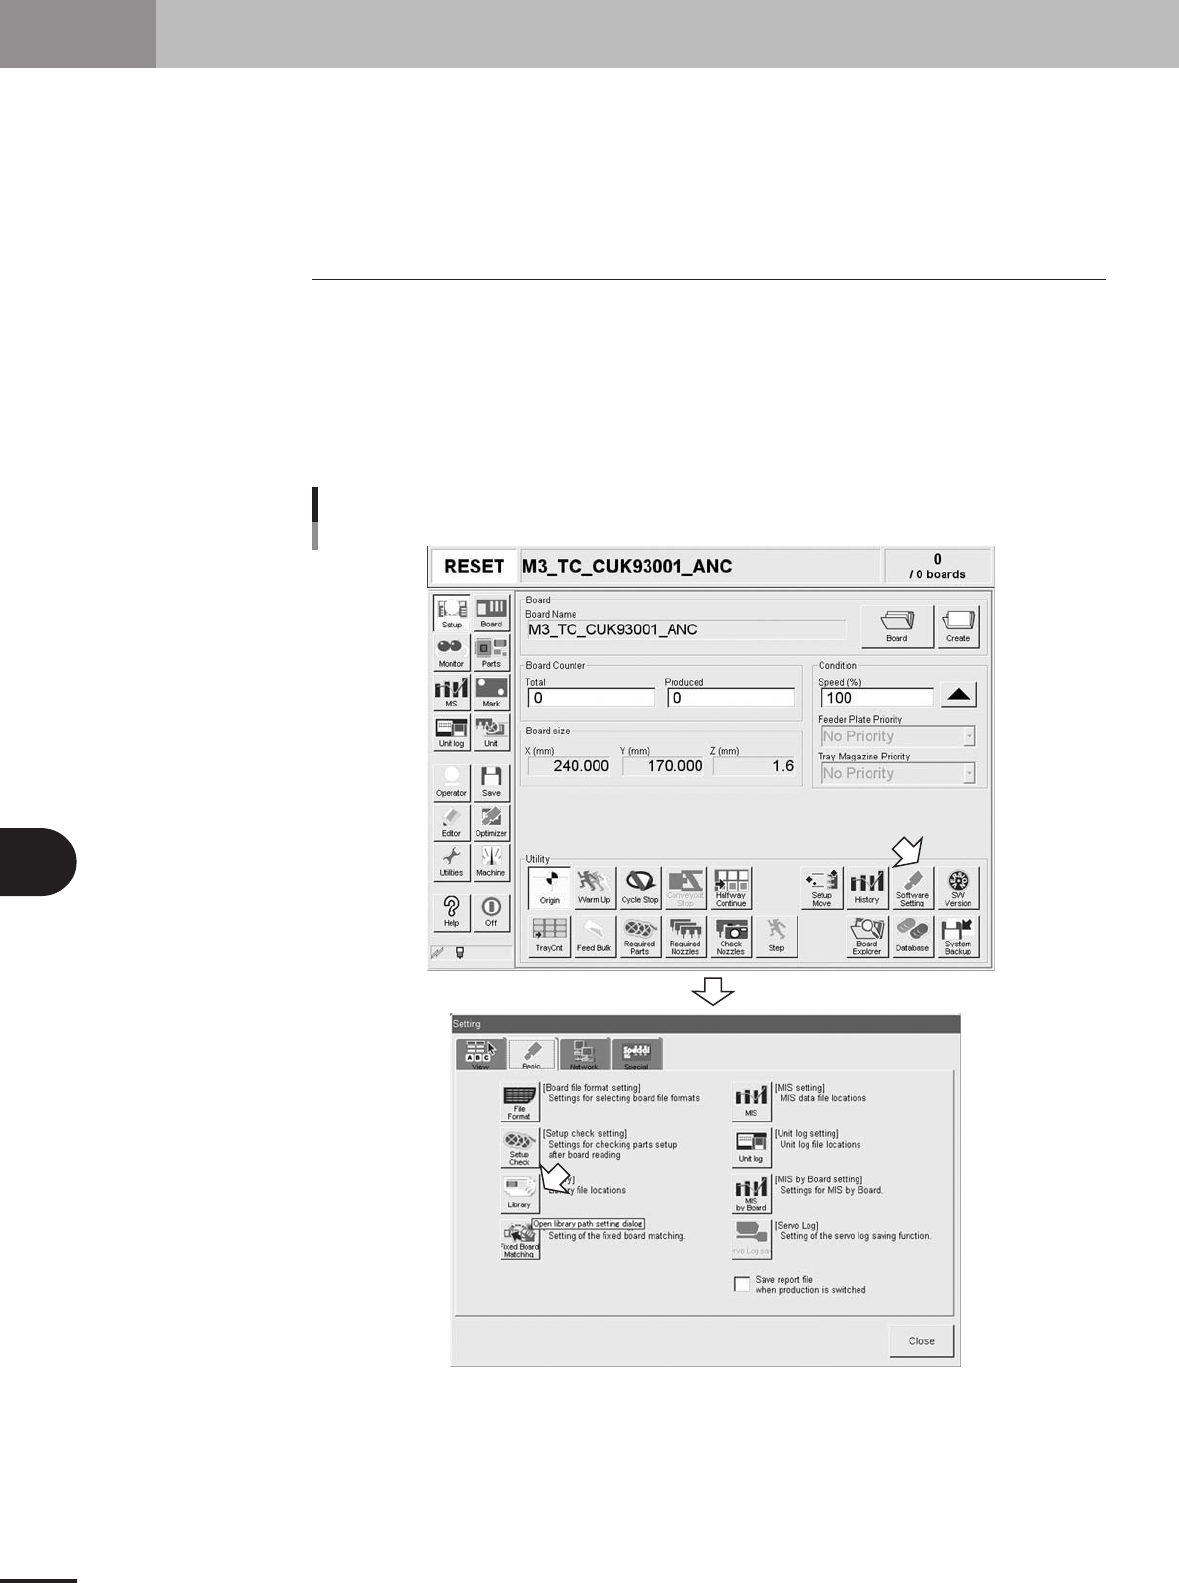
Open the "Setting" window.
Press the [Software Setting] button on the Setup window to open the "Setting"
window.
2
Press the [Library] button to open the library.
Opening the library
27600-5E-20