M3plus_OperationManual_e.pdf - 第258页
3 - 5 3 Setup 3.2 Changing the mounter setups 3.2.1 Changing the setups to use one or two TSF1 1 Remove the feeder plate safety hoods of the mounter. Remove the safety hood No. 1 when using one TSF1 unit or remove the sa…
3 -4
3
Setup
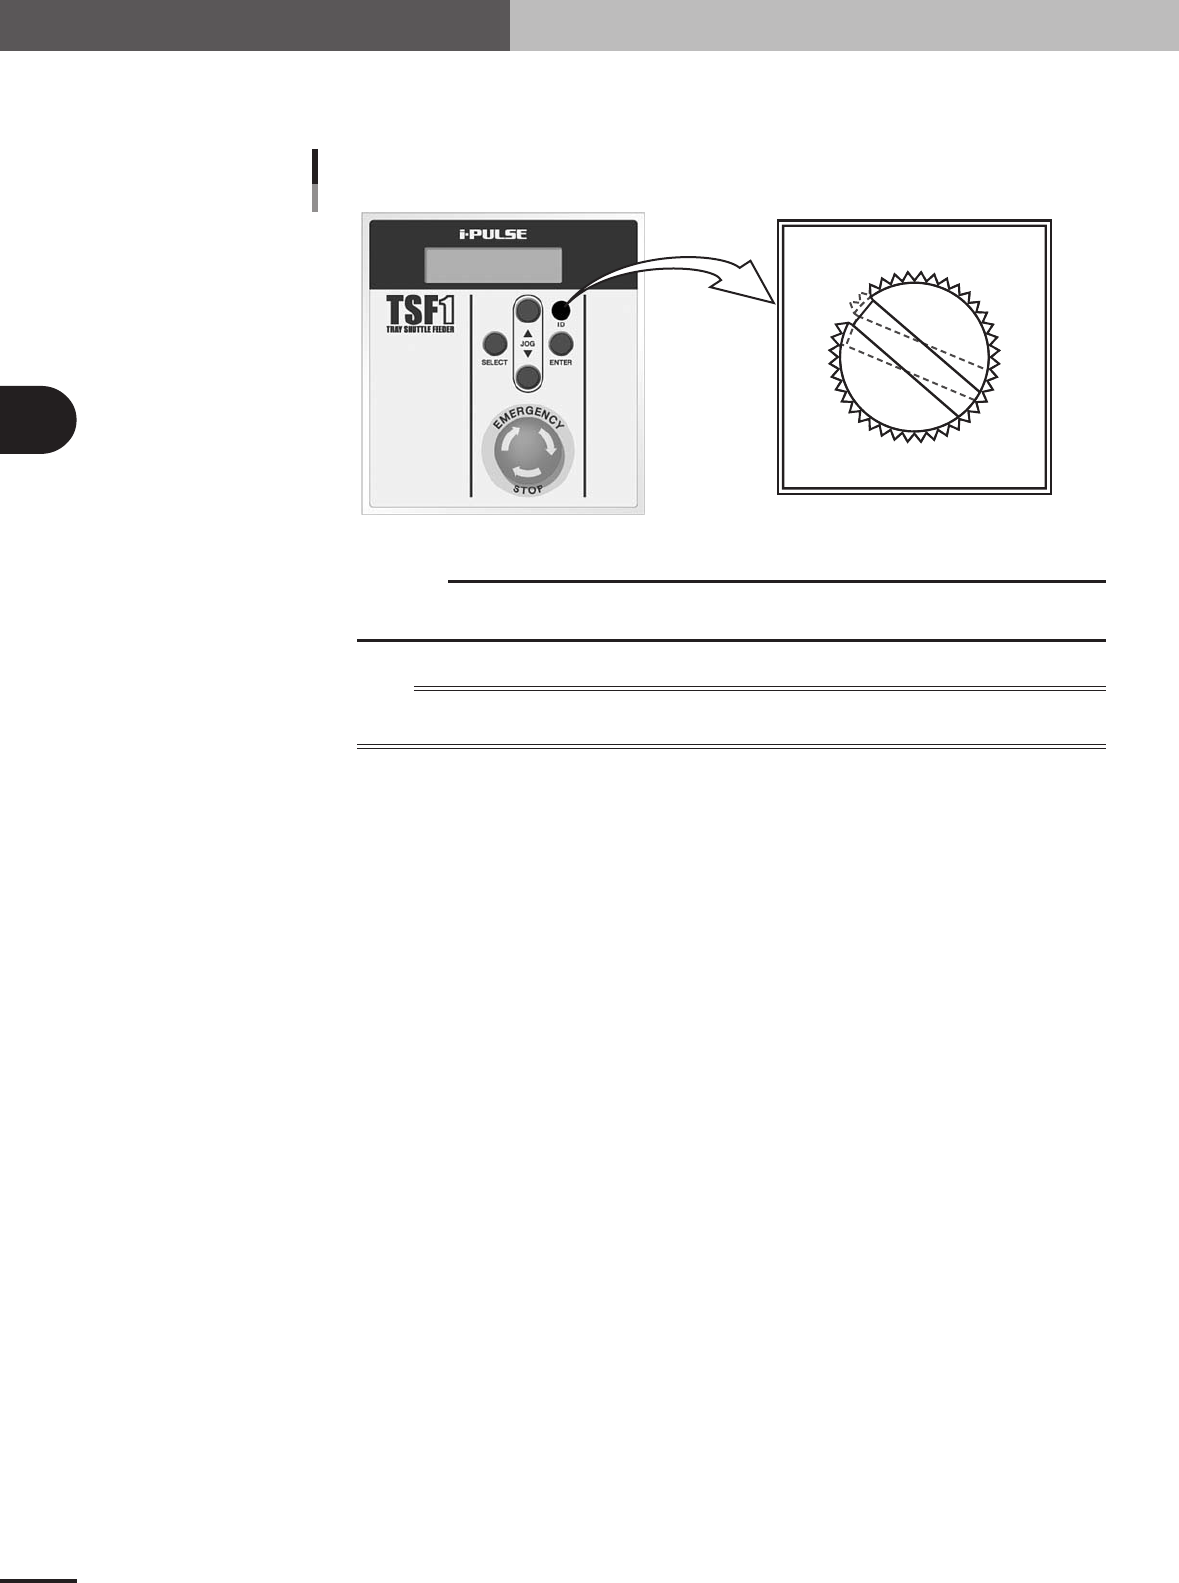
3.1.2 Changing the setups: from specifications A to C
Use a slotted screwdriver to change the ID setting from "ID 1" to "ID 2".
0
1
2
3
4
5
6
7
8
9
A
B
C
D
E
F
ID dial position (when set to ID 2)
Details of ID dial
73306-5V-00
c
CAUTION
Use the slotted screwdriver that fits the ID dial slot. (A 4-mm blade width would be the best.) If
you use a screwdriver that does not match the ID dial slot, the ID dial might be damaged.
n
NOTE
The ID information on the TSF1 is recognized by the mounter when it starts up. When you have changed the ID
number, check it on the LCD display of the TSF1 after the mounter has started.
3 -5
3
Setup
3.2 Changing the mounter setups
3.2.1 Changing the setups to use one or two TSF1
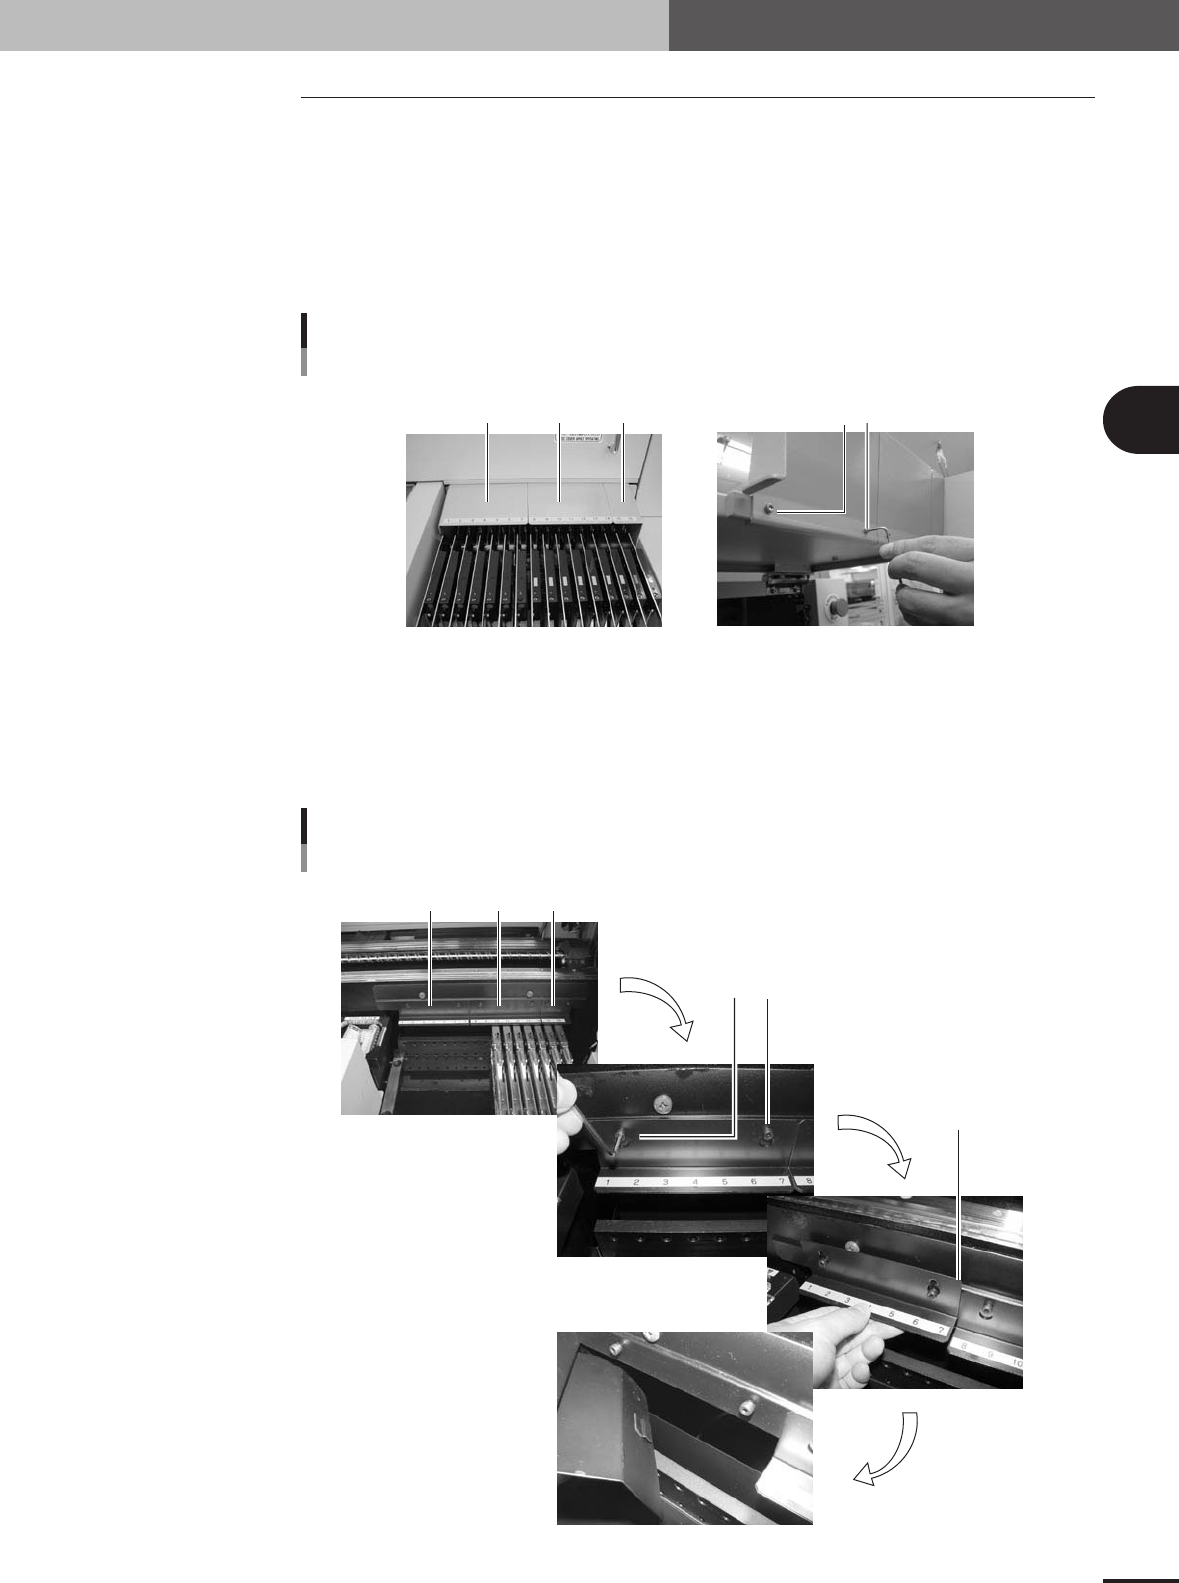
1
Remove the feeder plate safety hoods of the mounter.
Remove the safety hood No. 1 when using one TSF1 unit or remove the safety hoods
No. 1 and 2 when using two TSF1 units. To remove the safety hood, open the
mounter safety cover and loosen the two screws that hold the safety food from the
inner side.
Changing the mounter setup 1
Feeder plate safety hoods
Loosen the two screws
(inner side of mounter safety cover)
to remove the safety hood.
No.1 No. 2 No. 3
73307-5V-00
2
Remove the tape guide plates.
Remove the tape guide plates No. 1 when using one TSF1 unit or remove the tape
guide plates No. 1 and 2 when using two TSF1 units. To remove the tape guide plate,
loosen the two screws that hold the tape guide plate and then lift it up. Fasten the
removed screws into the screw holes in the mounter to avoid losing them.
Changing the mounter setup 2
Ta pe guide plate
To remove the plate, lift it up
and pull toward you.
Loosen the two set screws.
No.1 No. 2 No. 3
73308-5V-00

3 -6
3
Setup
3.2.2 Changing back to the initial setups that do not use TSF1
1
Reattach the feeder plate safety hoods to the mounter.
Reattach the safety hoods in the reverse of the procedure for removing them.
2
Reattach the tape guide plates to the mounter.
Reattach the tape guide plates in the reverse of the procedure for removing them.
Tighten the screws to secure the tape guide plate, being careful so that the pushing
piece on the backside of the tape guide plate holds the metal plate on the mounter
side.
Changing the mounter setup 3
Pushing piece
Metal plate on mounter side
73309-5V-00
w
WARNING
WHEN NOT USING THE TSF1, ALWAYS ATTACH THE FEEDER PLATE SAFETY HOODS AND
TAPE GUIDE PLATES TO ENSURE SAFETY. OPERATING THE MOUNTER WHILE THEY ARE
LEFT REMOVED MIGHT CAUSE AN ACCIDENT OR FAULTY OPERATION.
3.2.3 Checking the machine settings
To operate the TSF1 correctly, check that the following machine settings are correct.
c
CAUTION
When changing the machine settings, you must log in with an operator name having privileges
to change the machine settings.
1
Set the "Special Function" parameter.
1.Press the [Machine] button on the Setup screen.
The "VmSpec" window opens.
2.In the left pane (tree view), select "Option Setting" from under "Setting" - "Ma-
chine Information".
3.Set the "Special Function" parameter in the right pane to "Type A". If not using the
TSF1, set to "None".
c
CAUTION
Even if not using the TSF1, set the "Special Function" parameter to "Type A" when the mounter
is equipped with a custom device.
4.In the left pane, select "Function Setting" from under "Machine Information" -
"Special Setting".
5.Set the "Tray Shuttle Feeder" parameter to "Use". If not using the TSF1, set to
"NotUse".