00192156-04.pdf - 第22页
Maintenance Maintenance Instr uctions F 6 Maintenance work every week 03/2003 US E dition 22 6 Maintenance work every wee k 6

Maintenance Instructions F Maintenance
03/2003 US Edition 5 Daily maintenance jobs
21
Vacuum the nozzle changer 5
Keep the vacuum cleaner at least 1 cm away from the nozzles so as not to damage them. 5
5
5
a Vacuum the nozzle changers of the Collect & Place and Pick & Place heads.
5
Do not leave any loose components around the nozzle changer since they could prevent nozzles
being picked up and set down correctly. 5
5
5
Vacuum the feeders 5
s Carefully clean around the nozzle changer and the feeder area with the vacuum cleaner. There
should be no loose components in the feeder area.
5
Keep at least 1 cm away from the feeder module to avoid damaging the component covers. 5
5
5
: Close the protective hood.
: Press the Start button.
5
Production can continue on the placement machine during the next steps. 5
5
5
5
Empty waste tape container 5
d Pull the waste tape container out of the component cart or from the locations on machines with
waffle-pack changer.
: Empty it into the waste bin.
f Vacuum all around the waste tape container location and then push it back into the component
cart.
5
: Repeat the "daily maintenance jobs" at every feeder area.
5
5
Maintenance Maintenance Instructions F
6 Maintenance work every week 03/2003 US Edition
22
6 Maintenance work every week
6

Maintenance Instructions F Maintenance
03/2003 US Edition 6 Maintenance work every week
23
6
You will need the following tools and consumables for the weekly maintenance. 6
– Vacuum cleaner
– Collecting container
–Brush
–Scissors
–Pliers
– Lint-free cloths
– Ethyl alcohol
– Set of cleaned ceramic nozzles or new nozzles
– If necessary, Viledon filter mat, 225 x 362 (from article no. 00304048-01).
6
There must be no PCBs in the placement machine during the following maintenance steps. 6
: Select “Block manually” (status closed) on the station computer and click on OK (for dual con-
veyor track 1 / track 2).
Wait until the last PCB has been produced and has left the placement machine.
The working area is now clear. 6
: Press the Stop button.
: Open the protective hood.
To move the gantry, take hold of the handle and push gently and carefully. 6
6
6
6
: Push the gantry over the component feeder table. This will stop it outside your working area.
6
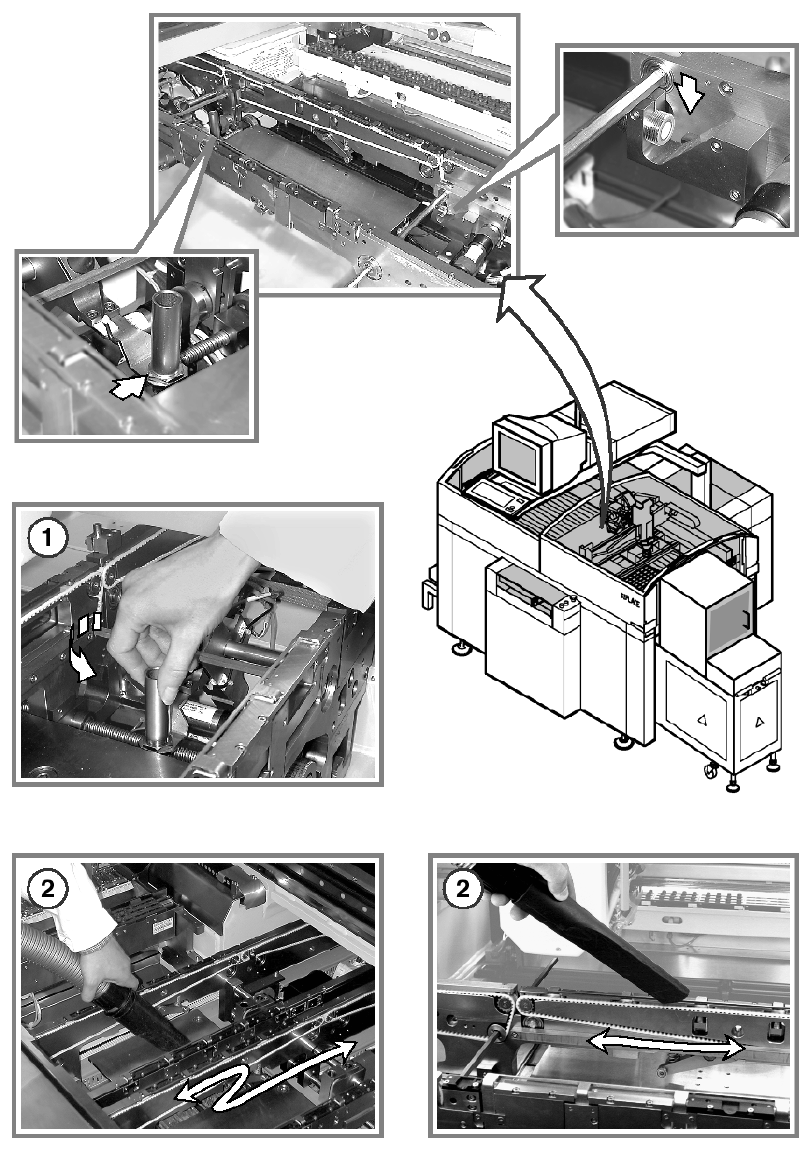
Vacuum the PCB conveyor / sonar sensors 6
a Unscrew the barrel of the sonar sensor on the PCB stopper and remove any loose parts. Then
screw the barrel hand-tight back onto the sonar sensor.
s Use the vacuum cleaner to remove all loose components on and around the PCB conveyor.
Loose components on the PCB conveyor and in the barrel of the sonar sensor can cause malfunc-
tions. 6
6
6
6
6
6