00192156-04.pdf - 第34页
Maintenance Maintenance Instr uctions F 7 Monthly m aintenance work 03/2003 US E dition 34 7 7

Maintenance Instructions F Maintenance
03/2003 US Edition 7 Monthly maintenance work
33
7
7
You will need the following tools, equipment and consumables for the monthly maintenance: 7
– Vacuum cleaner
–Brush
– Slotted-head screwdriver
– Set of hexagon socket spanners
– Pallet jack
– Laboratory gloves
– Ethyl alcohol
– SIPLACE cleaning tissue (article no. 00315253-02)
– SIPLACE cottonwool buds (article no. 00352931-02)
– Clean, lint-free cloths
– Lens cleaning cloth
– ISOFLEX TOPAS, NCA 52 (article no. 00328369-01)
–WD40
– Set of clean sleeves
– Set of cleaned and lightly greased valve plungers.
7
7
Remove component trolley 7
: Open the protective hoods and push the gantry over the PCB conveyor.
7
To move the gantry, take hold of the handle and push gently and carefully. 7
7
: Remove the reject bin from inside the machine and the waste bin from beneath the changeover
table.
7
Disconnect the changeover table from the power supply as follows: 7
a Remove the round mains plug
s When the yellow indicator lamp on the changeover table goes out, remove the square data
plug
d Detach the compressed air supply for the bulk case feeder
7
: Move the pallet jack beneath the changeover table and lift it until it just touches the changeover
table.
f Loosen the hexagon socket head screws.
g Release the clamps.
Maintenance Maintenance Instructions F
7 Monthly maintenance work 03/2003 US Edition
34
7
7

Maintenance Instructions F Maintenance
03/2003 US Edition 7 Monthly maintenance work
35
a Raise the changeover table until it is flush with the top edge of the lateral anti-slip guard.
: Pull it out of the machine.
7
: Switch the placement system off at the main switch.
7
7
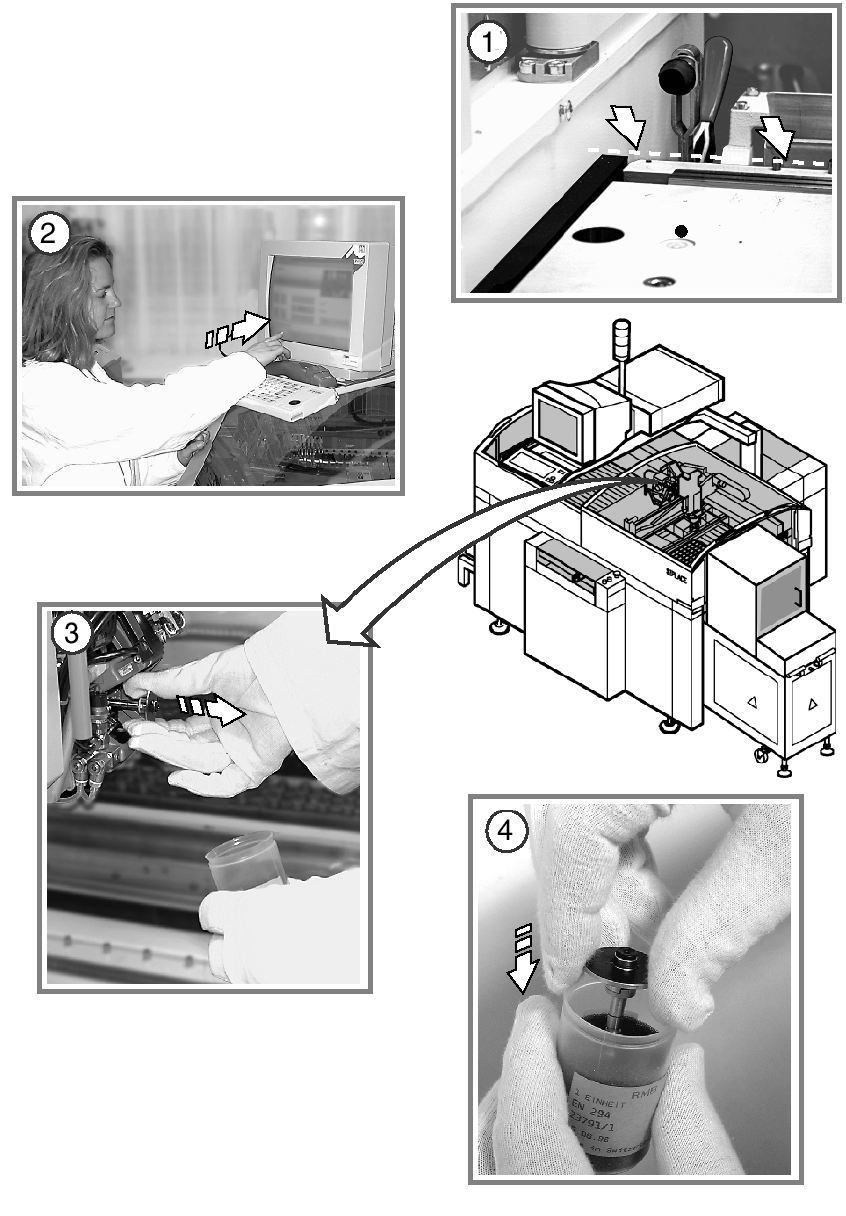
Replace the sleeves and valve plungers 7
The sleeves can be replaced at the same time as the clean ceramic nozzles. The procedure is as
follows: 7
s Use the Single Functions menu to return the nozzles of the Collect & Place head to the nozzle
changer.
: Open the protective hood.
Do not hold the sleeves or nozzles in your bare hands. Wear laboratory gloves when carrying out
any maintenance work on the sleeve.
7
In this way you will avoid dirtying the glass disk and friction wheel unnecessarily, which could
cause malfunctions (counting errors and overshoot). 7
7
d Remove the sleeves from the head.
Pull the sleeves out as shown in the diagram. 7
7
7
7
f Place them in the containers provided.
Use the “Single Functions” menu to step the star.