00192156-04.pdf - 第36页
Maintenance Maintenance Instr uctions F 7 Monthly m aintenance work 03/2003 US E dition 36 7

Maintenance Instructions F Maintenance
03/2003 US Edition 7 Monthly maintenance work
35
a Raise the changeover table until it is flush with the top edge of the lateral anti-slip guard.
: Pull it out of the machine.
7
: Switch the placement system off at the main switch.
7
7
Replace the sleeves and valve plungers 7
The sleeves can be replaced at the same time as the clean ceramic nozzles. The procedure is as
follows: 7
s Use the Single Functions menu to return the nozzles of the Collect & Place head to the nozzle
changer.
: Open the protective hood.
Do not hold the sleeves or nozzles in your bare hands. Wear laboratory gloves when carrying out
any maintenance work on the sleeve.
7
In this way you will avoid dirtying the glass disk and friction wheel unnecessarily, which could
cause malfunctions (counting errors and overshoot). 7
7
d Remove the sleeves from the head.
Pull the sleeves out as shown in the diagram. 7
7
7
7
f Place them in the containers provided.
Use the “Single Functions” menu to step the star.
Maintenance Maintenance Instructions F
7 Monthly maintenance work 03/2003 US Edition
36
7

Maintenance Instructions F Maintenance
03/2003 US Edition 7 Monthly maintenance work
37
a Use a lens cleaning cloth to clean the glass disk of the turning station scanning unit.
7
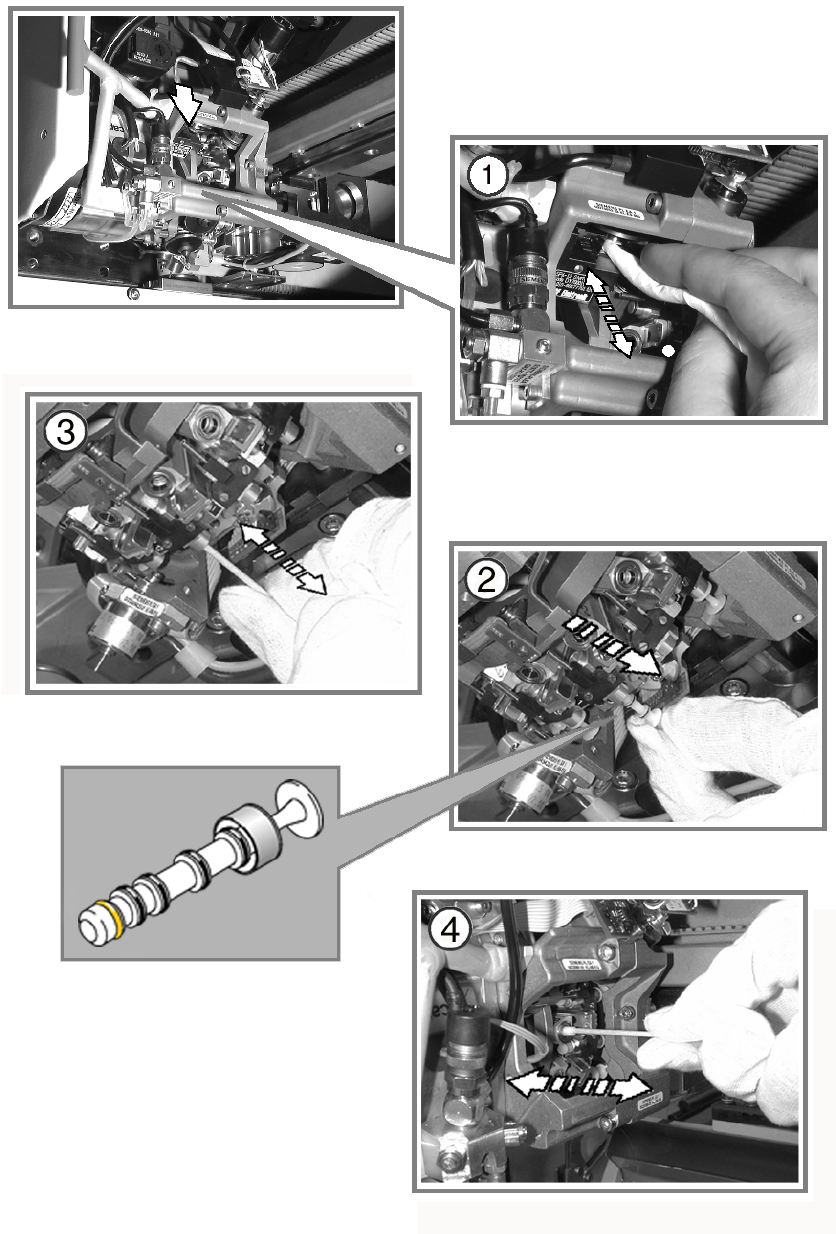
s Remove the 12 valve plungers.
d Clean the valve casings using a cottonwool bud moistened with ethyl alcohol.
Never use pipe-cleaners or bottle brushes to clean the valve casing.
This could tear out the sleeve retaining springs or leave lint or hairs in the segment which, in turn,
could cause faults. 7
7
: Insert the cleaned and very lightly greased valve plungers into the valve casing.
See section ("Maintain the valve plungers").
7
: Move them backwards and forwards several times.
: If the valve plungers move very easily, replace them with new plungers.
If they do move very easily, they are not guaranteed to work correctly. 7
7
: Insert the cleaned sleeves into the segments.
See section ("Maintain the sleeves").
Use only gentle pressure to latch the sleeves into position so as not to damage the sleeve retain-
ing springs. 7
7
7
: Check that the sleeve can be moved easily in the segment.
If the sleeve does not move easily: 7
: Remove the sleeve once more.
f Clean the segment using a cottonwool bud moistened with ethyl alcohol.
7
Never use pipe-cleaners or bottle brushes to clean the segment.
This could tear out the sleeve retaining springs or leave lint or hairs in the segment which, in turn,
could cause faults. 7
7
: Use the "Single Functions" menu to pick up the nozzles of the Collect&Place head.