00192156-04.pdf - 第61页
Maintenance Inst ructions F Maintenance 03/2003 US Edition 9 4-monthly m aintenance jobs 61 Dismantle f ront part of head 9 : Use the "S ingle Funct ions" m enu to r eturn th e nozzl es of e very C ollect&P…
Maintenance Maintenance Instructions F
9 4-monthly maintenance jobs 03/2003 US Edition
60

Maintenance Instructions F Maintenance
03/2003 US Edition 9 4-monthly maintenance jobs
61
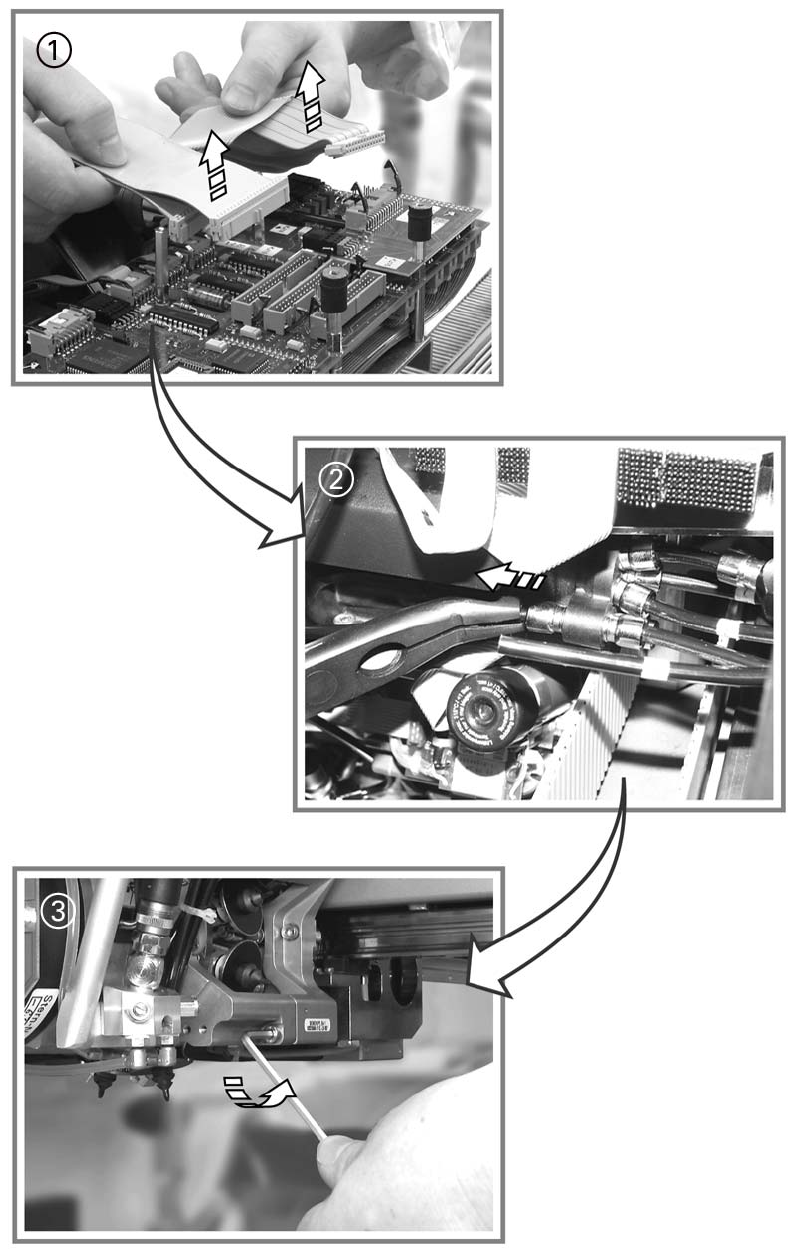
Dismantle front part of head 9
: Use the "Single Functions" menu to return the nozzles of every Collect&Place head to the noz-
zle changer.
: Switch the placement system off at the main switch.
Follow the correct shut-down routine. 9
9
9
Remember to follow the ESD regulations.
9
9
: Cover the feeder area to protect the feeder modules and front part of the head.
a Unplug the ribbon cables for the front part of head on the conversion board.
s Detach the compressed air hose.
To do this, use the pliers from the service box for the DLM 1 and DLM1-6 heads. 9
9
9
d Loosen the 3 (10.000er / 8000x head) or the 4 screws (DLM1 / DLM1-6) of the front part of
head (using a 3 mm Allen key) and remove it.
Hold the front part of head firmly as you remove the screws. 9
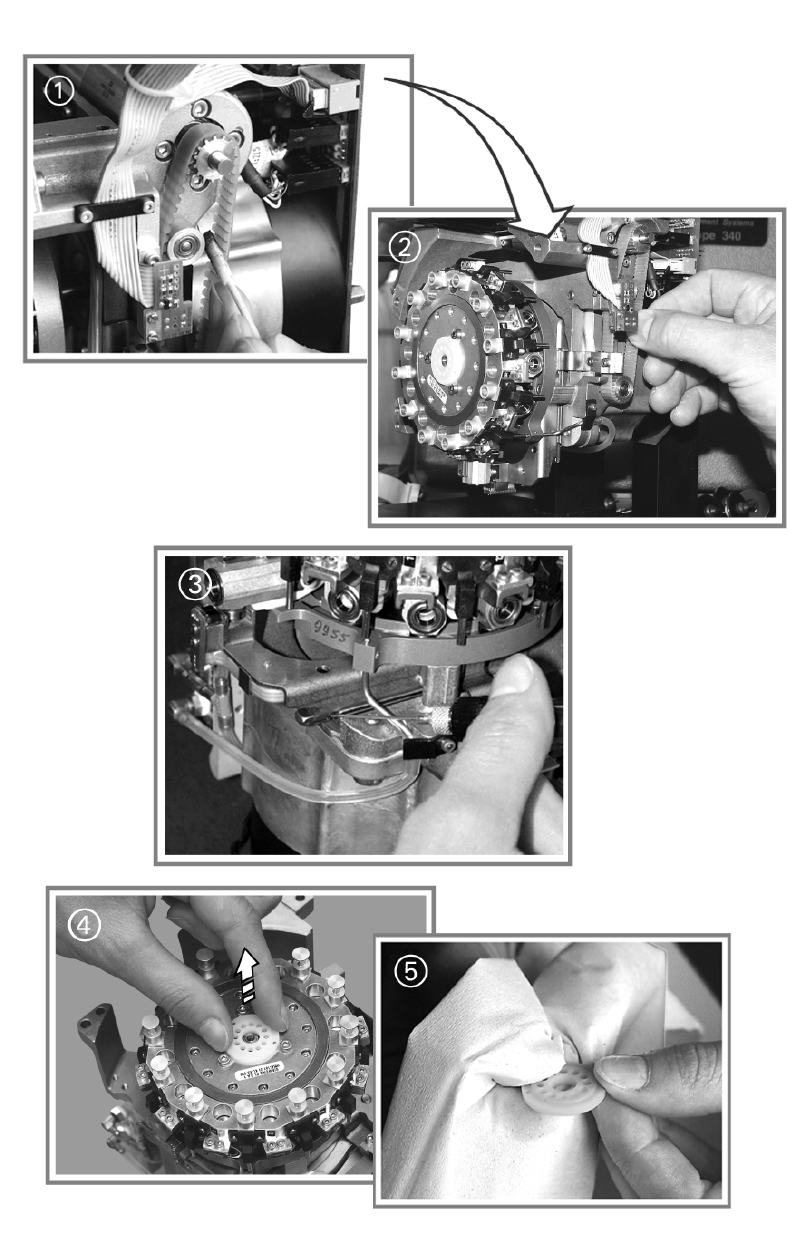
Look out for the white plastic distributor plate and the distributor. 9
9
Turn the star half a revolution to avoid damaging the valve plunger drive with the valve plunger.9
9
: Place the front part of the head on a soft ESD surface (with the valve plunger side underneath)
or place it on a suitable head stand.
: Remove the sleeves and place them in the containers provided.
Maintenance Maintenance Instructions F
9 4-monthly maintenance jobs 03/2003 US Edition
62
9