00192156-04.pdf - 第64页
Maintenance Maintenance Instr uctions F 9 4-monthly maintenance jobs 03/2003 US Edition 64 9

Maintenance Instructions F Maintenance
03/2003 US Edition 9 4-monthly maintenance jobs
63
Z axis (front part of head) 9
a Use a brush or cottonwool bud to move dirt from the Z axis toothed belt.
: Clean the rollers, toothed wheels and the toothed belt with a cottonwool bud or lint-free cloth
moistened with ethyl alcohol.
: Check the toothed belt for wear.
Replace the toothed belt if it shows signs of wear (see servicing instructions).
: Lightly grease the toothed belt with ISOFLEX TOPAS NCA 52 and remove any excess grease.
s Check that the Z axis guide runs easily and without play.
: Check the jaws for damage.
Contact your regional Service Center if defects are identified in the Z axis or jaws. 9
Oil the miniature roller table 9
: Move the Z axis into its bottom position.
: Wipe the needle of the oil dispenser.
Do not press any oil out of the oil dispenser. Just one visible drop would be too much oil. 9
9
9
d Simply place the needle against the grooves of the miniature roller table. When it makes con-
tact, sufficient oil will be transferred to the grooves (capillary effect).
: Move the Z axis up and down several times to distribute the film of oil.
Distributor plate 9
f Remove the distributor plate.
: Blow through with compressed air.
g Clean the sleeve shaft using a lint-free cloth moistened with ethyl alcohol.
: Grease the back very lightly with Unisilkon L250L to ensure it is sealed with respect to the star.
Remove any visible, excess grease.
9
There must be NO grease in the holes. 9
9
: Place the distributor plate on a clean surface.
Maintenance Maintenance Instructions F
9 4-monthly maintenance jobs 03/2003 US Edition
64
9

Maintenance Instructions F Maintenance
03/2003 US Edition 9 4-monthly maintenance jobs
65
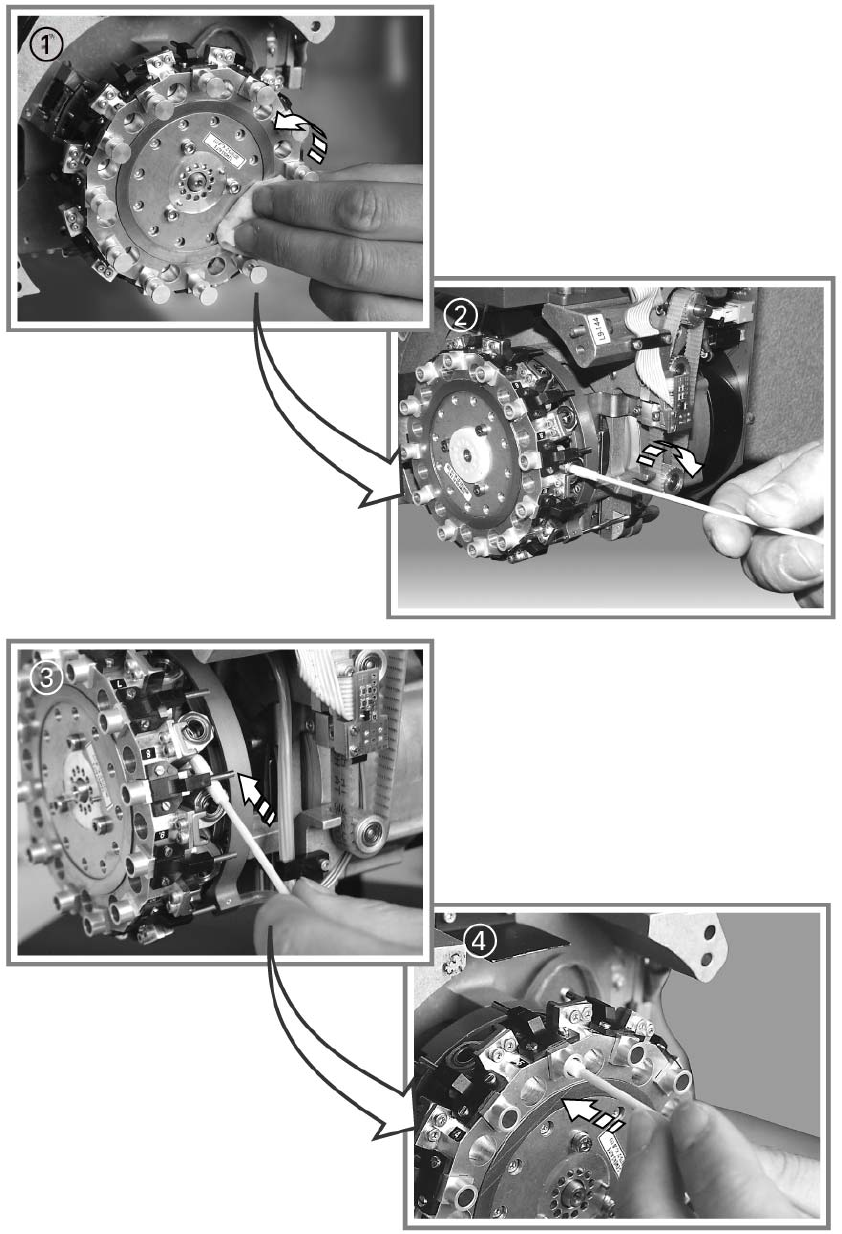
Star 9
a Wipe the star including the distributor plate seat with a lint-free cloth.
: Apply a light film of ISOFLEX TOPAS NCA 52 grease to the running surface of the star brake.
Remove any visible excess grease.
9
Make sure that no dirt or grease gets into the vacuum channels. 9
9
9
9
Segments 9
9
When cleaning, be careful not to damage the sleeve retaining springs in the segments. 9
9
s Carefully clean the segments using a cottonwool bud moistened with ethyl alcohol.
d Remove any visible dirt around the segments.
9
9
Valve channels 9
: Remove the 12 valve plungers.
f Clean the valve channels using a cottonwool bud moistened with ethyl alcohol.
: Then clean all around the valve channels.
Assembling the front part 9
: Insert cleaned or new sleeves into the segments.
: Insert cleaned or new valve plungers into the valve channels.