00192156-04.pdf - 第78页
Maintenance Maintenance Instr uctions F 9 4-monthly maintenance jobs 03/2003 US Edition 78 9
Maintenance Instructions F Maintenance
03/2003 US Edition 9 4-monthly maintenance jobs
77
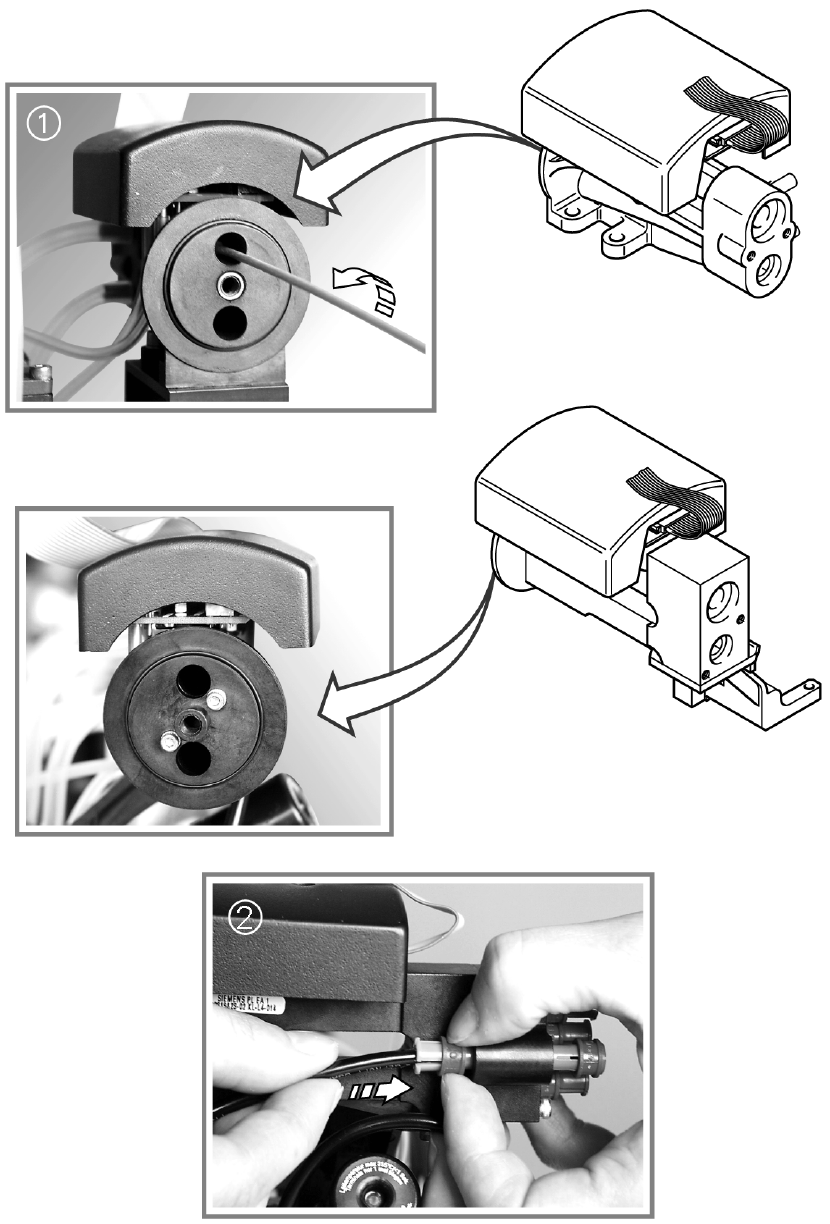
: Carefully clean the Venturi nozzles using a lint-free cloth moistened with ethyl alcohol.
: Blow through the Venturi nozzles with compressed air.
: Lightly grease the O-rings of the vacuum generator with Unisilkon L250L.
9
: Clean the vacuum generator block with a cottonwool bud moistened with ethyl alcohol and
blow through with compressed air.
9
: Place the cleaned parts of the vacuum generator on a clean surface.
9
9
9
9
9
9
9
9
9
9
9
9
9
9
9
9
9
9
9
Maintenance Maintenance Instructions F
9 4-monthly maintenance jobs 03/2003 US Edition
78
9

Maintenance Instructions F Maintenance
03/2003 US Edition 9 4-monthly maintenance jobs
79
Silencer 9
: Turn the silencer counter-clockwise to remove.
a Clean the holes to the Venturi nozzles with a cottonwool bud moistened with ethyl alcohol.
9
: Check the silencer for dirt.
If there are any signs of discoloration, replace the silencer and reverse the sequence described
above to fit.
9
Don't forget the O-ring. 9
9
9
: Check the plastic silencer mount for breaks (10000x head).
9
Assemble the vacuum generator 9
: Assemble the block with the Venturi nozzles and carefully screw tight.
9
s Attach the compressed air hoses once more.
To do this, use the pliers from the service box for the DLM 1 and DLM1-6 heads. 9
Make sure that the connections are seated correctly. 9
9
The hoses must engage correctly in the couplings. 9
9
9
: Fit the head cover.
: Use the Single Functions" menu to pick up the nozzles once more.
9
Test placement 9
The distance between the component camera and the PCB camera can be changed by separating
the front and back parts of the head. 9
9
: Carry out a test placement run to test whether the placement accuracy is still guaranteed.
: If the placement accuracy is not guaranteed, remeasure the placement head.