YSM10_Mainte_E.pdf - 第104页
3-37 3 Periodic maintenance items 5.3.2 Cleaning and lubricating the W-axis guide 1 Change the conv ey or width to its maximum width. 1. Press the [Width] button on the [Unit] - [Conveyor] tab screen to display the "…

3-36
3
Periodic maintenance items
5
Apply grease.
1. Apply the specified grease (NSL) by hand
uniformly over the surfaces of the
hexagon spline and the ball screw and
lead grooves while the conveyor is the
minimum width.
2. Close the machine safety cover to
cancel the emergency stop.
3. Change the conveyor to the maximum
width with the procedure of Step 1.
e
4. Press the emergency stop button to open
the machine safety cover.
5. Apply grease to the positions where the
grease could not be applied in 1.
53350-KMG-00
6
Spread the grease.
1. Close the machine safety cover to
cancel the emergency stop.
2. Change the conveyor width from
maximum to minimum several times with
the procedures of Step 1 and 3.
7
Wipe away excess grease.
e
1. Press the emergency stop button to open
the machine safety cover.
2. Wipe all excess grease from the ball
screw and the hexagon spline end faces.
Step 5
Applying grease
Grease
(Apply grease in a uniform manner.)
3-37
3
Periodic maintenance items
5.3.2 Cleaning and lubricating the W-axis guide
1
Change the conveyor width to its
maximum width.
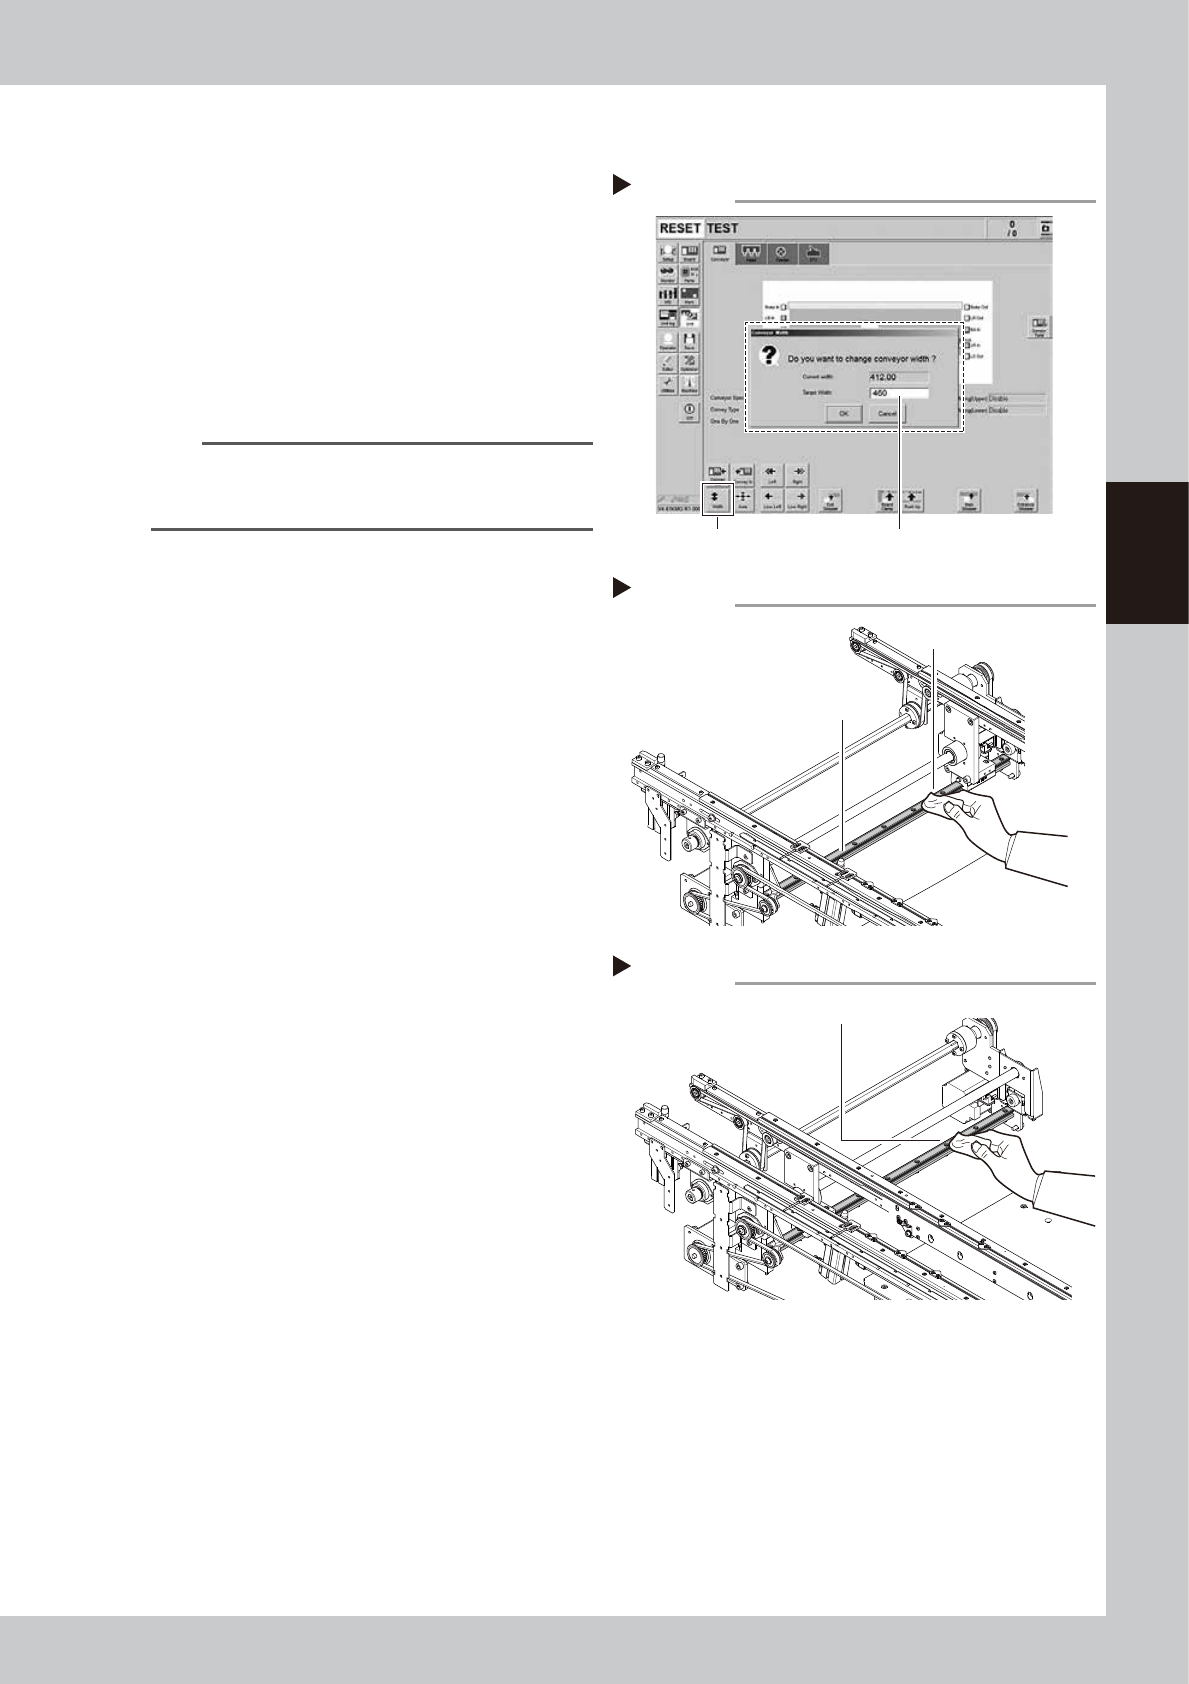
1. Press the [Width] button on the [Unit]
- [Conveyor] tab screen to display the
"Conveyor Width" screen.
2. Enter the maximum value of the
conveyor width in the "Target Width" box
and press the [OK] button. The conveyor
width is changed to the specified width.
54308-KMG-00
TIP
The maximum conveyor width is 460 mm as a standard
feature. If the machine is equipped with sATS15, the
maximum width is 360 mm
2
Clean the guide.
e
1. Press the emergency stop button to open
the machine safety cover.
2. Wipe the old grease and soiling from the
entire guides (2 positions) with a lint-free
cloth or paper towel (for clean room
use).
53351-KMG-00
3
Change the conveyor width to its
minimum width.
1. Close the machine safety cover to
cancel the emergency stop.
2. Press the [Width] button on the [Unit]
- [Conveyor] tab screen to display the
"Conveyor Width" screen.
3. Enter the minimum value of the conveyor
width "50 mm" in the "Target Width" box
and press the [OK] button. The conveyor
width is changed to the specified width.
4
Clean the rest of the part.
e
1. Press the emergency stop button to open
the machine safety cover.
2. Wipe off the remaining grease or soiling
described in Step 2 with paper towel or
similar tools.
53352-KMG-00
Step 1
Enter the maximum conveyor width.
[Width] button
Changing the conveyor width
Step 2
Cleaning the guide
Guide
Cleaning cloth
Step 4
Wipe off remaining grease or soiling.
Cleaning the guide 2
3-38
3
Periodic maintenance items
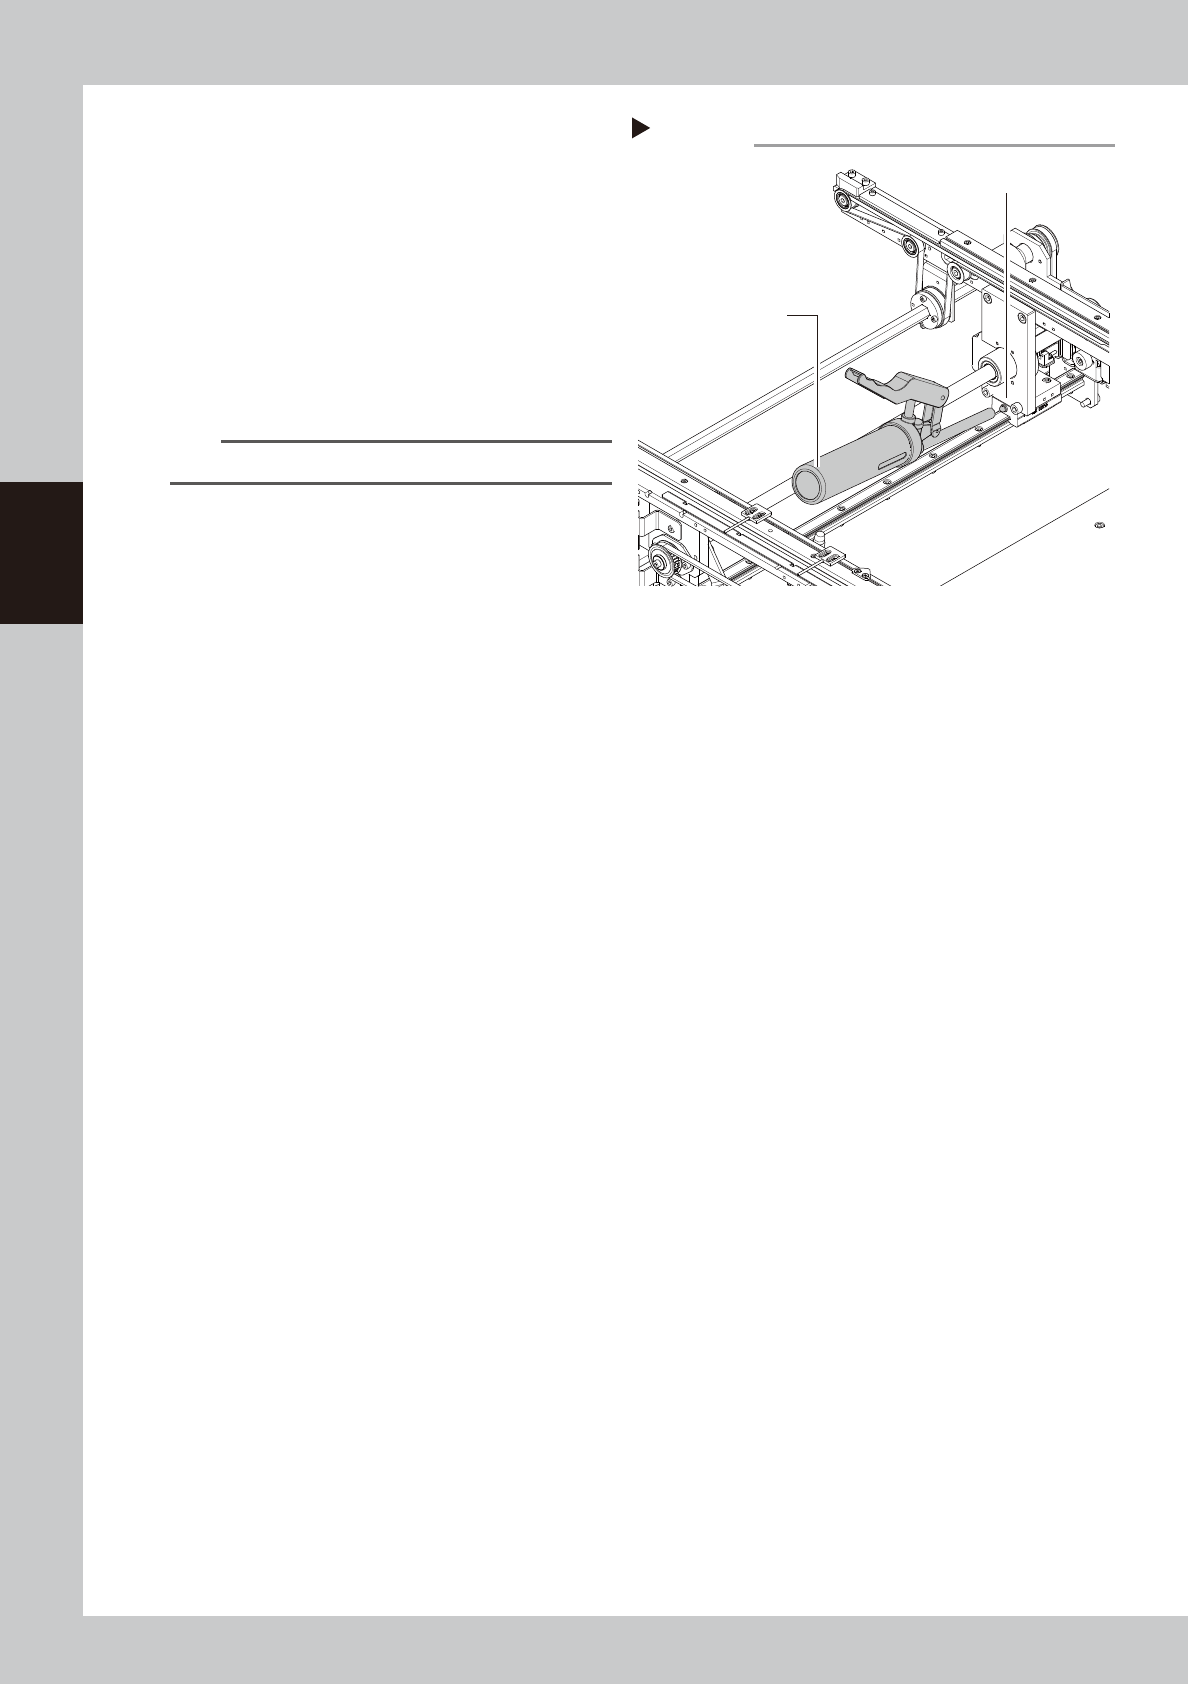
5
Apply grease.
1. Close the machine safety cover to
cancel the emergency stop.
2. Change the conveyor to the maximum
width with the procedure of Step 1.
e
3. Press the emergency stop button to open
the machine safety cover.
4. Use a grease gun (standard type) to
inject the prescribed grease (NSL) at the
2 W-axis guide's grease nipples.
53353-KMG-00
n
NOTE
Inject until the grease begins to seep out from the gap.
6
Spread the grease.
1. Close the machine safety cover to
cancel the emergency stop.
2. Change the conveyor width from
minimum to maximum several times with
the procedures of Step 3 and 1.
7
Wipe away excess grease.
e
1. Press the emergency stop button to open
the machine safety cover.
2. Wipe all excess grease from the guide
end face.
Step 5
Applying grease
Grease gun
(Standard type nozzle)
Grease nipple