YSM10_Mainte_E.pdf - 第108页
3-41 3 Periodic maintenance items 6. T wo-year inspection 6.1 Head unit 6.1.1 Replacing the ejector bit As the ejector bit is used for a long time, its function ma y lower . Therefore, it is recommended to replace the ej…
3-40
3
Periodic maintenance items
5
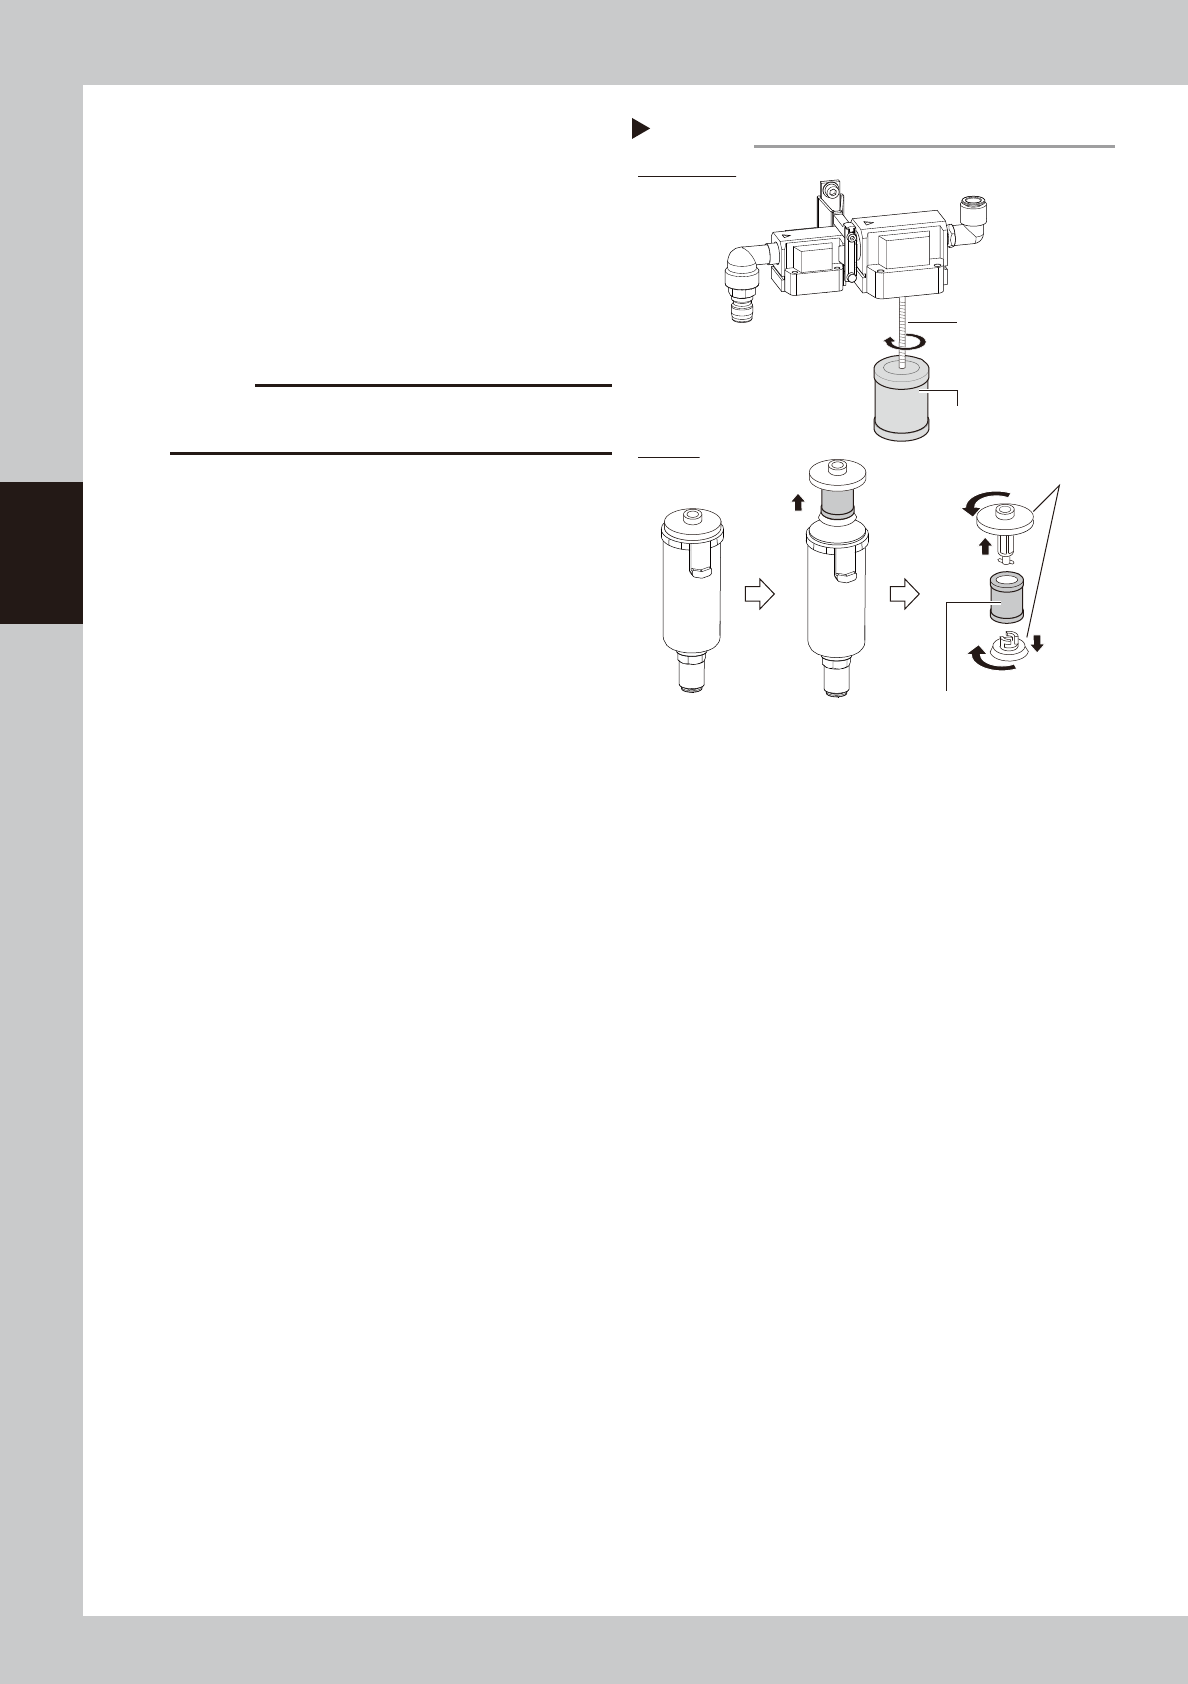
Check the filter media status.
Rotate the media to remove it, and check it
for soiling and clogging. If soiled, replace it
with a new media indicated in the
Consumable Parts List.
53360-KMG-00
6
Attach the media and cup.
Attach the media and cup by reversing the
removal procedure previously described.
c
CAUTION
Make sure not to drop the O-ring for cup when
attaching the media and cup.
7
Reconnect he air coupler.
1. After reconnecting the air hose, check
that no air is leaking.
2. Turn the air supply/exhaust switch to the
"Supply" side.
Step 5
Attach with screw.
Oil mist filter
Detaching and checking filter media
Air filter
Media
(ELEMENT ASSEMBLY)
Adapter
Media
(FILTER ELEMENT)
3-41
3
Periodic maintenance items
6. Two-year inspection
6.1 Head unit
6.1.1 Replacing the ejector bit
As the ejector bit is used for a long time, its function may lower. Therefore, it is recommended to replace the
ejector bit with a new one once every about 2 years so as to maintain its performance even though this service
life may vary depending on the operating conditions. The following describes the replacement procedures for
the ejector bit.
n
NOTE
The procedure of HM head unit is described as example. The procedure of HM5 head unit is also the same.
c
CAUTION
The bit cannot be reused. When replacing the ejector
bit, be sure to use a new one.
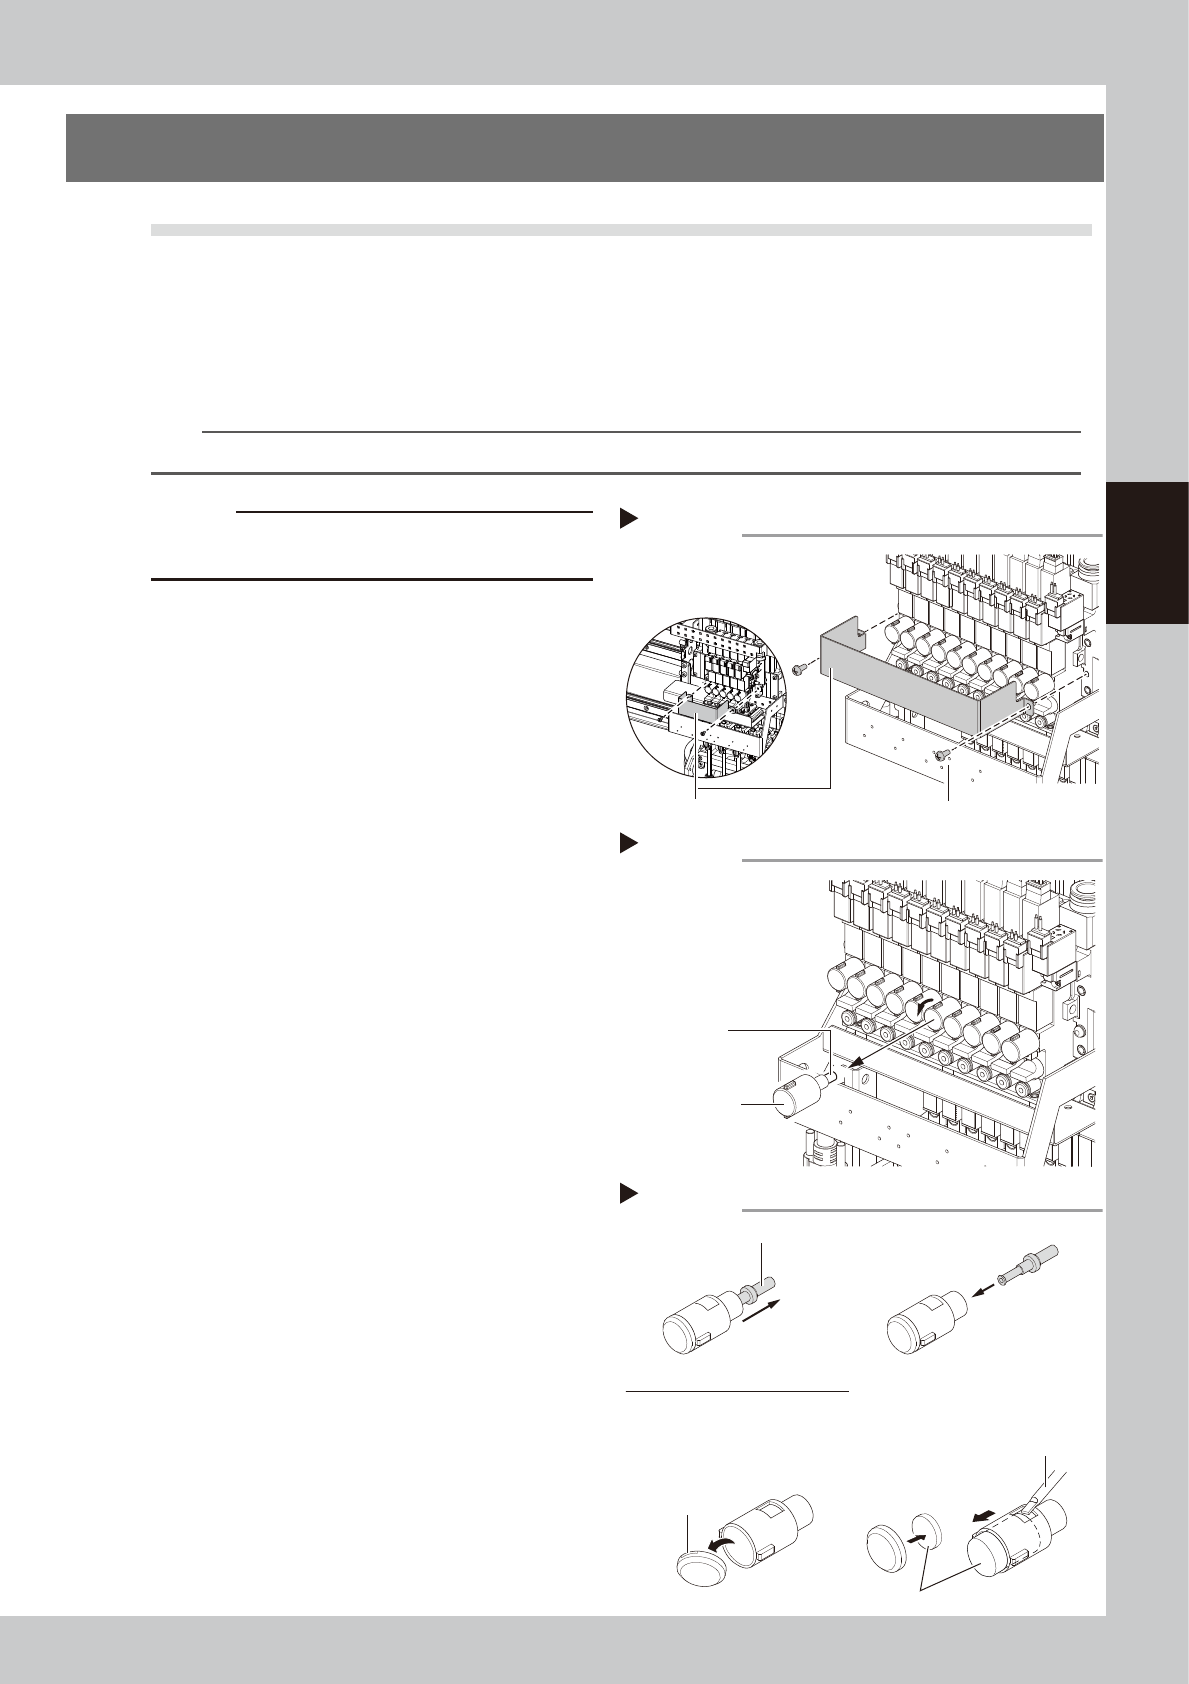
1
Prepare for the work.
e
1. Press the emergency stop button to open
the machine safety cover.
2. Move the head unit forward.
3.
Place a square cloth under the head unit
.
2
Detach the baffle plate.
Remove the 2 screws mounting the baffle
plate with a phillips screwdriver.
53325-KMG-00
3
Remove the bit cap.
Turn the bit cap left by hand to remove it.
53361-KMG-00
4
Replace the bit.
Pull out the bit to be replaced from the bit
cap and insert a new bit.
If the muffler is contaminated, replace it
with a new one.
53362-KMG-00
5
Reattach the bit cap.
Insert the bit cap into its original position
and turn it right to mount it.
6
Reattach the baffle plate.
1. Reattach the baffle plate.
2. Remove the square cloth
under the head
unit
.
Step 2
Mounting screw (2 locations)
Removing the baffle plate
Baffle plate
HM5 head
HM head
Step 3
Removing the bit
Bit cap
Bit
Step 4
Replacing the bit
Bit
If the muffler is contaminated
Precision screwdriver
Claw
Detach the bit cap tip. Replace the muffler.
Muffler

Chapter 4 Maintenance of options
Contents
1. Ionizer 4-1
1.1 Cleaning the ionizer discharge needle (Monthly) 4-2
1.2 Replacing the ionizer discharge needle (2-year) 4-3
2. UPS (Uninterruptible Power Supply) 4-5
2.1 Replacing the UPS battery (3-year) 4-5
3. Nozzle station 4-6
3.1 Checking and cleaning nozzle station sensor (1-year) 4-6
4. Maintenance of sATS15 4-8
4.1 Daily inspection 4-9
4.1.1 Checking the pallet and the setting conditions 4-9
4.2 Monthly inspection 4-11
4.2.1 Checking the rack and the guide rail 4-11
4.2.2 Cleaning and lubricating the AZ-axis ball screw and guides 4-12
4.3 6-month inspection 4-14
4.3.1 Cleaning and lubricating the AH-axis guide 4-14