YSM10_Mainte_E.pdf - 第97页
3-30 3 Periodic maintenance items 5 Pr epare for cleaning. 1. Place a paper cup or cloth under the head to be cleaned. 2. Fill the cleaning kit with absolute ethanol. 6 Clean the inside of the spline shaft. 1. Insert the…
3-29
3
Periodic maintenance items
5. One-year inspection
This section describes the maintenance work performed once every year.
5.1. Head unit
5.1.1 Cleaning the spline shaft
As a general guide, clean the spline shaft once ever year, although this may vary depending on the machine
condition or surrounding situation.
n
NOTE
The procedure of HM head unit is described as example. The procedure of HM5 head unit is also the same.
1
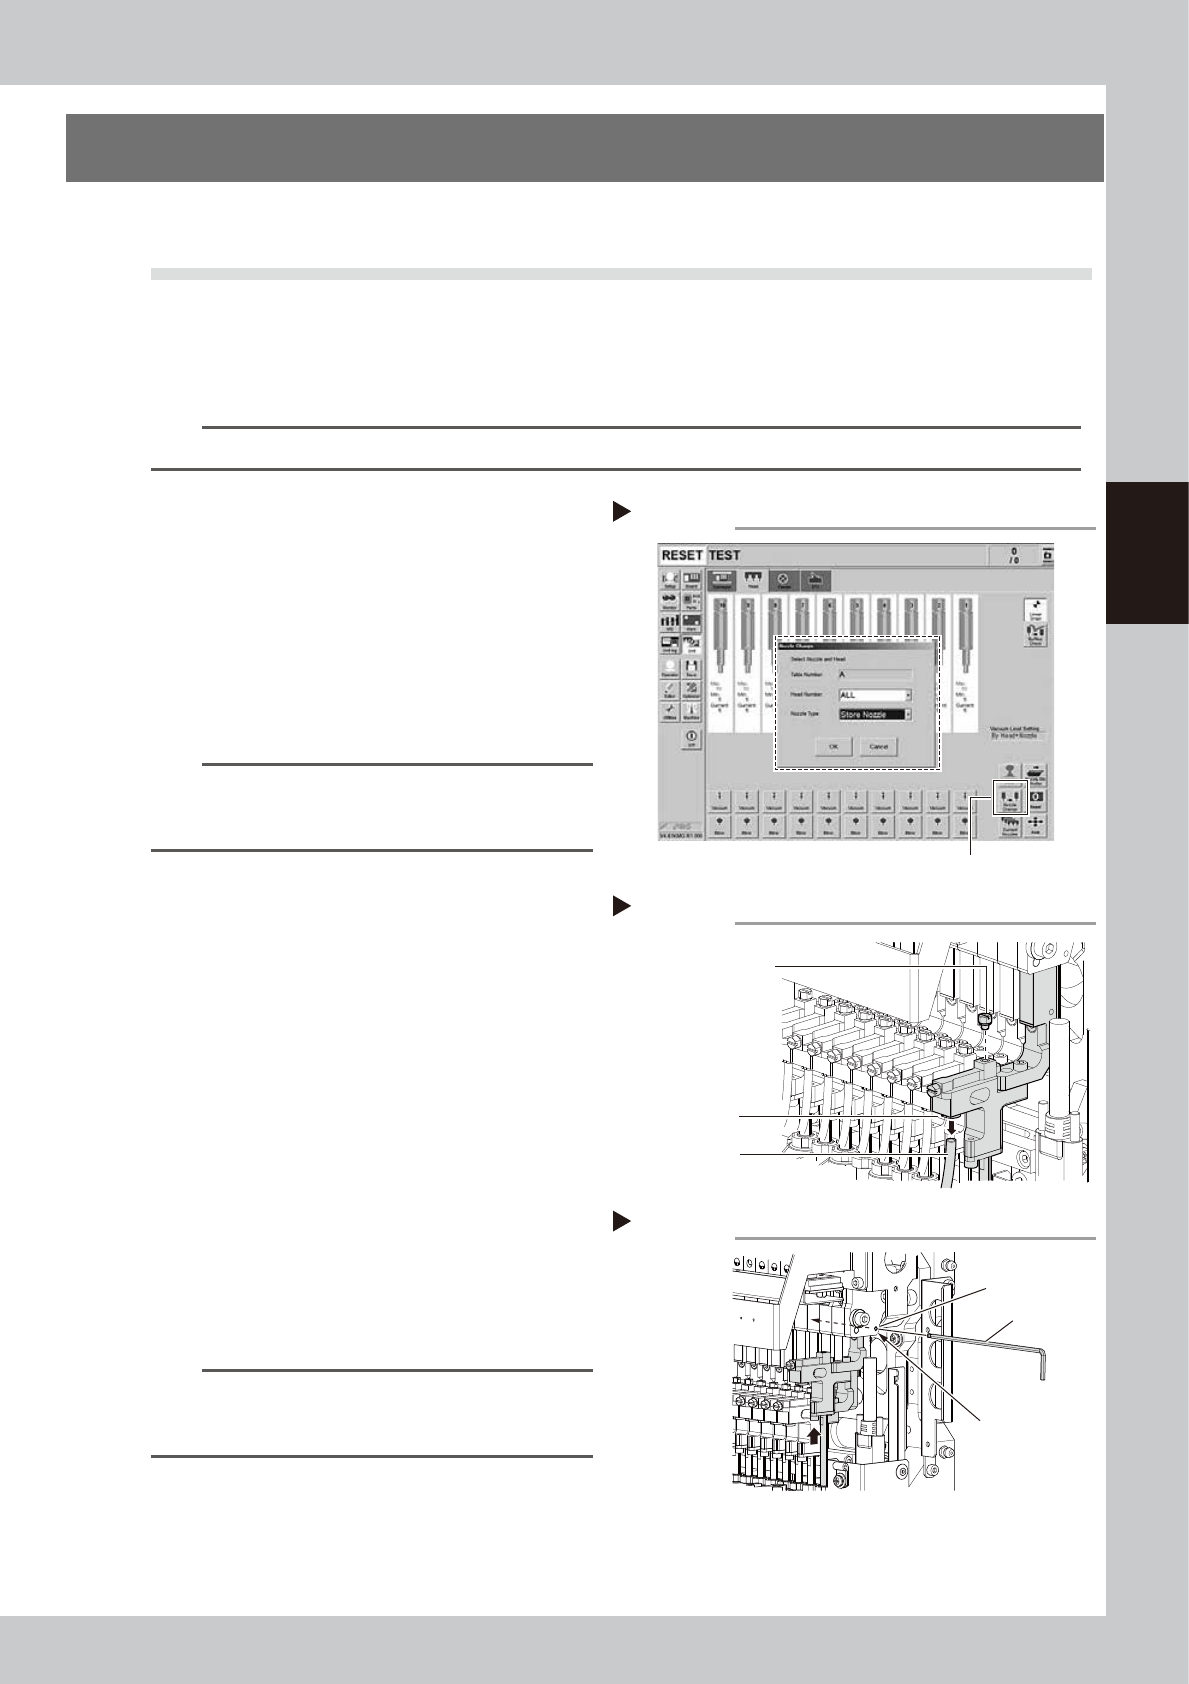
(With the nozzle station) Return all
nozzles to the nozzle station.
1. Press the [Nozzle Change] button on the
[Unit] - [Head] tab screen.
2. Select "ALL" from the "Head Number" and
select "Store Nozzle" from the "Nozzle
Type" on the "Nozzle Change" screen.
3. Press the [OK] button to return all nozzles
to the nozzle station.
54305-KMG-00
n
NOTE
If the machine is not equipped with the nozzle station,
press the emergency stop button to open the machine
sefety cover and detach the nozzles manually.
2
Move the head unit.
e
1. Press the emergency stop button to open
the machine safety cover.
2. Move the head unit forward.
3
Remove the air hose and the
maintenance bolt.
1. Remove the maintenance bolt with a
slotted screwdriver or a wrench.
2. Disconnect the air hose from the air
connector.
53339-KMG-00
4
Mount the Z-axis at the work position.
As shown in the figure on the right, move the
shaft to a position where the Z-axis linear
scale is hidden. Insert the hex wrench into
the Z-axis mounting hole to mount the Z-axis.
53340-KMG-00
n
NOTE
A hex wrench may not be inserted smoothly as cables
are around the head. In this case, use a wire (less than
ø2.5 mm), etc. to mount the Z-axis.
Step1
[Nozzle Change] button
Returning all nozzles to nozzle station
Step 3
Removing air hose and maintenance bolt
Maintenance bolt
Air hose
Air connector
Step 4
ø2.5 mm
Mounting the Z-axis
Hex wrench
Z-axis mounting hole
3-30
3
Periodic maintenance items
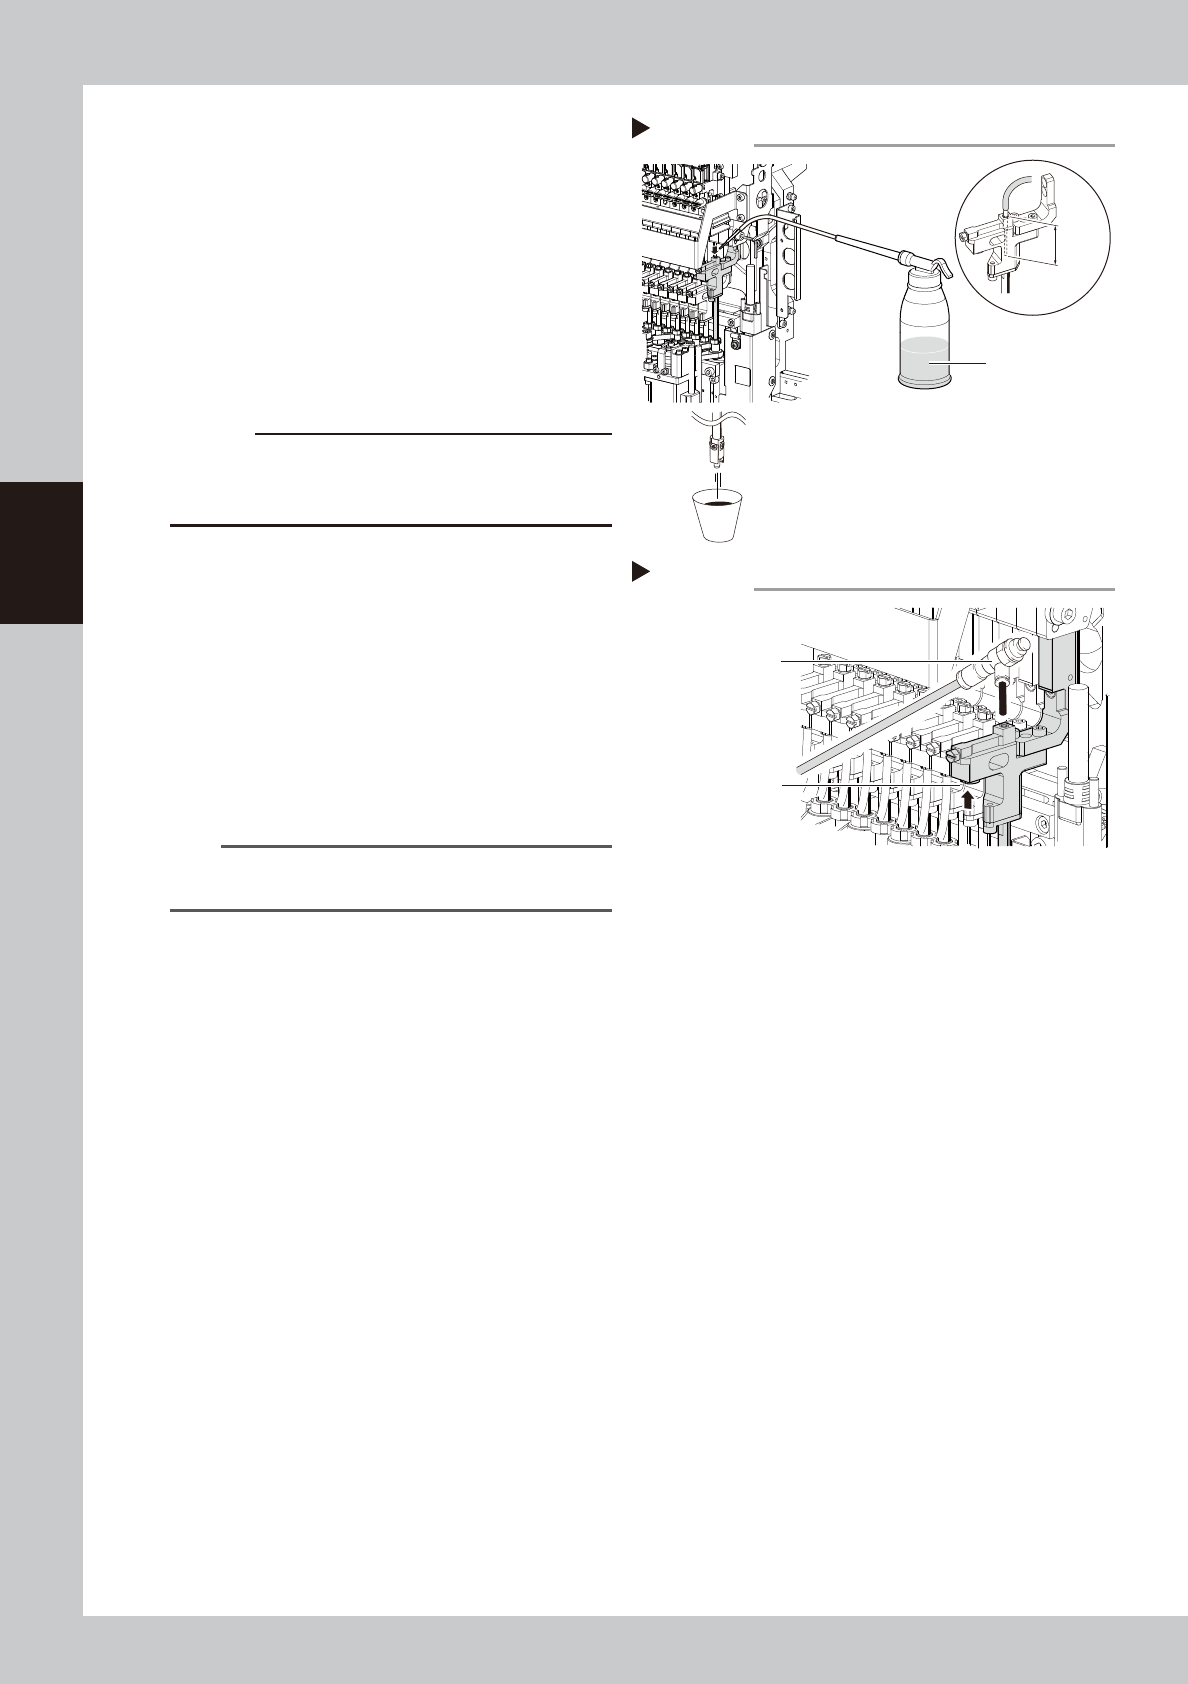
5
Prepare for cleaning.
1. Place a paper cup or cloth under the
head to be cleaned.
2. Fill the cleaning kit with absolute ethanol.
6
Clean the inside of the spline shaft.
1. Insert the nozzle of the cleaning kit into
the cleaning hole of the spline shaft.
2. Pour absolute ethanol into the spline
shaft air path to clean away dust and
grime.
53341-KMG-00
c
CAUTION
Be sure to insert the cleaning kit tip 25mm or more. If
the cleaning kit tip is inserted insufficiently, absolute
ethanol may flow into the packing.
7
Blow air into the spline air path.
1. Prepare the air blow tool and connect it
to the air connector on the left or right of
the feeder bank.
2. Cover the portion where the air hose has
been disconnected so that no air leaks.
Blow the air into the inside of the spline
shaft.
3. Check that contaminant is no longer
discharged from the spline shaft tip.
53342-KMG-00
n
NOTE
Repeat Step 6 and 7 until absolute ethanol that flows
out from the spline shaft becomes clean.
8
Return the head unit to its original
state.
1.
Install the maintenance bolt.
2. Connect the air hose to the air connector.
3. Pull out the hex wrench ( or wire etc.) that
mounts the Z-axis.
Step 6
Paper cup or cloth
25 mm
or more
Cleaning the spline
Absolute ethanol
Cleaning kit
Step 7
Blowing the air path
Push this portion
by finger.
Air blow tool
3-31
3
Periodic maintenance items
5.2 Conveyor
5.2.1 Inspecting conveyor belt and cleaning guides and pulleys
As the conveyor belt wears away, slippages may occur that prevent securely conveying the boards.
It is therefore necessary to make periodic checks for wear of the conveyor belt.
Additionally, if belt wear debris accumulate on the light receiving surface of the conveyor sensor, troubles such
as incorrect board detection may occur. If belt wear debris accumulate in the belt guide or pulley periphery,
the belt may be fixed.
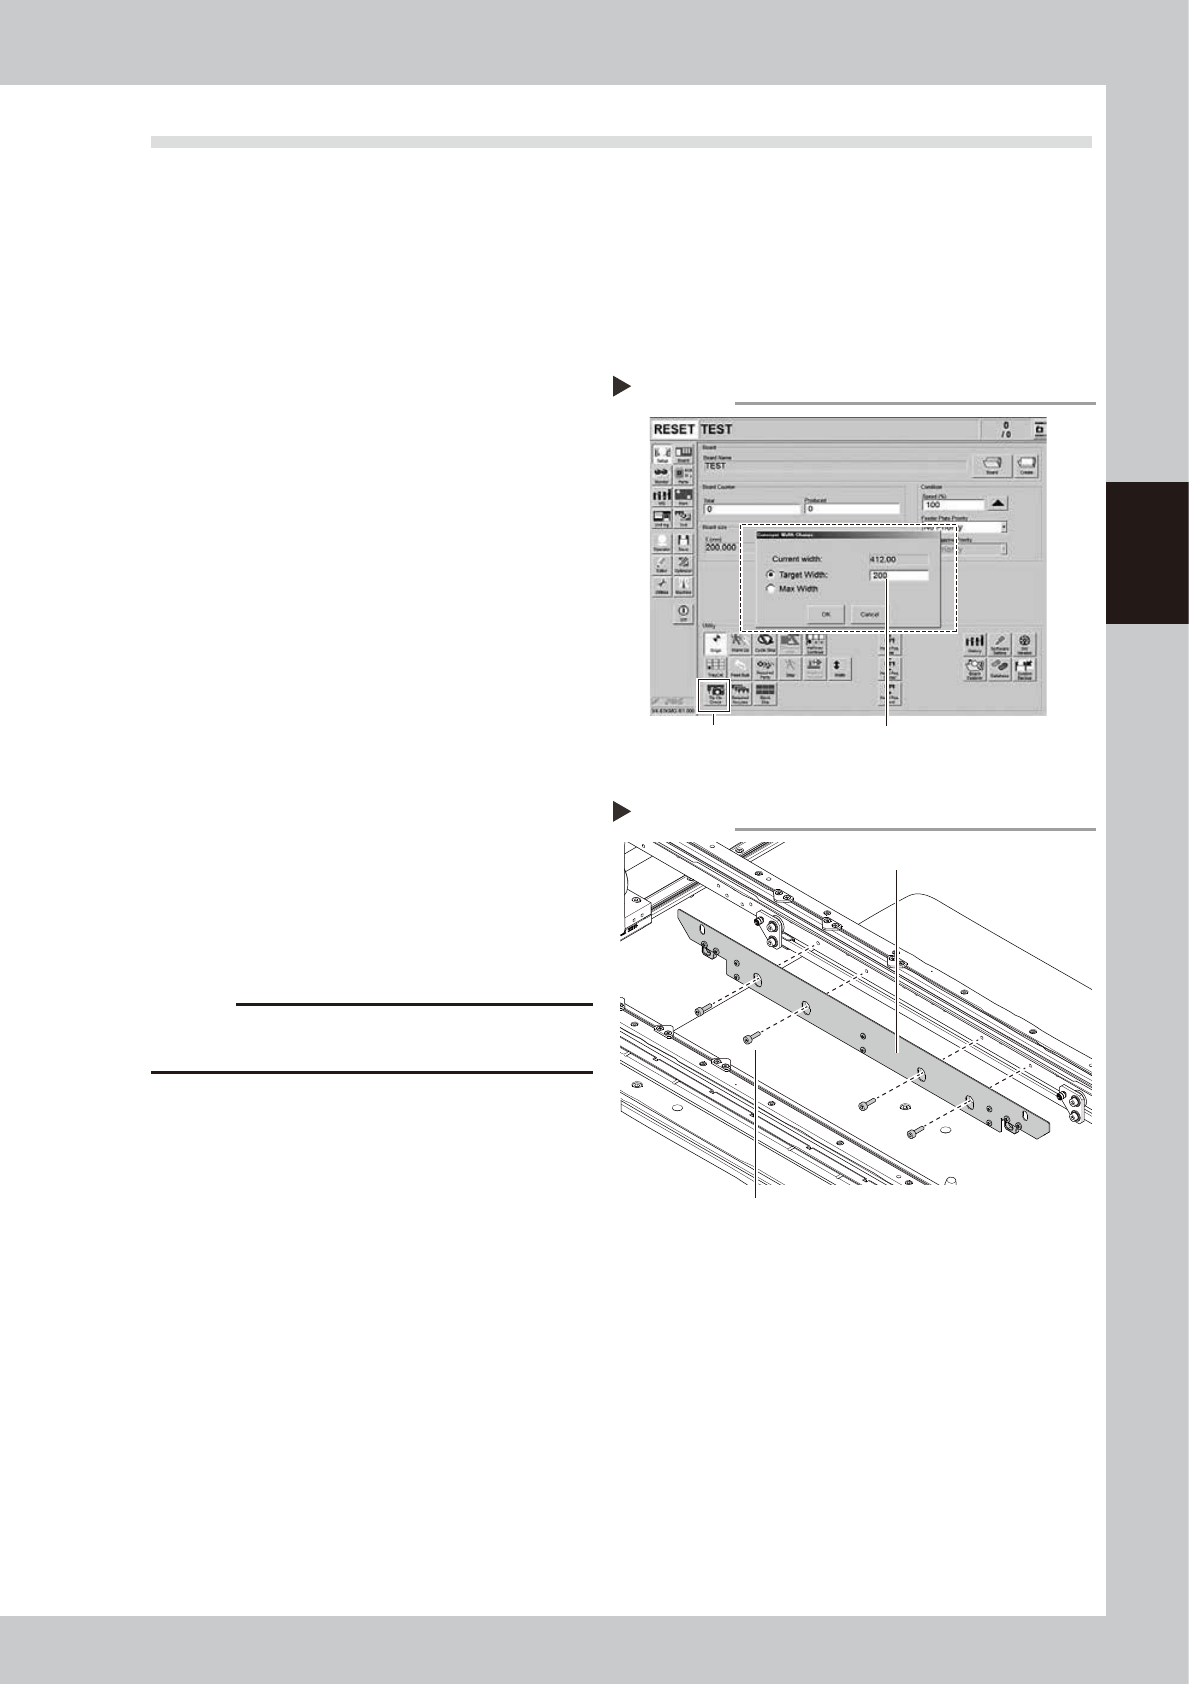
1
Change the conveyor width to a
convenient width for maintenance
work.
1. Press the [Width] button to display the
"Conveyor Width" screen.
2. Enter a width wide enough for a hex
wrench to be inserted (about 200 mm) in
the "Target Width" box and press the [OK]
button. The conveyor is changed to the
specified width.
54306-KMG-00
2
Prepare for cleaning.
e
1. Press the emergency stop button to open
the machine safety cover.
2. Place a square cloth on the push-up
plate.
3
Remove the board clamp plate.
Remove the board clamping plate mounting
bolts (8 positions shown in the figure on the
right) with a hex wrench (3) to remove the
board clamp plate.
53343-KMG-00
c
CAUTION
Do not remove any bolts other than the 4 bolts shown in
the figure on the right.
Step 1
Enter maximum conveyor width.
[Width] button
Changing the conveyor width
Step 3
Removing the board clamp plate
Board clamp plate
Board clamp plate mounting bolt