YC8_Ope_E.pdf - 第64页
2-14 2 asic operation n Manual head operation [Unit] – [Head] screen 1 2 3 4 5 24207-N8-00 Button name Function 1 V acuum T urns the vacuum of each head on or off. 2 Blow T urns the air blow in each head on or off. 3 N…
2-13
2
asic operation
4. [Axis] button
Pressing this button opens the "Move Axis" screen as shown below. You can manually move each axis at a specified step
stroke with the arrow buttons or to a specified position with the [PTP] button.
5. [Left] button, [Right] button
Rotates the conveyor motor in the left or right direction at high speeds.
6. [Low Left] button, [Low Right] button
Rotates the conveyor motor in the left or right direction at low speeds.
7. [Exit Stopper] button
Raises or lowers the exit stopper that stops a board at the conveyor exit.
8. [Push Up] button
Pressing this button opens a dialog box for entering board thickness. Check or enter the board thickness to clamp the
board by pushing it up from the bottom (underside).
9. [Board Clamp] button
Clamps the board by pushing up its edges from the bottom (underside).
10. [Main Stopper] button
Raises or lowers the main stopper that stops a board in the clamp position on the conveyor.
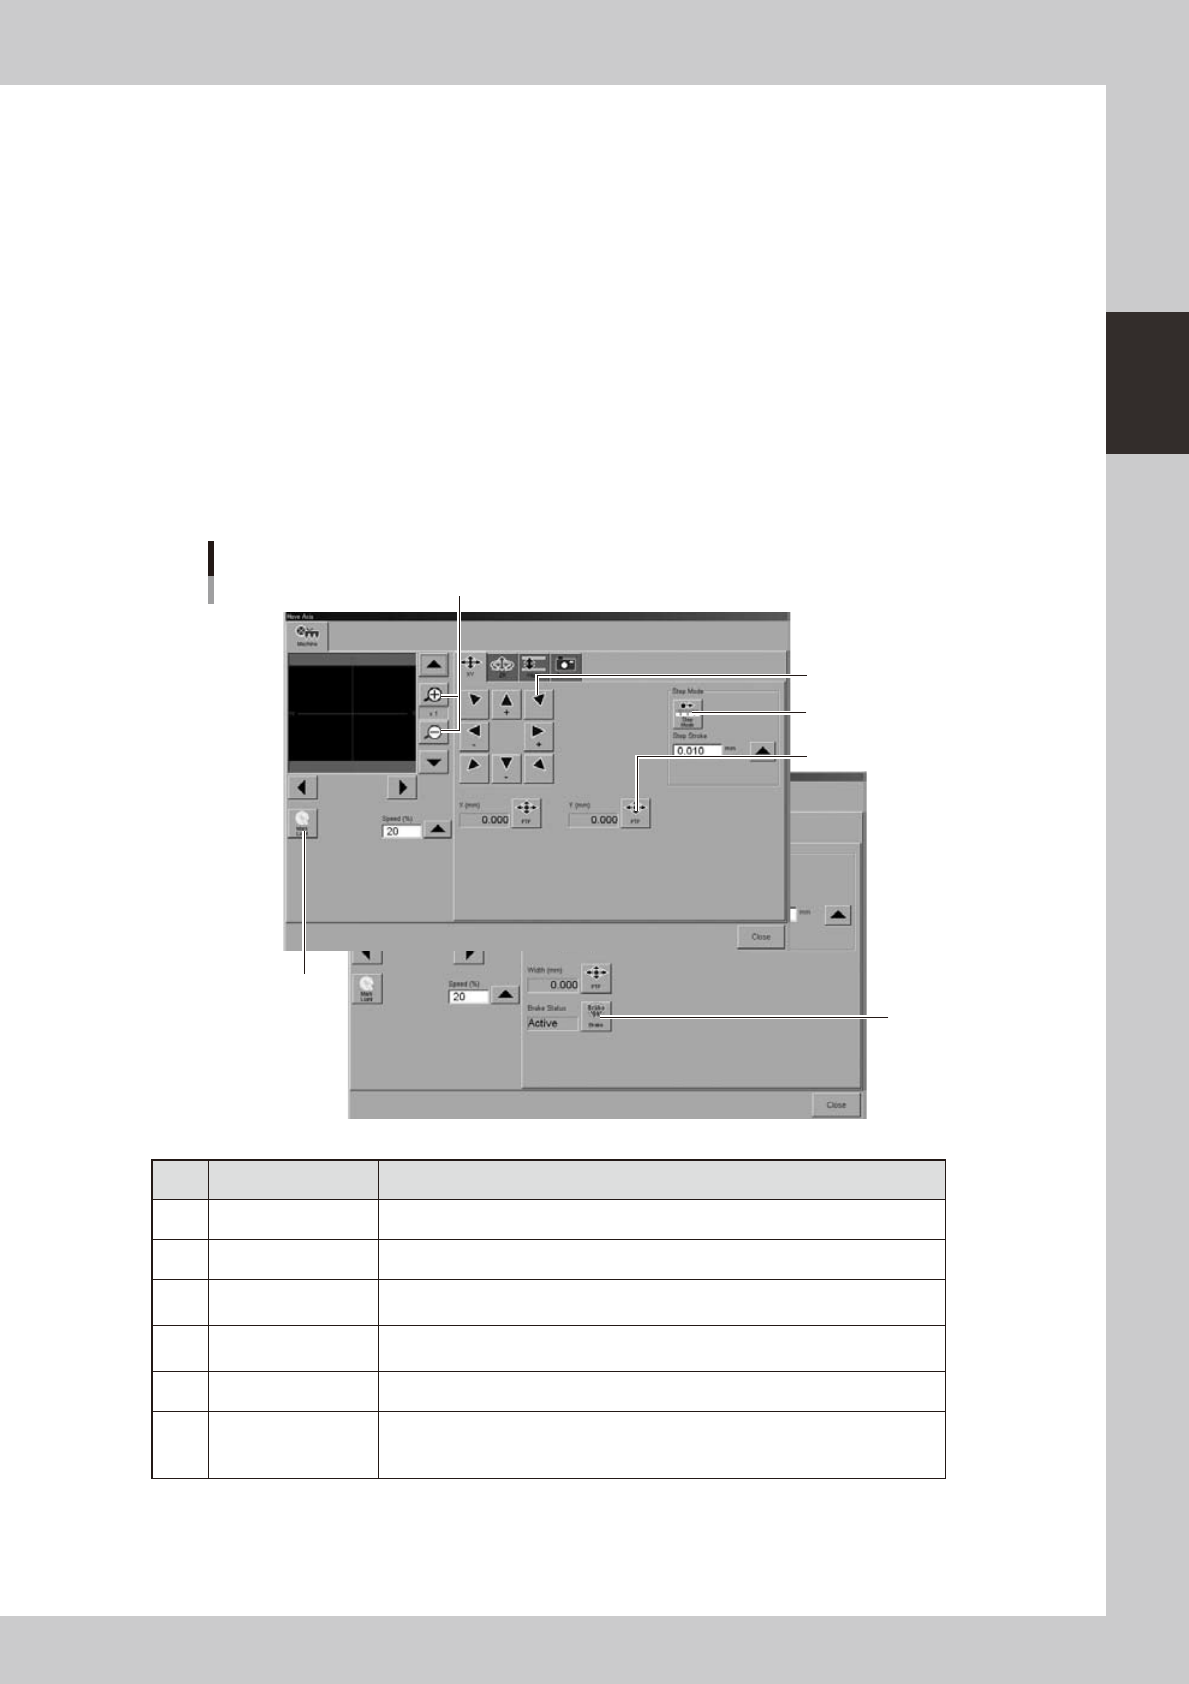
"Move Axis" screen
1
2
3
4
5
6
24206-N8-00
Button name Function
1 Zoom in/out (+, -) Zooms in or out the image. (16 times to 1/16 times)
2 Mark Light Allows changing mark lighting manually. Using this button does not affect data.
3 PTP
Displays the "PTP" dialog box that allows directly specifying the position where
you want to move the selected axis.
4 Step Mode
When this button is pushed in, the selected axis can be moved in "step mode
(inching mode)" with the arrow buttons at a specified step stroke (inching stroke).
5 Arrow Use these buttons to move the selected axis in the desired direction.
6 Brake
Use this button when you want to release the brake during emergency stop.
(W-axis and PU axis only)
The brake is automatically released when the servo is turned on.
2-14
2
asic operation
n
Manual head operation
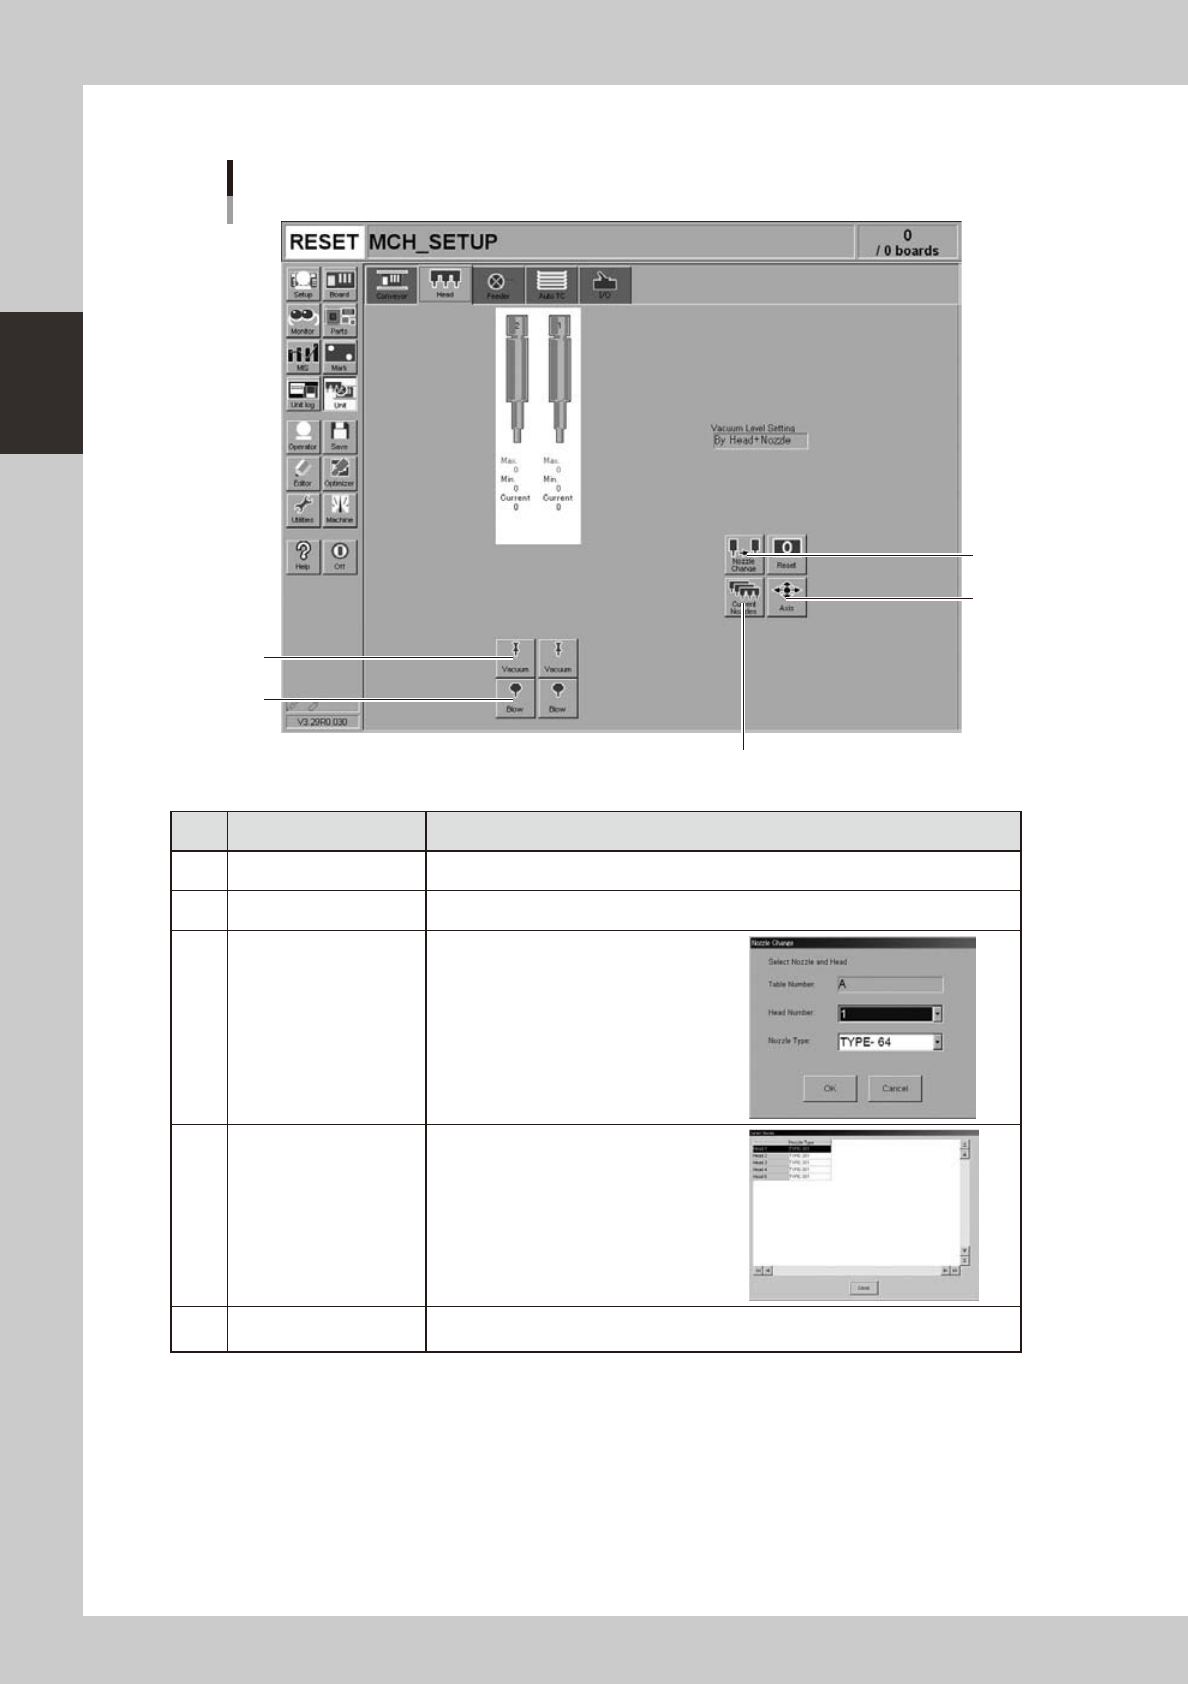
[Unit] – [Head] screen
1
2
3
4
5
24207-N8-00
Button name Function
1 Vacuum Turns the vacuum of each head on or off.
2 Blow Turns the air blow in each head on or off.
3 Nozzle Change
Opens the "Nozzle Change" dialog box.
Specify the head and nozzle type to
perform nozzle change.
4 Current Nozzles
Shows a list of nozzle types currently
attached to each head.
5 Axis
Opens the "Move Axis" screen. This is the same as the [Axis] button on the [Unit]-
[Conveyor] screen.
2-15
2
asic operation
n
Manual feeder operation
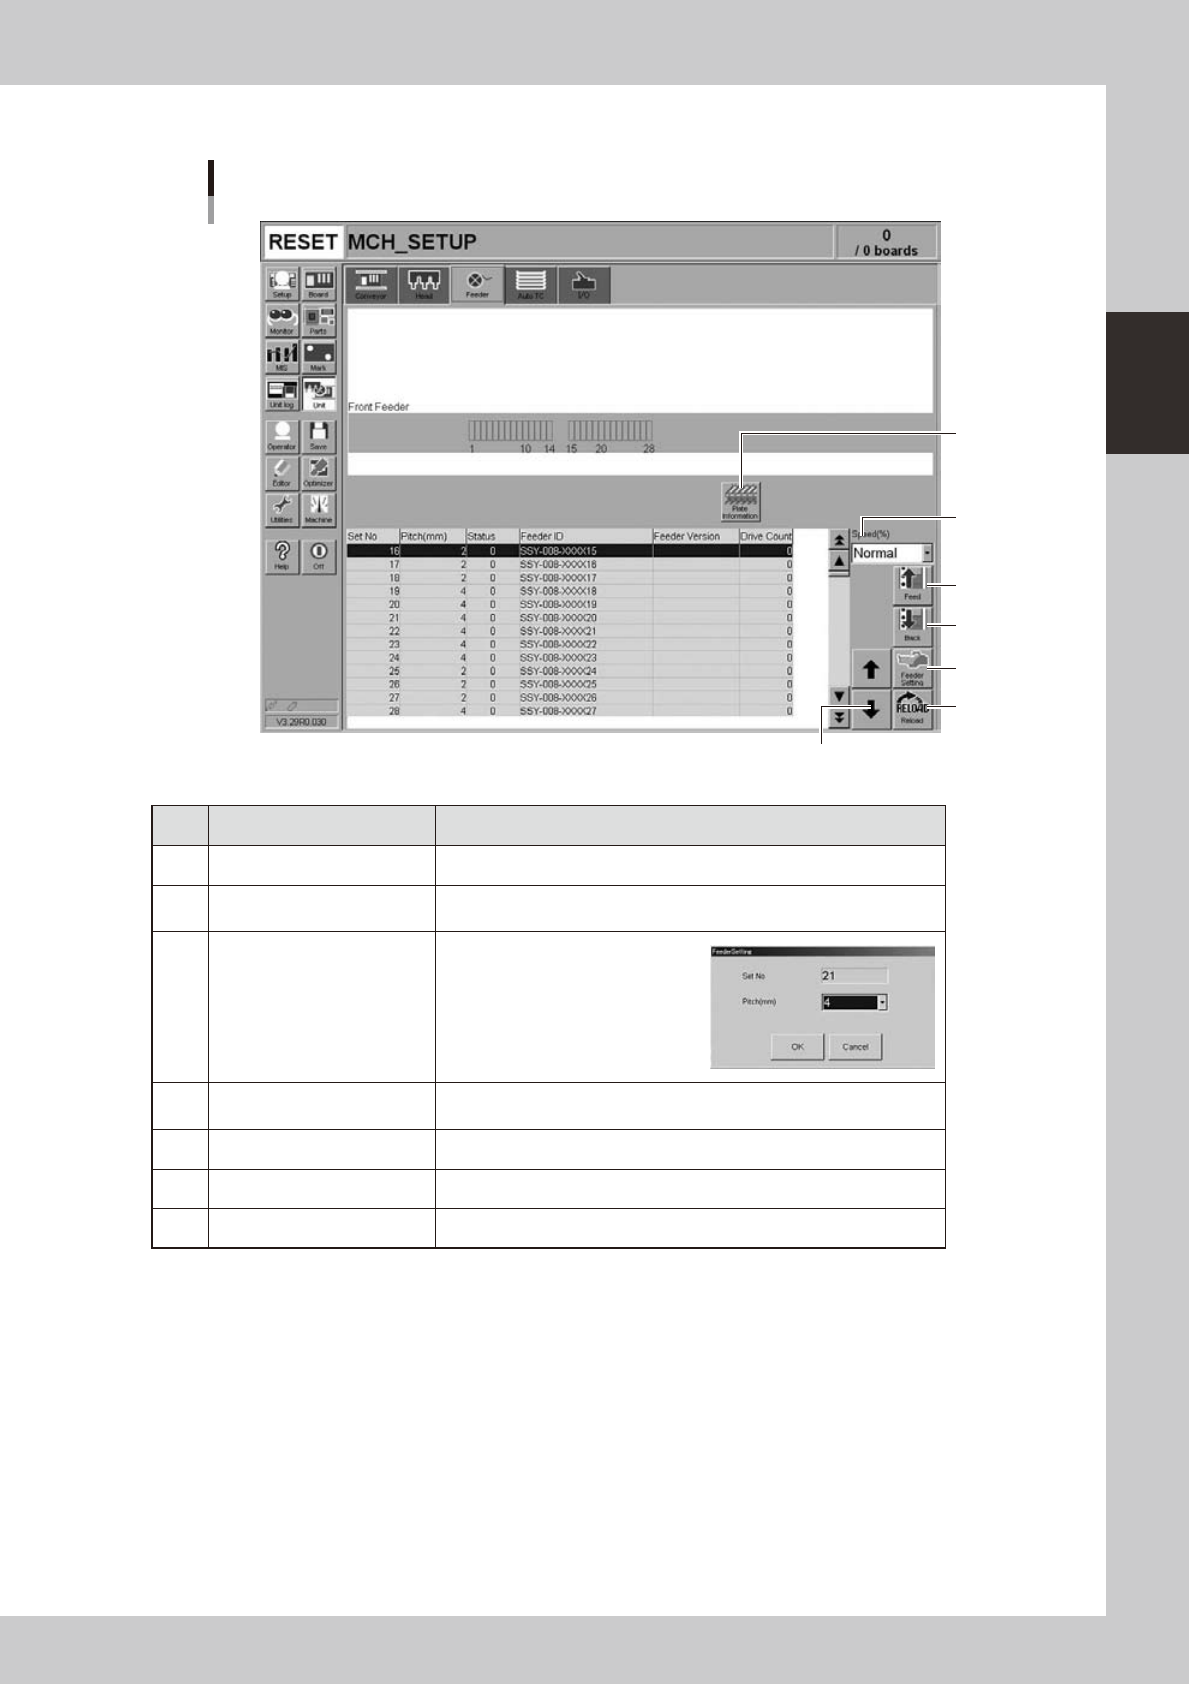
[Unit] – [Feeder] screen
1
4
2
6
5
3
7
24208-N8-00
Button name Function
1 Feed Each time pressing this button advances the tape at the specified pitch.
2 Back
Each time pressing this button moves the tape backward at the specified
pitch.
3 Feeder Setting
Pressing this button opens the
feeder setting dialog box that
allows selecting a feed pitch from
2 to 56mm.
Set the feed pitch and press the
[OK] button. The set feeder pitch
is stored in memory.
4 Speed
Select the feed speed from the drop-down list. The selectable speeds
are "Normal", 90, 80, … 10%.
5 Reload Clears the feeder condition (memory) and reloads the setting.
6 Up/down arrows Moves the selected row up or down.
7 Plate Information Allows you to check the version of the plate board in the feeder plate.