Nordson-EFD-725D-725DA-Tech-Support-Guide.pdf - 第2页
V alve Disassembly 1. T urn the stroke adjustment collar to the maximum position. 2. Install the 1/8 NPT rod in the fluid body mounting hole or fluid inlet. 3. Holding the rod, use an 8" adjustable wrench to remo ve t…
Tools required
1/8" hex wrench
1/4" flat-tip screwdriver
3/8" open-end wrench
8" adjustable wrench (2 required)
1/8 NPT threaded rod
™
725D / 725DA Dispense Valve
Tech Support Guide
Electronic pdf files of Nordson EFD
manuals are also available at
www.nordsonefd.com

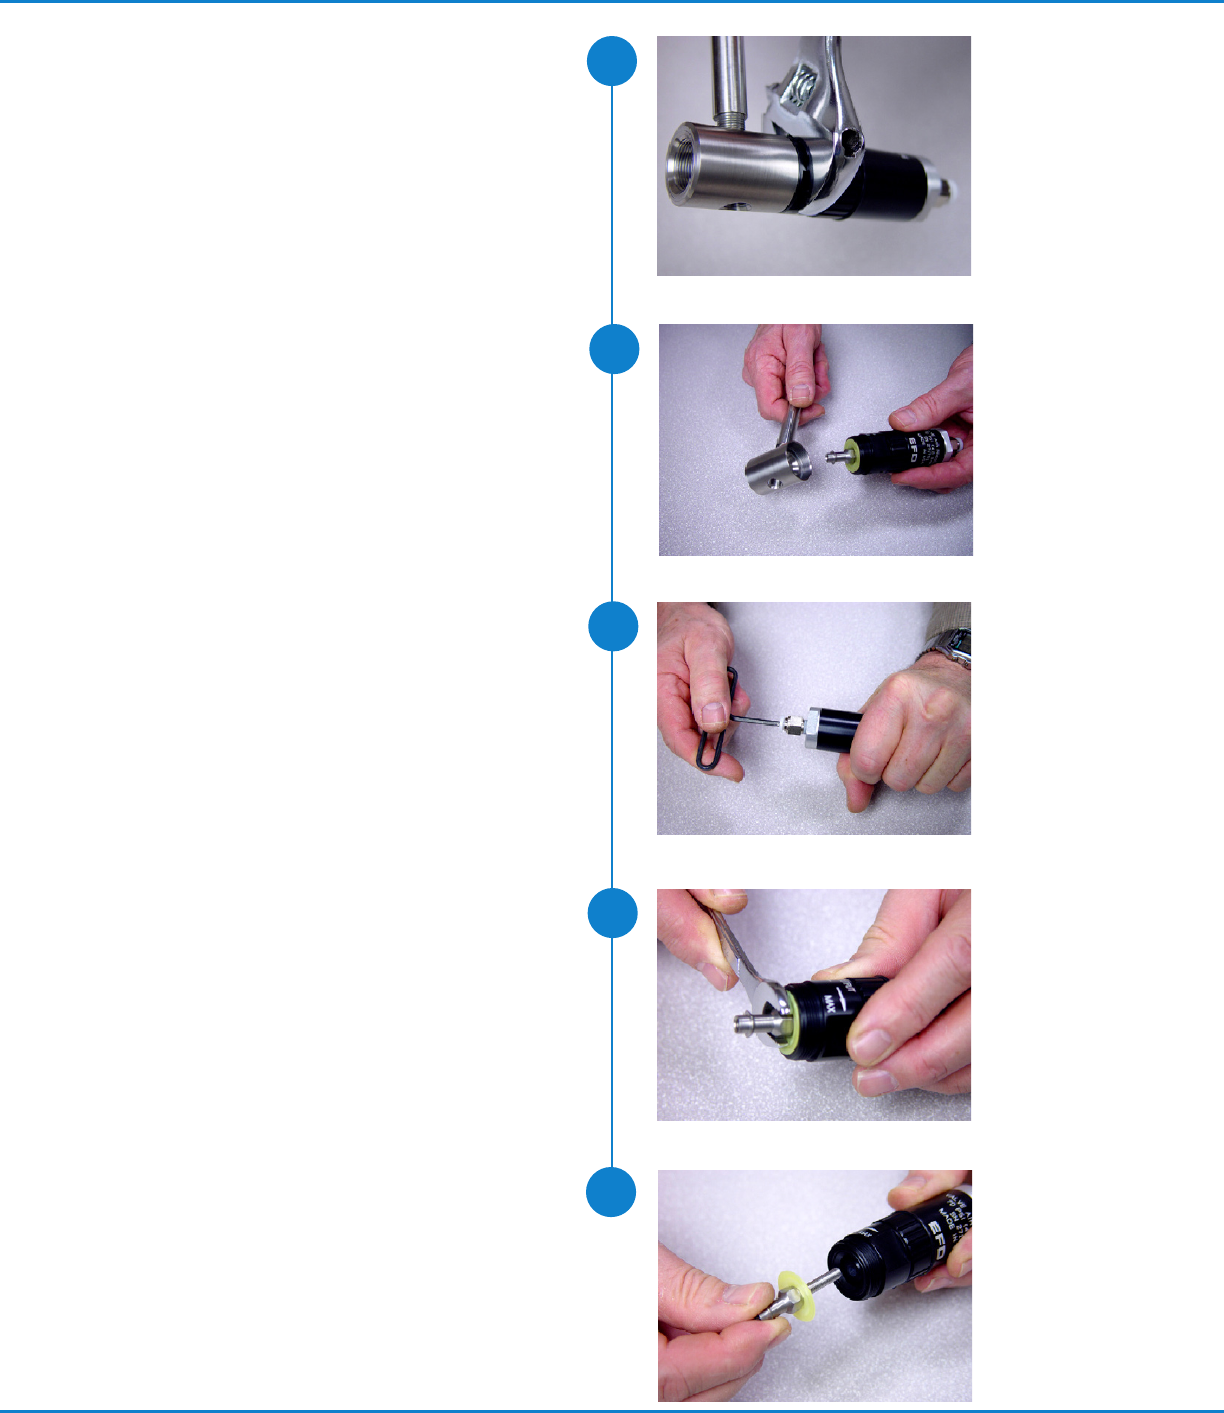
Valve Disassembly
1. Turn the stroke adjustment collar to the
maximum position.
2. Install the 1/8 NPT rod in the fluid body
mounting hole or fluid inlet.
3. Holding the rod, use an 8" adjustable
wrench to remove the fluid body cap.
4. Using the flat tip screwdriver, remove the
sealing head and screw.
1
2
3
4
725D / 725DA Dispense Valve | Tech Support Guide
2 www.nordsonefd.com info@nordsonefd.com +1-401-431-7000 Sales and service of Nordson EFD dispensing systems are available worldwide.
5
6
7
8
5. Holding the rod, use one of the 8"
adjustable wrenches to loosen the fluid
body.
6. Remove the fluid body from the air
cylinder.
NOTE
At this point, the fluid end of the valve
can be thoroughly cleaned without further
disassembly.
For diaphragm replacement or complete
valve rebuild, proceed to Step 7.
7. Insert the 1/8" hex wrench through the
air inlet fitting, loosen the shaft locking
screw, and turn it out two full turns.
8. Using the 3/8" open-end wrench, loosen
the shaft.
9. Remove the shaft and diaphragm.
9
725D / 725DA Dispense Valve | Tech Support Guide
3www.nordsonefd.com info@nordsonefd.com +1-401-431-7000 Sales and service of Nordson EFD dispensing systems are available worldwide.