00191376-07.pdf - 第64页
8 Annual maintenance work HS Preventive Maintenance 01/2006 US E dition 64 8

HS Preventive Maintenance 8 Annual maintenance work
01/2006 US Edition
63
8
You will need the following tools, equipment and consumables for the annual maintenance. 8
– Vacuum cleaner
– Grease gun
– SIPLACE cleaning tissue
– ISOFLEX TOPAS NCA52 grease
– Grease nipples, if required
– Damping cylinder, if required.
8
: Select "Disable interface" on the station computer. The placement machine will continue plac-
ing until the last PCB is finished and has left the PCB conveyor.
: Switch the placement machine off at the main switch.
: Open both protective covers on one side of the machine (gantries 1+4 or 2+3).
8
8
To move the gantry, take hold of the C&P head handle and push gently and carefully. 8
8
: Move the gantry over the feeders. This will stop it outside your working area.
8
Vacuum beneath the lifting table 8
: Lift the lifting table out of the placement machine.
To do this for the HS-60, remove the four screws.
: Carefully vacuum the area beneath the lifting table.
8
Clean and preserve the PCB conveyor 8
a Clean and preserve the recirculating ball screw by running a SIPLACE cleaning tissue along
the thread of the screw.
s Clean and grease the sliding surfaces of the guide rails using a SIPLACE cleaning tissue.
: Clean and preserve the hexagonal shafts using a SIPLACE cleaning tissue.
: Clean and preserve the guide shafts of the PCB stopper using a SIPLACE cleaning tissue.
8
8 Annual maintenance work HS Preventive Maintenance
01/2006 US Edition
64
8
HS Preventive Maintenance 8 Annual maintenance work
01/2006 US Edition
65
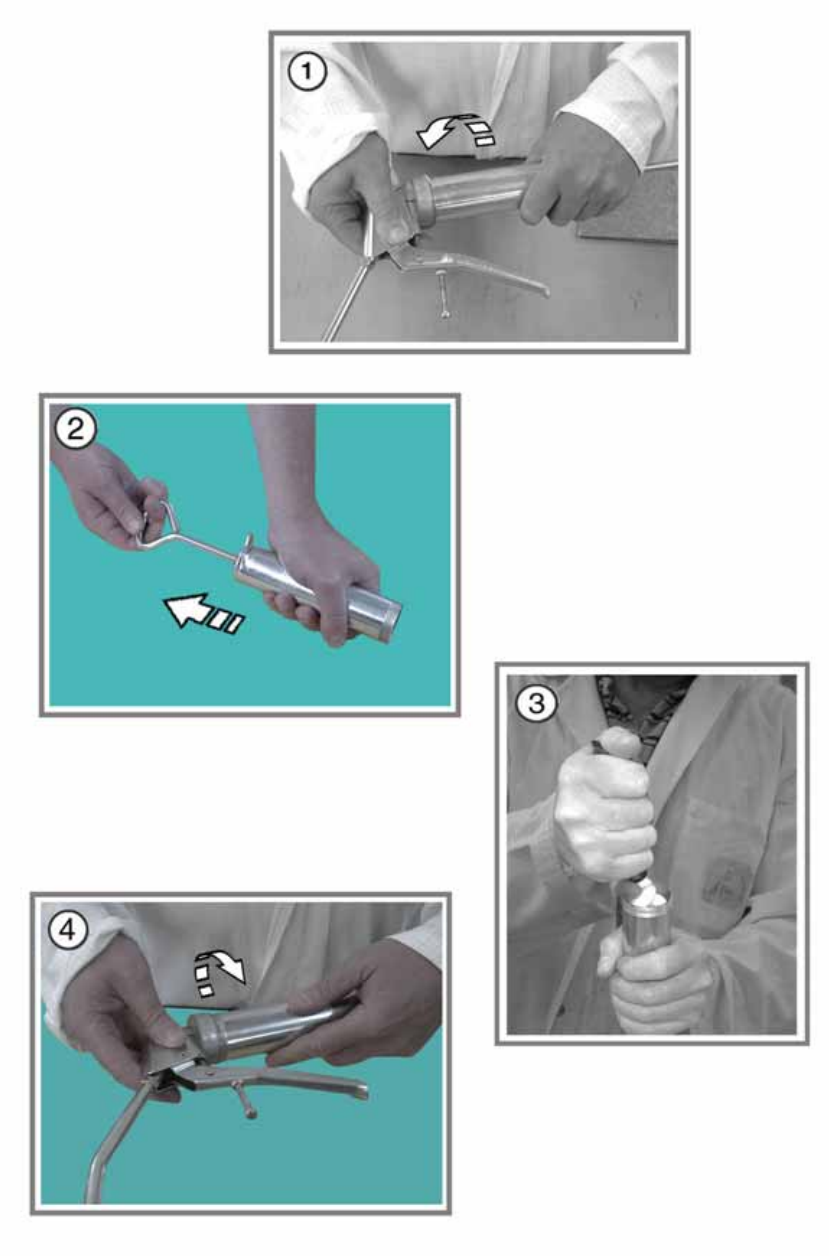
Greasing the Y-axis gantries 8
8
a Turn the grease gun counter-clockwise to open.
8
s Pull back the grease gun plunger.
It must lock into place.
8
d Fill the grease gun with ISOFLEX TOPAS NCA 52 grease.
8
: Turn the grease gun clockwise to close.
8
f Release the lock.
The spring force moves the plunger forward.
8
g Push back the ball on the vent screw to vent the grease gun.
8
: Press the trigger until the grease emerges.
The grease gun is now ready for use.
8
8
8
8
8
8
8
8
8
8
8