00194329-03.pdf - 第190页
Replacement instructions - Gantry c able and hose carrier SIPLACE HS / S / F 01/2007 Edition 190 : Check the position of the cable and hose car rier once more. With the screws tightened , it must be loose enough that it …
Replacement instructions - Gantry cable and hose carrier SIPLACE HS / S / F
01/2007 Edition
189
Fine adjustment 2
: Move the fitted cable and hose carrier, together with the air hoses, into its final position and fix
it in place with a screw.
Be careful not to push the power chain up too far, otherwise individual links will jump out or may
even break.
2
2
: Move the gantry until the two end links of the power chain are in line.
2
2
2
Replacement instructions - Gantry cable and hose carrier SIPLACE HS / S / F
01/2007 Edition
190
: Check the position of the cable and hose carrier once more. With the screws tightened, it must
be loose enough that it can be easily moved against the power chain in the cable arc.
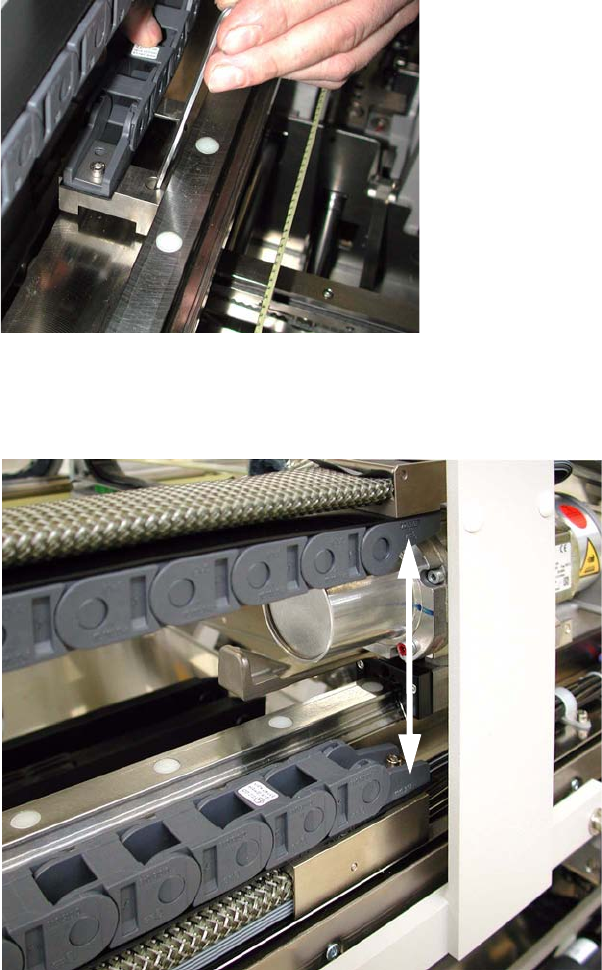
: Move the gantry away from the cable arc as far as it will go.
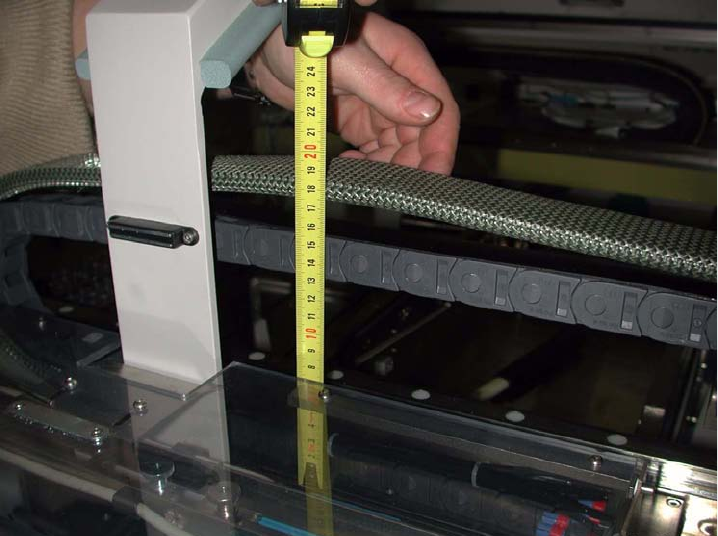
Now carefully lift the cable and hose carrier away from the power chain. At its highest position,
the carrier must be no further than 185 mm away, measured from the hood guide plate.
2
2
: At the same time, the flexible tubing should be pulled so tight that it can be moved 3-5 mm in
each direction.
If the flexible tubing is pulled too tight, it will damage the ribbon cable and shear off.
If the flexible tubing is too loose, it will shear off at the hoods or linear guide.
: If the cable and hose carrier is too loose or too tight, loosen the strain relief screw once more
and move the flat ribbon cable set in the strain relief. The pin can then be left in the strain relief.
Screw the strain relief tight once more.
2
2
2
2
2
2
Replacement instructions - Gantry cable and hose carrier SIPLACE HS / S / F
01/2007 Edition
191
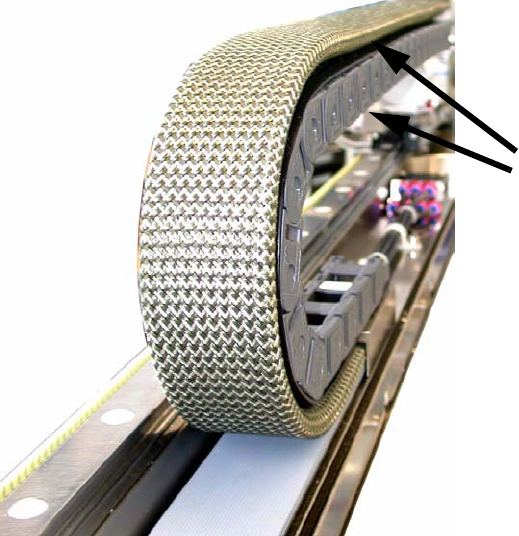
: Align the cable guiding chain and the cable and hose carrier so that they are parallel.
The chain should run parallel on the outside and flush with the carrier.
2
2
: Once you have made sure that the cable and hose carrier is installed in the correct position,
unscrew the power chain from the strain relief once more.
: Now fix the strain relief definitively with the two screws.
Screw the power chain to the strain relief once more. Tighten the cover strip so that it lies
against the chain, but does not actually restrict its movement.
: Check that the cable and hose carrier is parallel once more.
2
2
2
2
2
2
2
2
2
Chain flush and parallel
with the carrier