Oxford-100-ICP-2-Step-DRIE-SOP-in-PDF-Format.pdf - 第8页
Oxford ICP 2 - step DRIE SOP Page 8 of 10 Revisi on 2- 12 0 321 8. Shutdo wn Proce dures 8.1 Vent Load Lock 8.1.1 Click OK whe n the sof tw are says “Proces s comp let ed”. 8.1.2 Look inside load lock window to make sure…

Oxford ICP 2-step DRIE SOP Page 7 of 10
Revision 2-120321
Table 1, Deep Etch Recipe
Step
C
4
F
8
SF
6
Set
Pressure
ICP Power
RF Power
Temp.
(C)
Time
Flow
C
4
F
8
80sccm
0
0mT
0
0
15
5s
Strike
Plasma
80sccm
0
0mT
500W
30W
15
7s
Etch
0
80sccm
0mT
500W
25W
15
12s
Deposit
80sccm
0
0mT
500W
10W
15
5s
Repeat
Etch &
Deposit
Steps
7.1.8.1 In all steps the He backing is 10.0.
7.2 Start Etch Process
7.2.1 Make sure the chuck is at the correct temperature. If it is too warm the Bosch process won’t
work correctly.
7.2.2 Click the ‘Run’ button. See Figure 6.
NOTE: The pumpdown and subsequent wafer transfer will begin automatically and the etch process
will start when the wafer is loaded. The wafer will automatically transfer to the load lock
when the process is complete.
7.2.3 Listen closely to the machine during the first steps.
7.2.3.1 If the machine makes a repetitive clicking sound, or the ICP power is greater than 10 or
fluctuating wildly, you need to stop and restart the process.
7.2.3.1.1 Press Stop.
7.2.3.1.2 Return the wafer to load lock-YES
7.2.3.1.3 Click the Run button after you see that the wafer is inside the load lock to restart
the process.
7.2.4 Monitor the parameters during the first few steps of the process.
7.2.4.1 Go to the Process Control page.
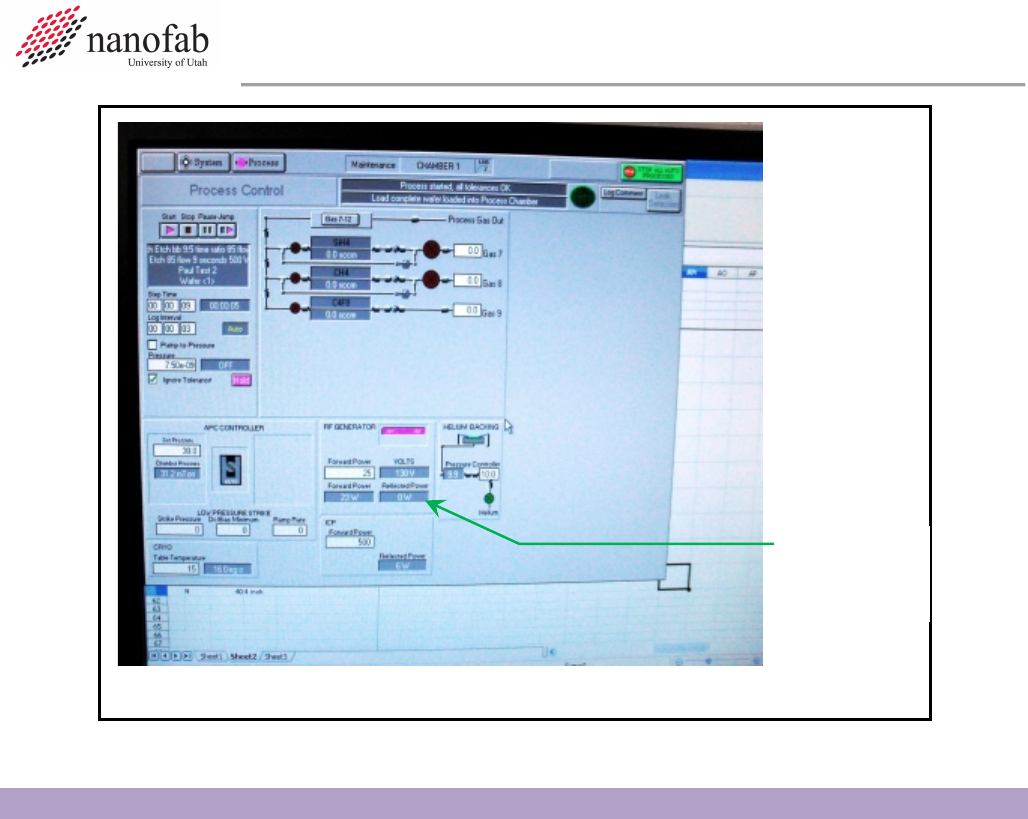
7.2.4.2 Monitor the Reflected Power. It should be less than 10. See Figure 7, Process Control
Page.
7.2.4.3 Make sure the temperature cooling is working and stable +/- 1 degree C.
Oxford ICP 2-step DRIE SOP Page 8 of 10
Revision 2-120321
8. Shutdown Procedures
8.1 Vent Load Lock
8.1.1 Click OK when the software says “Process completed”.
8.1.2 Look inside load lock window to make sure wafer has transferred successfully from main
chamber to load lock.
8.1.3 Vent load lock.
8.1.3.1 Press stop button corresponding to the load lock mechanical pump. See Figure 4.
8.1.3.2 Click ok when it says “Wafer has finished processing”.
8.1.3.3 Press vent button. See Figure 4.
8.1.3.4 Wait ~1 min. for the load lock to vent.
8.1.4 Pull up to open load lock lid. Do not force it open, once it is vented it should open easily.
8.1.5 Press stop button to stop venting.
8.1.6 Remove wafer.
8.2 Shutdown System
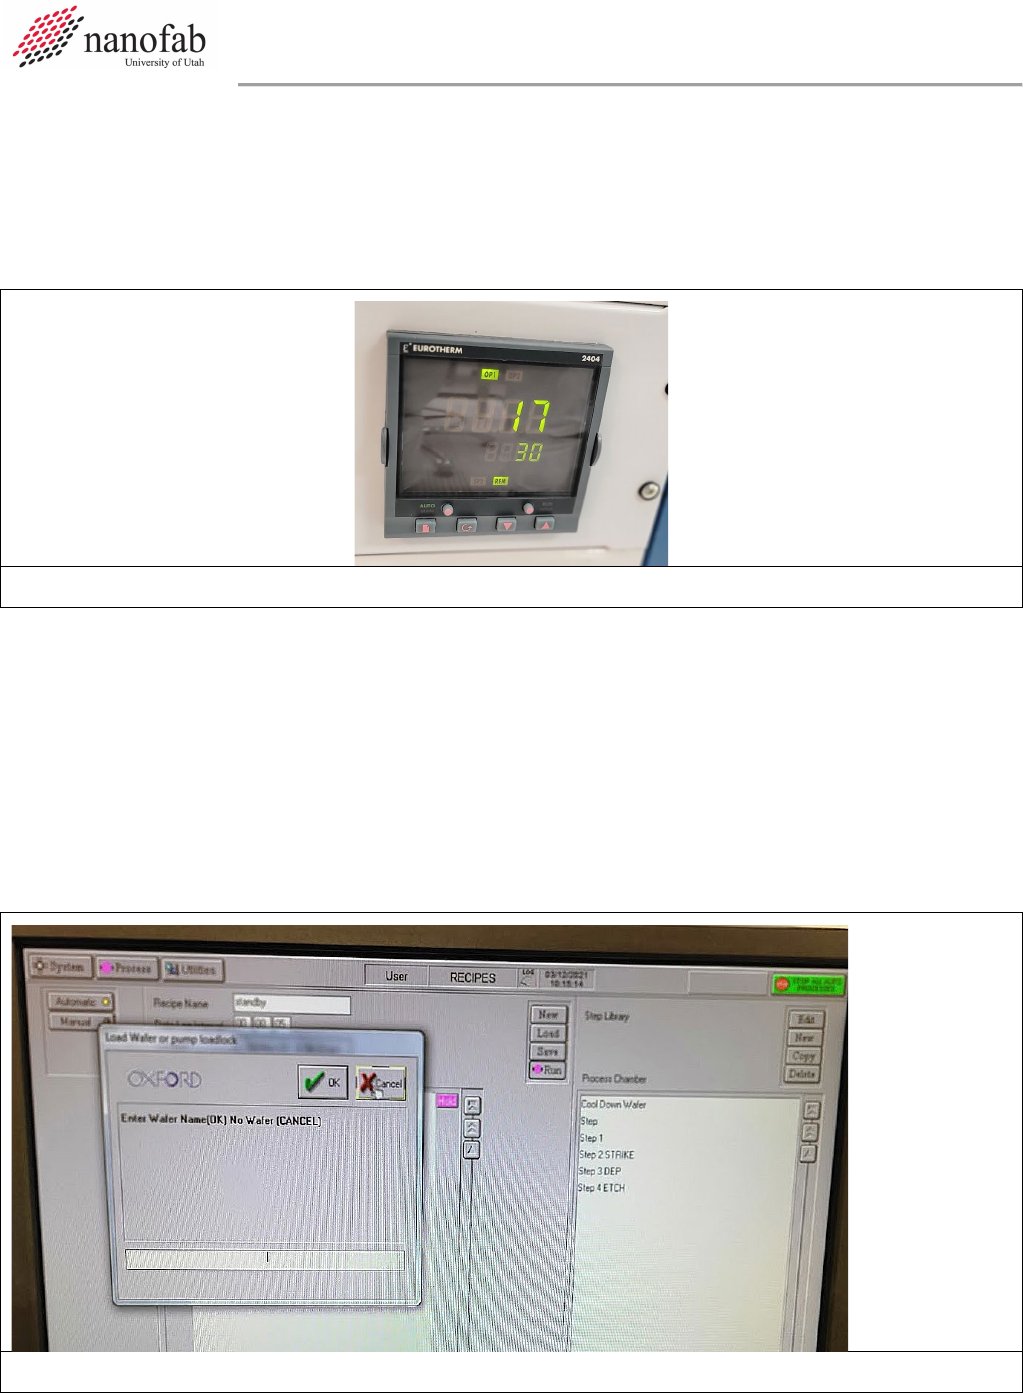
8.2.1 Set the chuck temperature to 30C. This is important! Otherwise the N2 dewar will run out
overnight and you will be billed for a new tank.
Reflected
Power
Figure 4, Process Control Page
Oxford ICP 2-step DRIE SOP Page 9 of 10
Revision 2-120321
8.2.1.1 Click on Process icon. See Figure 1, Pump Control Page.
8.2.1.2 Click on “Chamber 1” on the drop-down menu
8.2.1.3 Set the table temperature to 30 (lower left corner of screen) See Figure 1.
8.2.1.4 Press the pink start button, then immediately click stop (right next to it). See Figure 1.
8.2.1.5 Double check to make sure the bottom temperature setpoint on the controller reads 30.
Figure 8. Temperature controller set to 30C
8.2.2 Run the Standby recipe to pump down the empty load lock.
8.2.2.1 Close load lock lid.
8.2.2.2 Load the “Standby” recipe
8.2.2.3 Run the Standby recipe
8.2.2.4 Important: Press ‘cancel’ when software asks for wafer name. Do not click ok or enter a
name or the system will get confused and think there is a wafer inside.
8.2.2.5 Enter run data, measurements, and disable tool in Coral.
Figure 9. Run standby recipe to shutdown system