YSM20R_YSM20WR_Mainte_E.pdf - 第170页
6-14 6 How to replace consumable parts n Differences in conveyor belt replacement depending on the machine stage type Regarding W2 and W3 convey or belts for YSM20R Dual-stage type, belt replacement procedure is differen…
6-13
6
How to replace consumable parts
Replacing the conveyor belt
YSM20WR Dual-lane type
Loosen the pulley.
Loosen the pulley.
Mark pulley position
with permanent marker.
Hex wrench (5) Hex wrench (4)
Hex wrench (4)
: Place where the shaft is separated from the pulley.
: Shaft pull-out direction
53635-KMK-00
6-14
6
How to replace consumable parts
n
Differences in conveyor belt replacement depending on the machine stage type
Regarding W2 and W3 conveyor belts for YSM20R Dual-stage type, belt replacement procedure is different from other
conveyor belts. Go on to Step 10 for replacement procedures other than W2/W3 conveyor belts for YSM20R Dual-stage type.
n
Replacing the conveyor belt (YSM20R Dual-stage W2/W3)
5
Read desired board data.
1. Read desired board data.
2. If the value on "B. Board Size Y (mm) on
"Board" screen is 380 mm or more, enter
the value less than 380 mm.
6
Move the conveyor U-axis.
1. Close the machine safety cover and
cancel the emergency stop. Set the
carriage if the machine is the carriage
type.
2. Press the [Mount Position] button on the
[Setup] screen to move the conveyor to
the component mounting position.
e
3. Press the emergency stop button and
then open the machine safety cover.
4. Detach the carriage if the machine is the
carriage type.
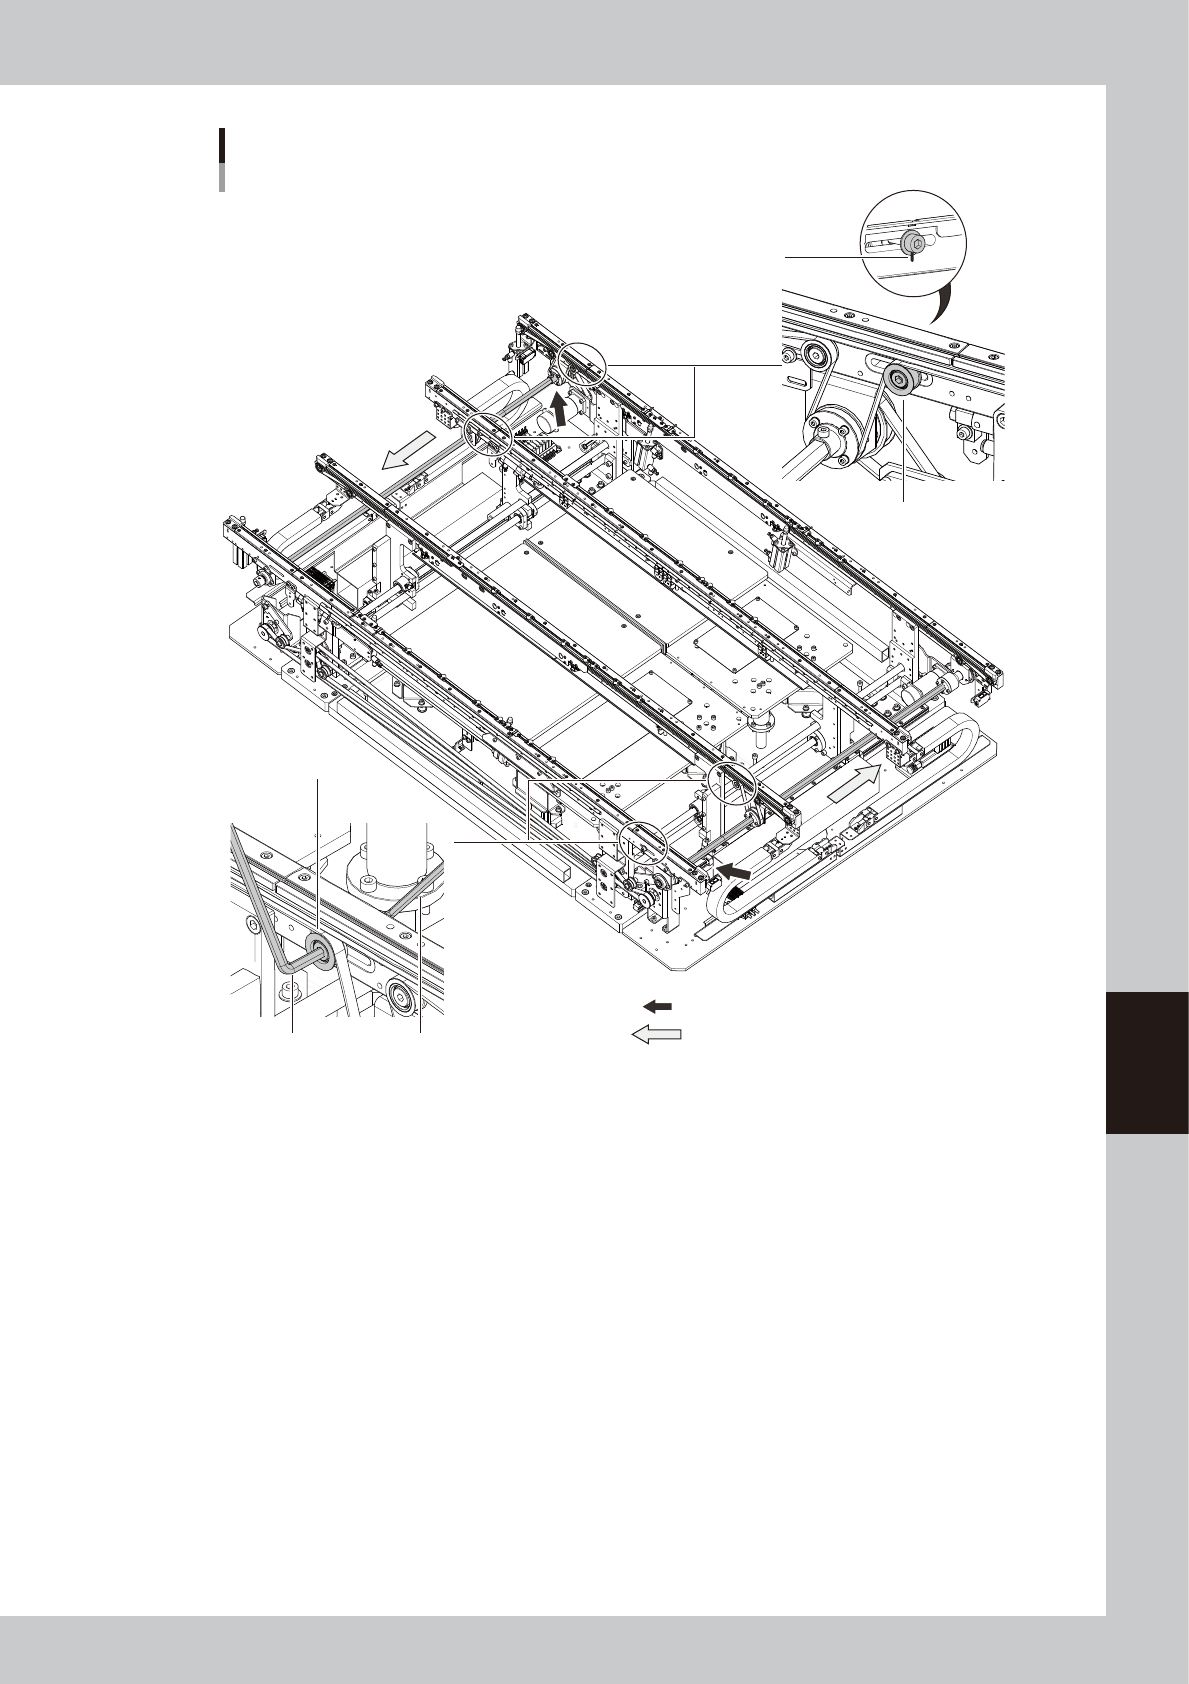
5. Moving the U-axis belt manually moves
the entire conveyor. For the W2-axis, fully
move the conveyor to the rear side by
moving the U-axis belt in the direction
indicated by an arrow shown in the
figure on the right. For the W3-axis, fully
move the conveyor to the front in the
same manner.
TIP
The stage 2 (W2-axis) and stage 3 (W3-axis) move back
and forth by pressing [Mount Position] button when
"Board Size Y" is less than 380 mm.
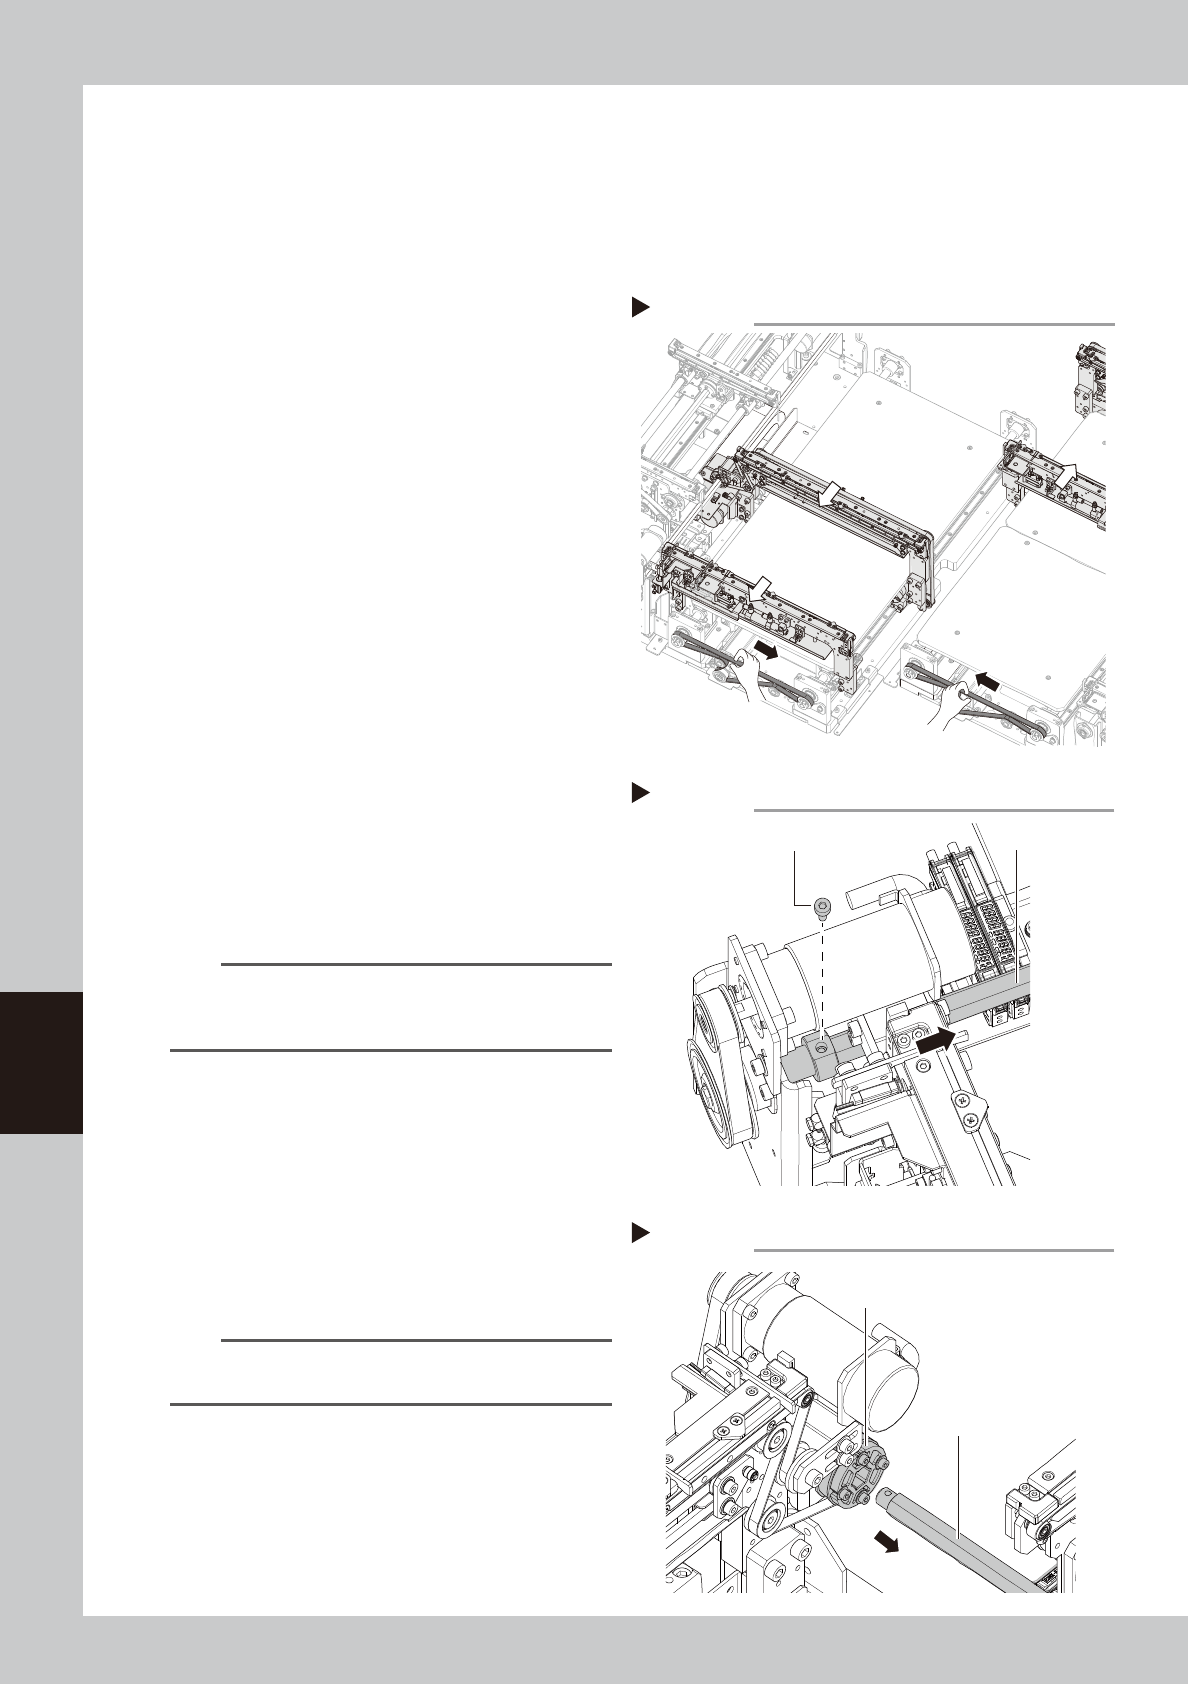
7
Separate the shaft.
Remove the bolt from the shaft (for the
pulley position, see the figure shown in Step
4) with a hex wrench (3).
8
Pull out the shaft from the belt
drive pulley.
Pull the shaft toward the front for the W2-axis
or the rear for the W3-axis to pull it out from
the drive pulley completely.
n
NOTE
When pulling out shaft, drive pulley comes off easily.
Therefore, pull out the shaft holding pulley with hand.
W2-axis
W3-axis
Moving conveyor U-axis
Step 6
53620-KMK-00
Detaching shaft
Step 7
Shaft
Bolt
53621-KMK-00
Drive pulley
Shaft
Pull out shaft from belt drive pulley
Step 8
53622-KMK-00
6-15
6
How to replace consumable parts
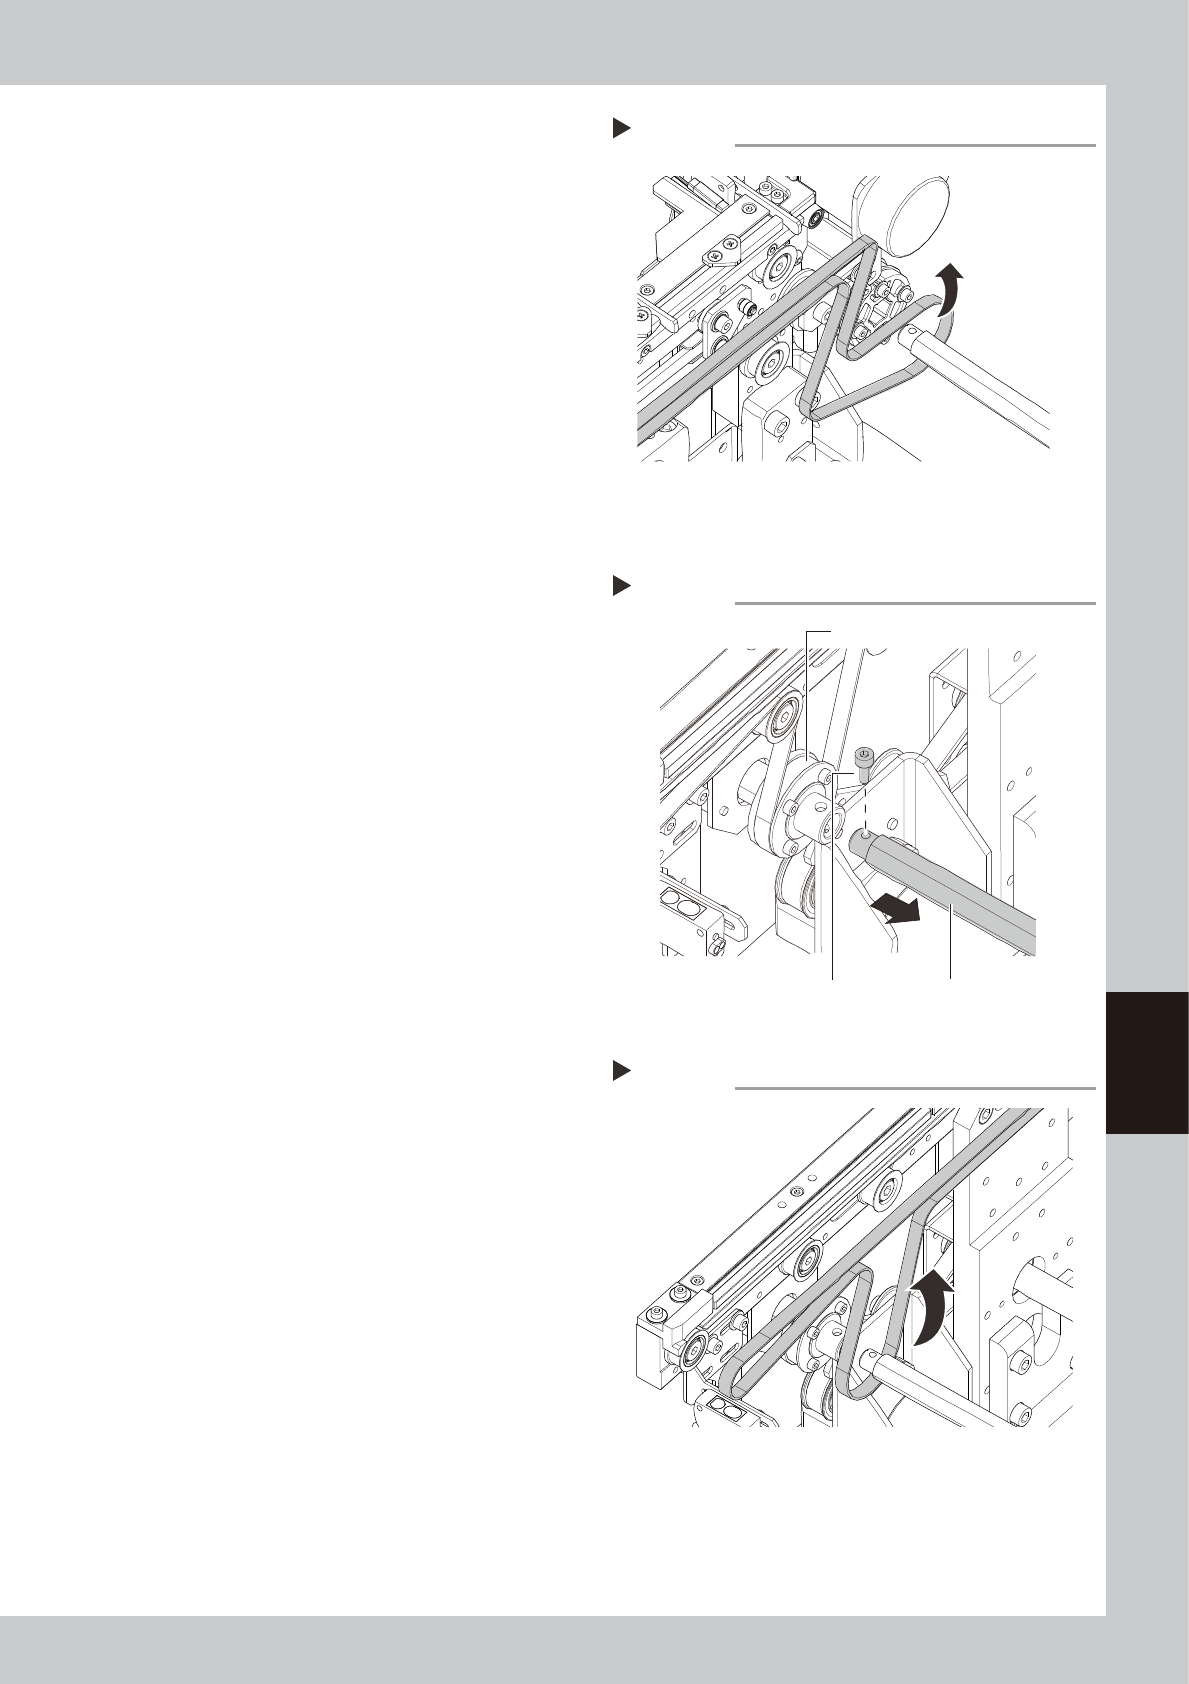
9
Detach the belt from the conveyor.
Detach the conveyor belt through the
clearance between the shaft and drive
pulley.
Go on to Step 12.
n
Replacing the conveyor belt (Other than YSM20R dual-stage W2/W3)
0
Separate the shaft from the drive
pulley.
Remove the bolt from the belt drive pulley
(for the pulley position, see the figure shown
in Step 4) with a hex wrench (3), and then
pull out the shaft to make a clearance.
q
Detach the belt from the conveyor.
Detach the conveyor belt through the
clearance between the shaft and drive
pulley.
Detaching conveyor belt
Step 9
53623-KMK-00
Removing shaft
Step 10
ShaftBolt
Drive pulley
53624-KMK-00
Detaching conveyor belt
Step 11
53625-KMK-00