HS50_advance_level 1_20200522_221201 (1).pdf - 第501页
06/2002 E dition S tudent Guide HS-50 Advance d I 12 Preve ntive Maintenance 68

Student Guide HS-50 Advanced I 06/2002 Edition
12 Preventive Maintenance
67
Greasing the Y axis gantries
a Turn the grease gun anti-clockwise to open.
s Pull back the piston in the grease gun.
The locking element must latch into place.
d Fill the grease gun with ISOFLEX TOPAS NCA 52 grease.
: Turn the grease gun clockwise to close.
f Release the locking element.
Spring energy moves the piston forward.
g Pull back the ball on the vent plug to vent the grease gun.
: Keep squeezing the trigger until grease starts to emerge.
The grease gun is now ready for use.
06/2002 Edition Student Guide HS-50 Advanced I
12 Preventive Maintenance
68

Student Guide HS-50 Advanced I 06/2002 Edition
12 Preventive Maintenance
69
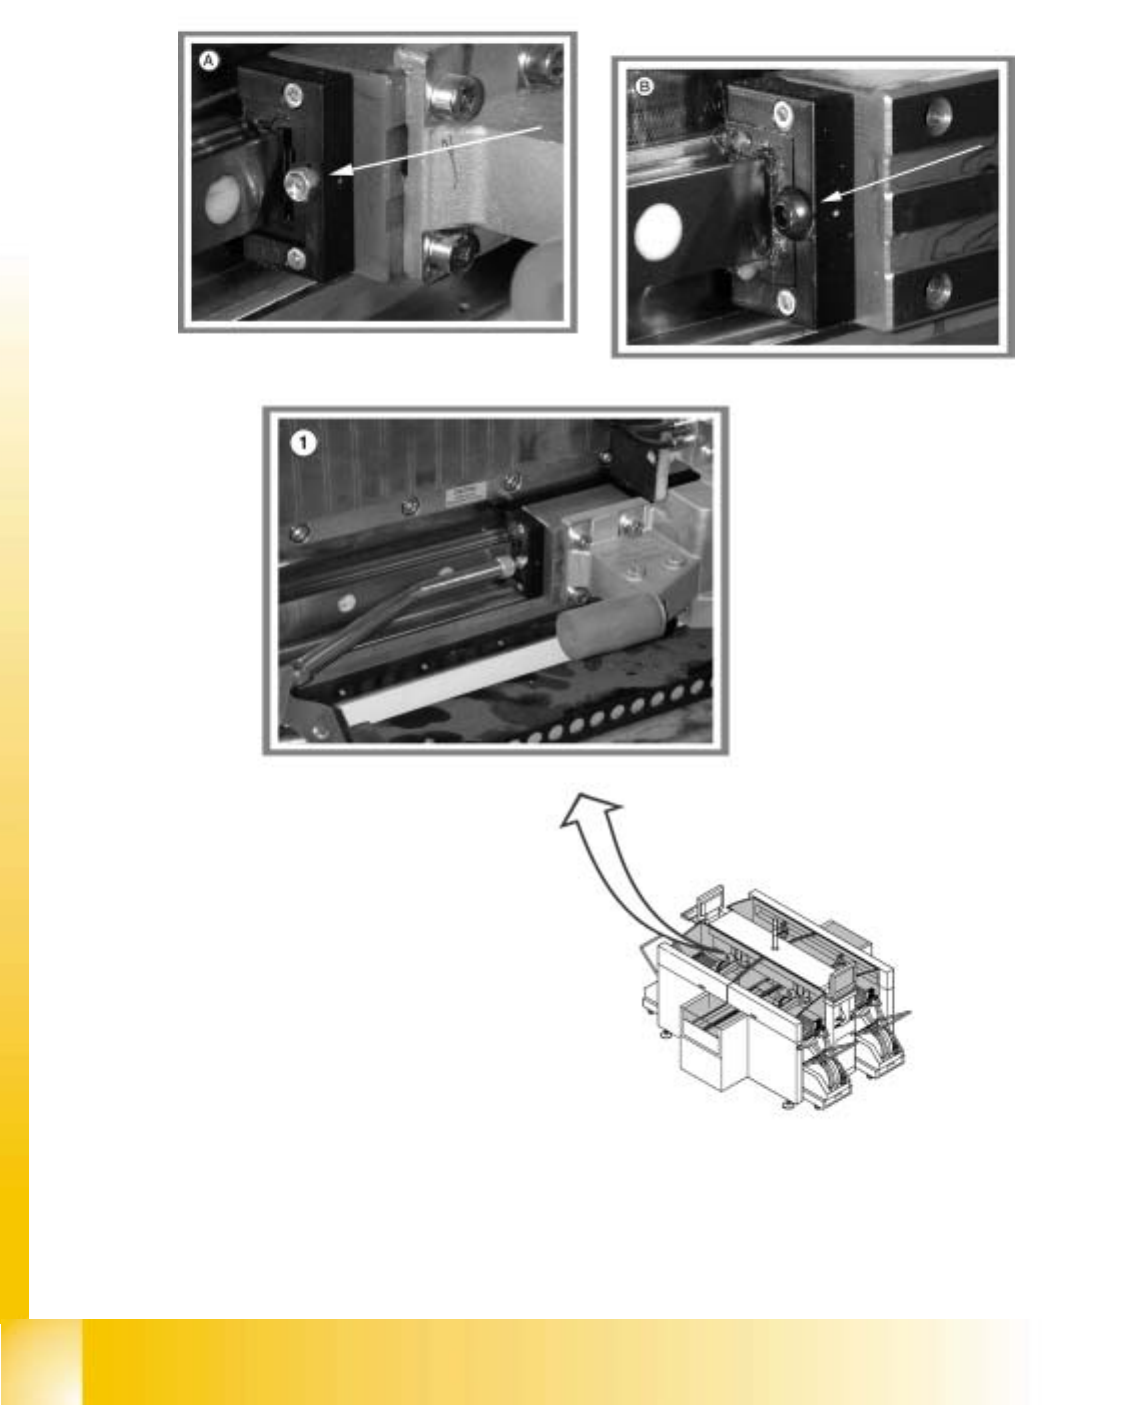
: The Y axis gantry must have a grease nipple to be able to grease it using the grease gun.
If this is not the case, remove the screw (figure B) and insert a grease nipple (part no.:
00366104-01, 8-pack).
a Place the grease gun (part no.: 00366174-01), filled with ISOFLEX TOPAS NCA 52, straight
onto the grease nipple.
: Give one squeeze of the grease gun.
12
If the grease comes out beside the grease nipple, the bearing can be full or the grease nipple
doesn’t shut tightly. In this case use a new grease nipple.
: Grease the other gantry carriage in the same way.
12
Remember to grease both visible grease nipples on each gantry (this will mean greasing eight
grease nipples in total on the HS machine).
: Move the gantry around 30 cm to distribute the grease.
: Apply grease and distribute three more times. This ensures that the correct amount of grease
is applied.
: Use a cloth to remove any excess grease on and around the grease nipple.
: Repeat the greasing process on all four gantries.