YSi-X_Ope_E.pdf - 第69页
4-8 4 Maintenance 3.3 Required tools Prepare the following tools and items necessary for maintenance. n T ool list : Supplied with machine, : Options Name Description Remarks Phillips screwdriver Large, small D-2 Slotted…
4-7
4
Maintenance
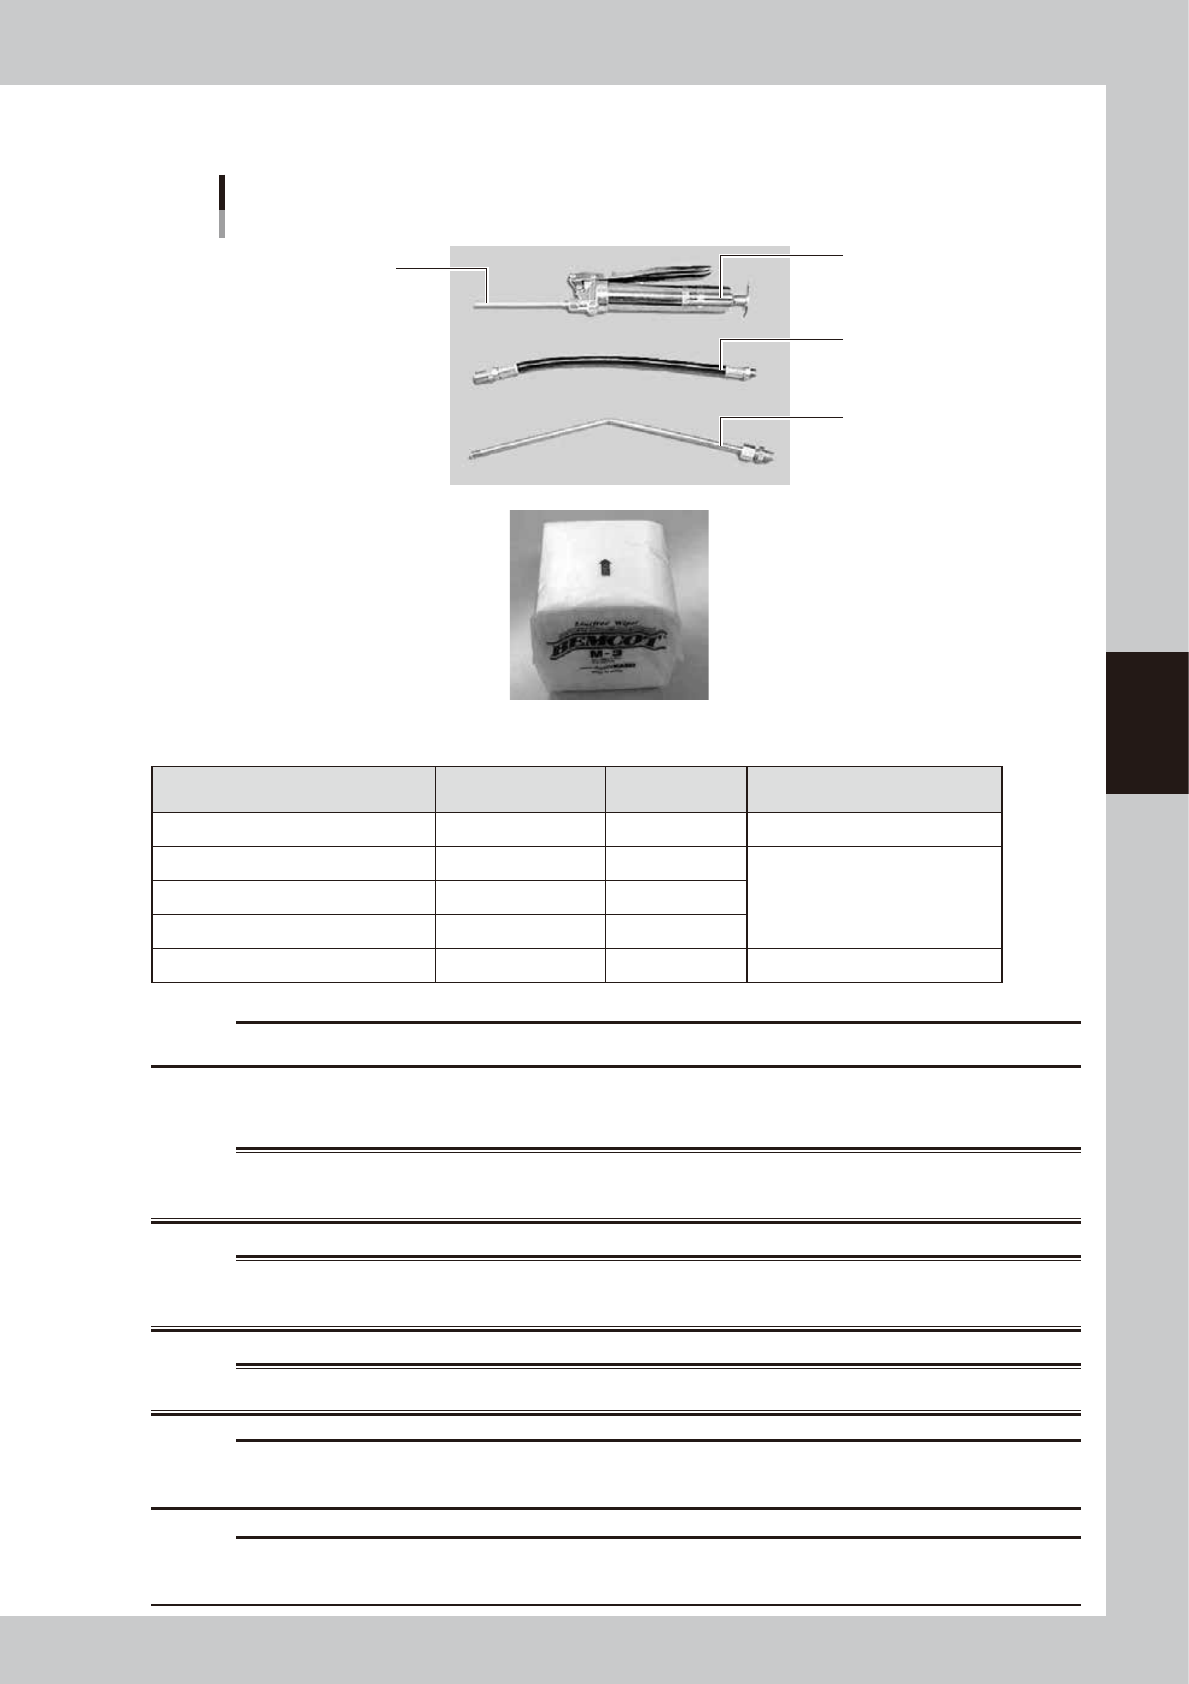
3.2.2 Lubricating tools and grease
Lubricating and greasing tools
Lubricating tools
Grease gun
Standard nozzle
Grease gun nozzle
(flexible type)
Grease gun nozzle
(30 deg. bent type)
Cleaning wiper
GREASE GUN SET
53402-M6-00
n
Lubricating and greasing tools
Product Name
Parts List
Designation
Parts No. Note
Lithium-based grease GREASE PACK K48-M3856-00X NSL 80g
Grease gun (with standard nozzle) GREASE GUN K48-M3852-01X
GREASE GUN SET
KHW-M3852-YYY
Nozzle (flexible type) GREASE NOZZLE K48-M3857-00X
Grease gun nozzle (30 deg. bent type) GREASE NOZZLE K48-M3854-00X
Cleaning wiper WIPER KGS-M3840-YYY
c
CAUTION
Part numbers are subject to change without notice. Please contact our sales representative before ordering.
n
Precautions when handling grease
w
WARNING
INFLAMMATION MAY OCCUR IF GREASE OR LUBRICANT GETS INTO THE EYES. BEFORE HANDLING THE GREASE OR
LUBRICANT, WEAR SAFETY GOGGLES TO ENSURE THE GREASE OR LUBRICANT DOES NOT GET INTO THE EYES.
w
WARNING
INFLAMMATION MAY OCCUR IF GREASE OR LUBRICANT COMES INTO CONTACT WITH SKIN. BE SURE TO WEAR PROTECTIVE
GLOVES TO PREVENT CONTACT WITH SKIN.
w
WARNING
DO NOT TAKE ORALLY OR EAT GREASE OR LUBRICANT. EATING WILL CAUSE DIARRHEA AND VOMITING.
c
CAUTION
After use, tightly cap the grease tube to ensure dust, debris and moisture do not enter inside. Store the grease in a
dark location not exposed to direct sunlight and keep it away from fire and heating sources.
c
CAUTION
Be sure to use the specified grease and apply it to the specified location by following the instructions in this manual.
Failure to follow the instructions may cause damage to the machine.
4-8
4
Maintenance
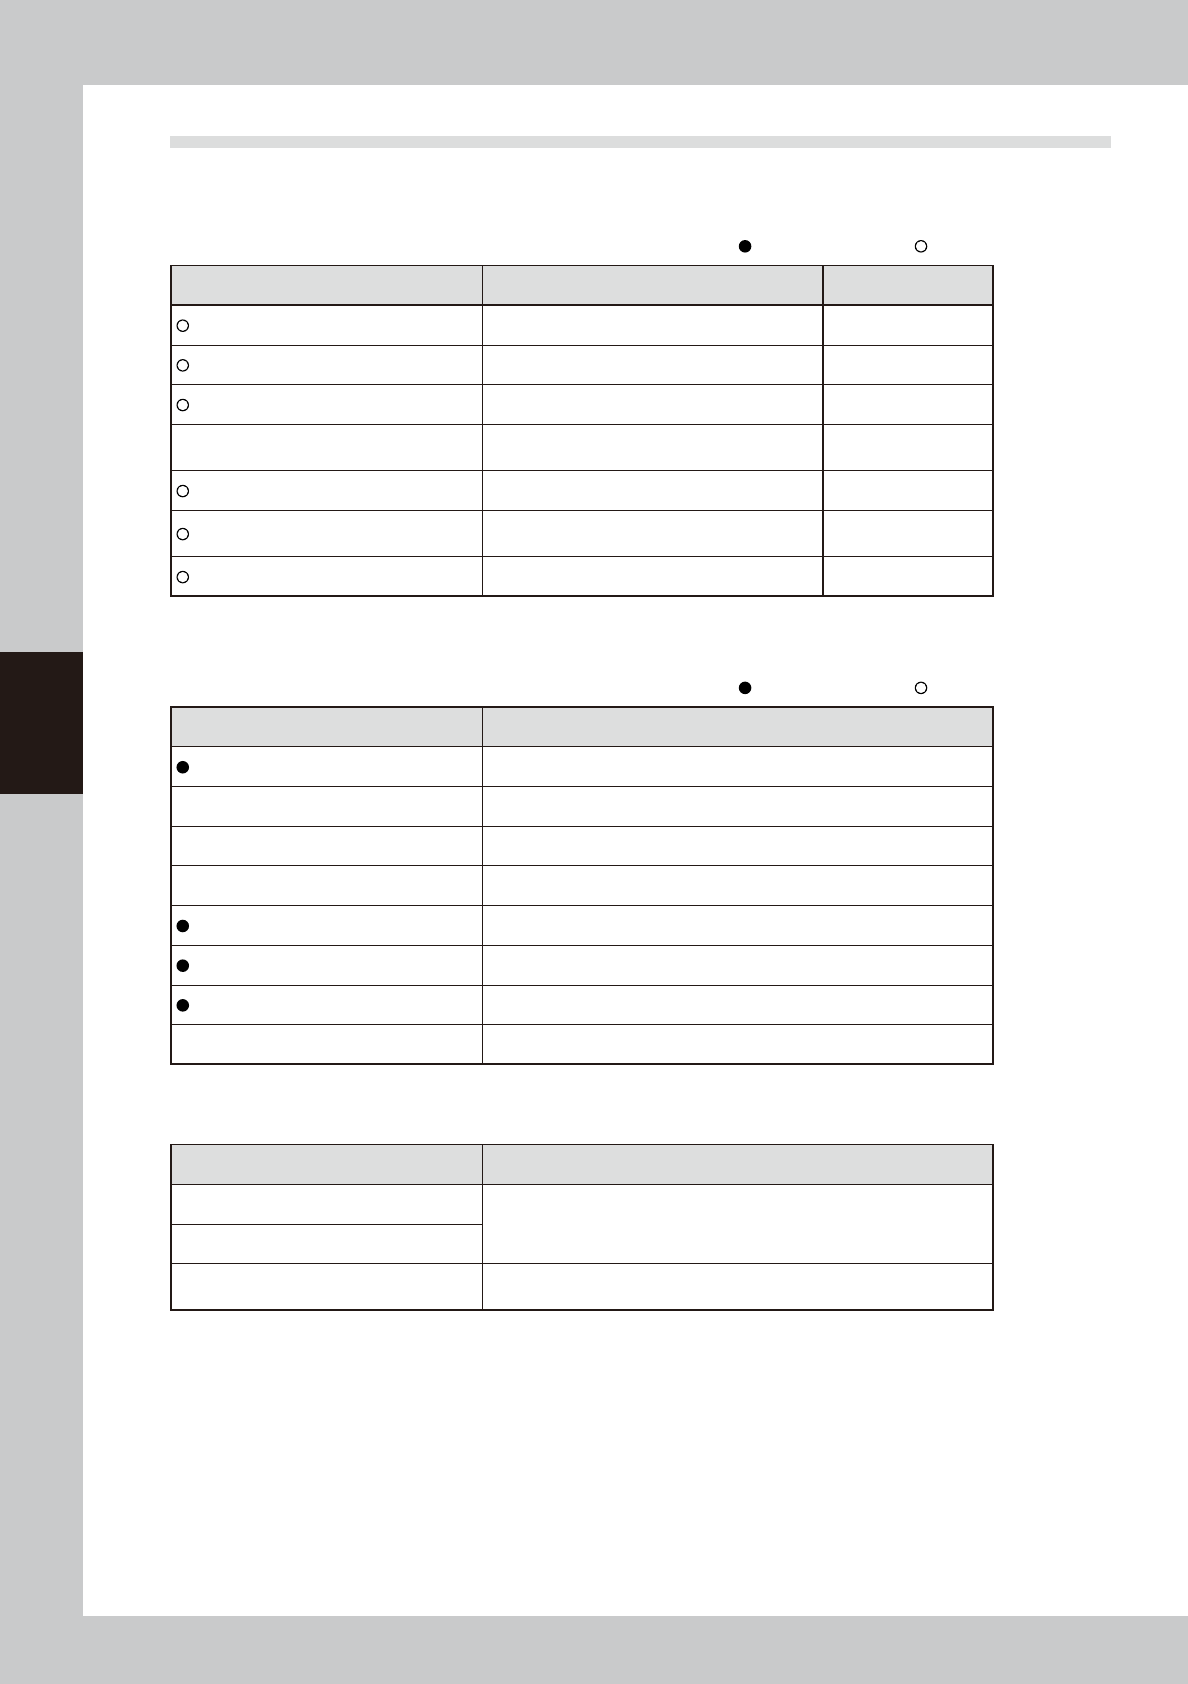
3.3 Required tools
Prepare the following tools and items necessary for maintenance.
n
Tool list
: Supplied with machine, : Options
Name Description Remarks
Phillips screwdriver Large, small D-2
Slotted (flat-blade) screwdriver Large, small
Hex wrench set 1 set HEX, WRENCH SET
Tweezers
Used to remove foreign objects or debris falling
on ball screw or guide.
Grease gun Used to supply grease
Vacuum ASSY
Used to clean belt groove and sensor detection
surface.
Air blow too Used for cleaning
n
Other tool list
: Supplied with machine, : Options
Name Description
Grease (lithium-based grease: NSL) Used to lubricate each axis.
Cleaning cloth Used to clean filter cup.
Cleaning wipe Use lint-free cleaning wipe (for clean room).
Square bandage Used to prevent parts from being lost or contaminated. (2 sheets)
Cotton swab stick Used to clean camera lens, half mirror and lighting unit.
Lens cleaner Used to clean camera lens and lighting unit.
Lens blower brush Used to clean camera lens and lighting unit.
Fine brush (tool brush, etc.) Used to clean the belt groove, etc.
n
Safety goggles and mask
Name Description
Dust-proof goggles
Always wear these goggles and mask when applying grease or when
using an air blow gun
Dust-proof mask
Protective gloves
Always wear protective gloves when applying grease or when removing
optical camera cover.
4-9
4
Maintenance
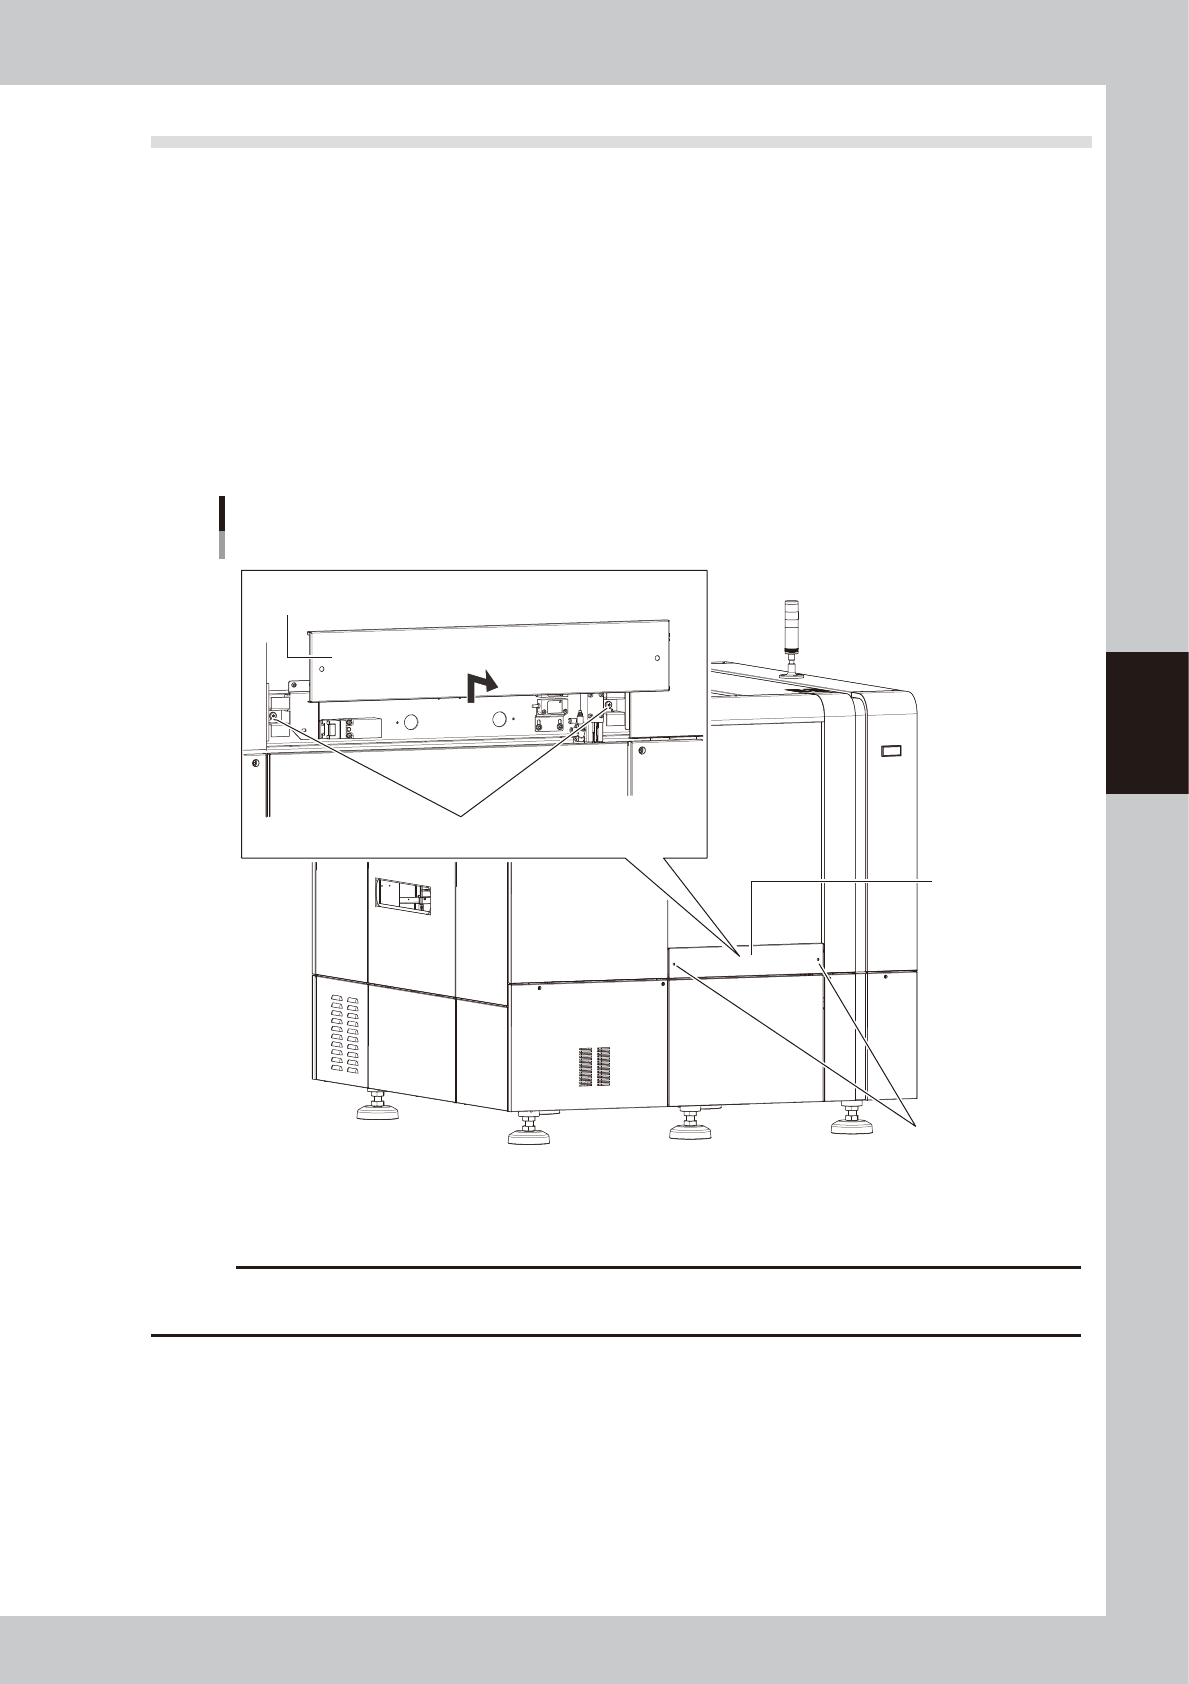
3.4 Removing the rear center panel
To open and close the rear safety door, the rear center panel should first be removed from the inspection
machine. The following describes the procedure for removing the rear center panel.
n
Required tool
• Phillips screwdriver
e
1
Press the emergency stop button to place the machine in emergency stop.
2
Remove the rear center panel from the machine.
1. Use the Phillips screwdriver to loosen the screws (2 screws) securing the panel.
2. Lift the panel straight upward and then pull it out toward you.
Removing the rear center panel
Rear center panel
Screws securing the panel
Remove the panel by lifting it upward.
Screws securing the panel
53403-M6-10
To reattach the rear center panel, reverse the procedure in step 2.
c
CAUTION
When the maintenance is complete, be sure to reattach the rear center panel. The machine does not operate if the
rear center panel is left removed.