00197963-01_AI_Power_Supply_Conversion_SIPLACE_E_en.pdf - 第30页
Conversion Restoring the Standard Configura tion of 3x400V 3.4.3 Restorin g the Original Vacuum Pump and Overload Relay Config uration 30 Assembly Instructions SIPLACE E 3.4.3 3 . 4 . 3 R e s t o r in g t h e O r ig i…
Conversion
3.4.2 Removing the Cable Harness Assembly Restoring the Standard Configuration of 3x400V
Assembly Instructions SIPLACE E 29
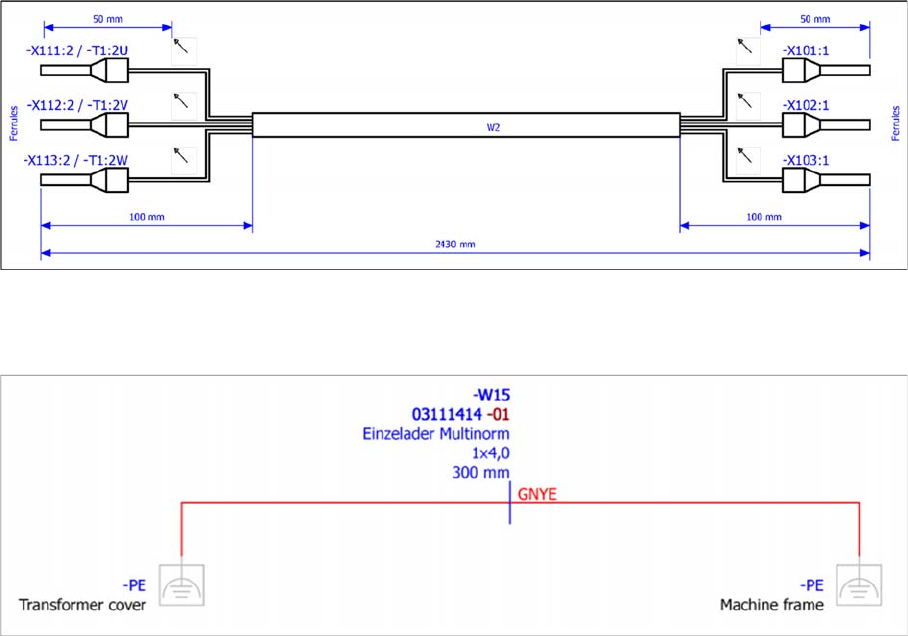
Main switch cable [03104081-xx]
► Disconnect the main switch cable [03104081-xx] from the transformer output T1:2U/2V/2W and re
-
connect it to terminal -X111/-X112/-X113 pin 2.
Grounding cable [03111414-xx]
► Remove the grounding cable [03111414-xx] from the transformer cover and the machine frame.
Conversion
Restoring the Standard Configuration of 3x400V 3.4.3 Restoring the Original Vacuum Pump and Overload Relay Configuration
30 Assembly Instructions SIPLACE E
3.4.3
3.4.3 Restoring the Original Vacuum Pump and Overload Relay Configuration
Restoring the Original Vacuum Pump and Overload Relay Configuration
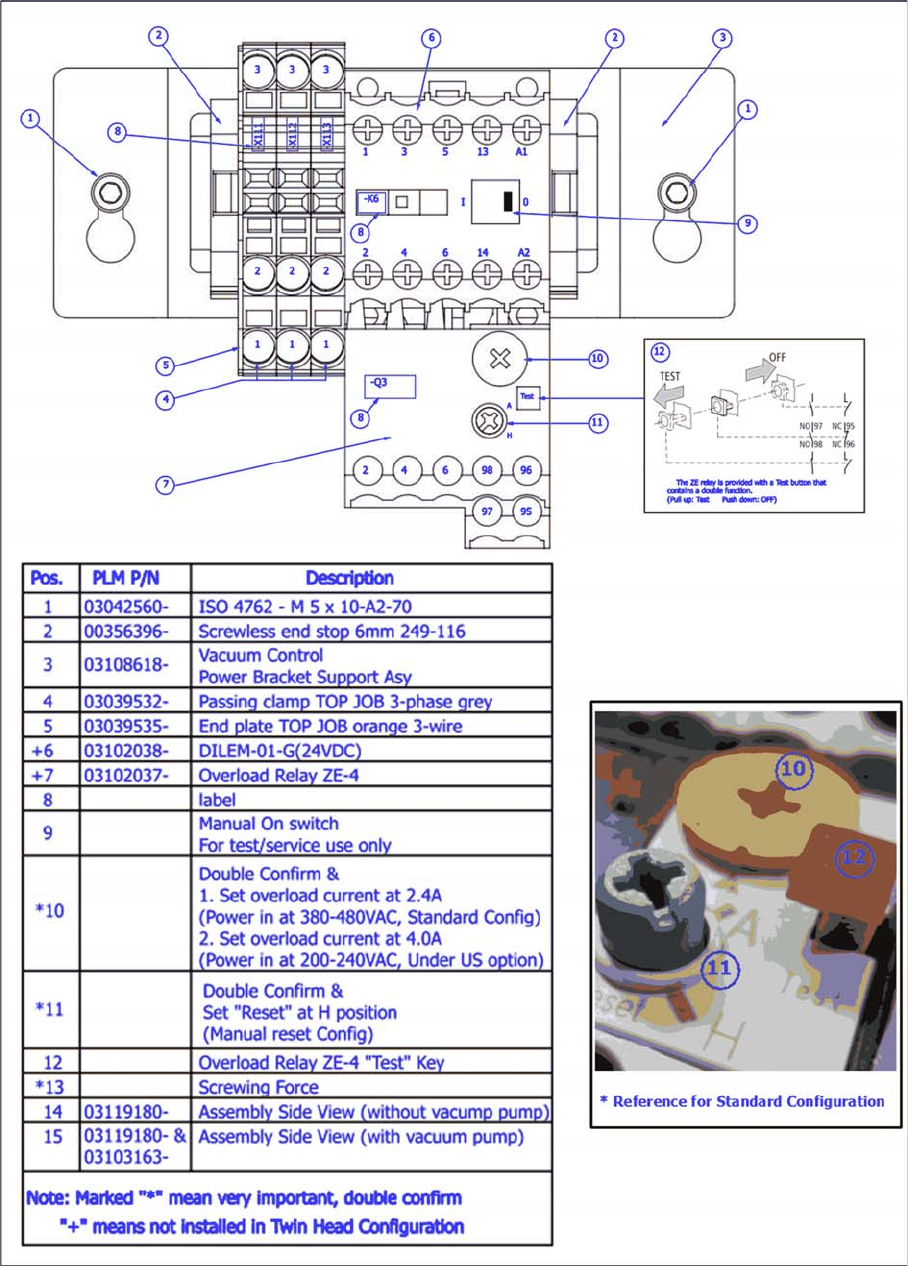
Restoring the Current Overlay Setting
Vacuum pump control unit assembly and setting
► Adjust the over current setting of the overload relay Q3 (10) to 2.4 A.
Conversion
3.4.3 Restoring the Original Vacuum Pump and Overload Relay Configuration Restoring the Standard Configuration of 3x400V
Assembly Instructions SIPLACE E 31
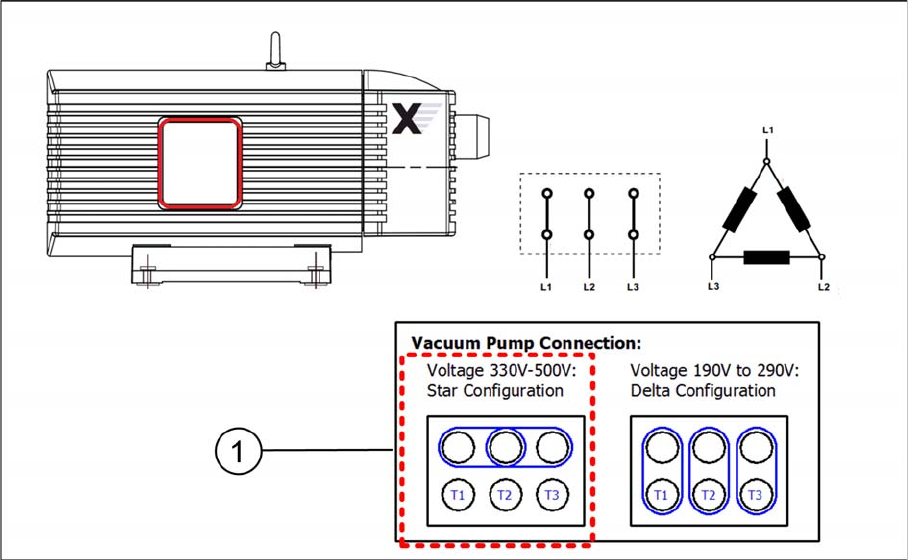
Restoring the Vacuum Pump Connection
Vacuum pump connection – star configuration
► Switch the vacuum pump connection plate to the star configuration (1).
► Proceed with the final safety checks ("3.5 Carrying out Final Safety Checks" [ ➙ 32]).
► Install all covers that you previously removed.