MAN00000772_SI-G200BB_SVCPDFA.pdf - 第74页
Install Tray Unit (Including machine modification) SHEET 35/73 WKGB-10104-03 Installing Tray Unit (Including machine modificat ion) [Connection with main body] 1 Connect the tray coupling I/F plate and S axis, V axis u…
Install Tray Unit (Including machine modification)
SHEET
34/73
WKGB-10104-03
Installing Tray Unit
(Including machine modification)
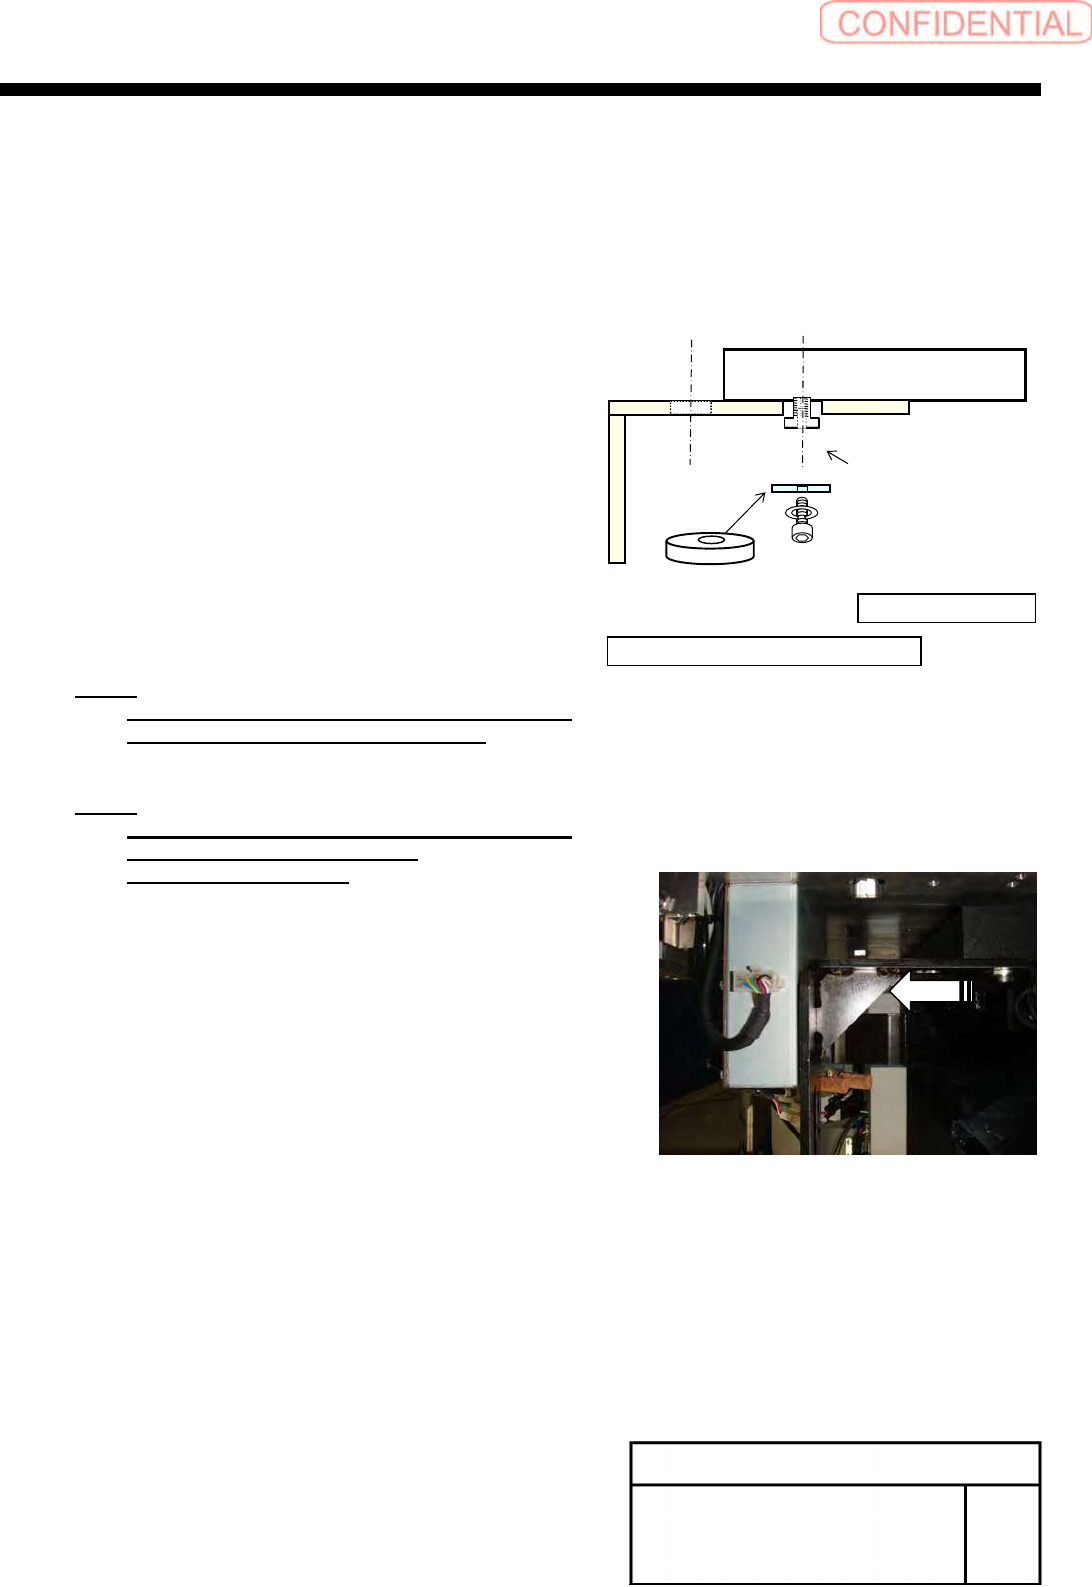
[Installation of mount bracket]
1
Install the mount bracket to the S axis
frame according to the conveyor width
specification.
NOTE:
Apply LOCKTITE 242 into the M10 thread
section on the spacer for mount base.
NOTE:
Fix temporarily at the position in which the
mount bracket was drawn out
outside of the machine.
360mm
410mm
Unit body side→
← Tray unit body side
Spacer
Spacer for mount base
Install Tray Unit (Including machine modification)
SHEET
35/73
WKGB-10104-03
Installing Tray Unit
(Including machine modification)
[Connection with main body]
1
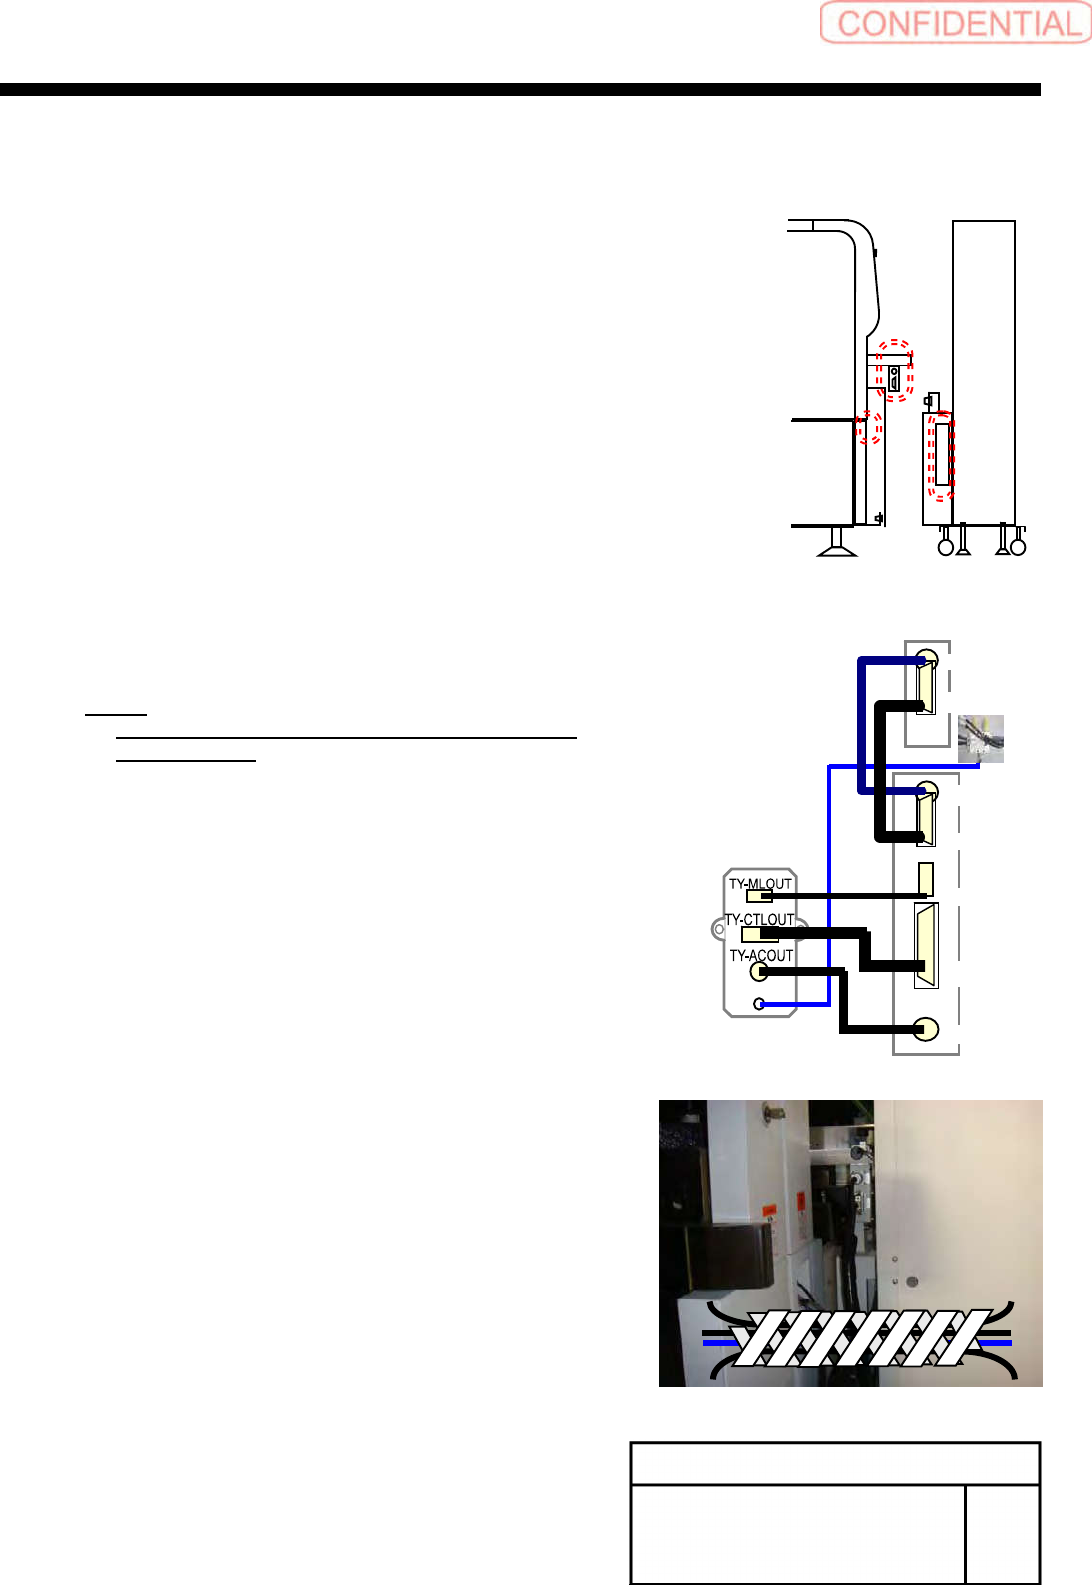
Connect the tray coupling I/F plate and S
axis, V axis units.
1.
Connect the AIR tube on the tray I/F plate to the
manifold on the lower section of the S axis with air
tube ofφ6.
2.
Connect each connector on the tray I/F plate to
each connector on the V axis unit.
TY-MLOUT <======> CU-1
TY-CTLOUT <======> TY-CTL
TY-ACOUT <======> TY-ACIN
3.
Connect the S axis unit and the V axis unit.
S-SMT1 <======> S-SMT2
VD-IO <======> S-IO
NOTE:
At this time, do not dock the tray unit and the
main body yet.
2
Bind the cable with spiral tube after
connection.
AIR
CU1
TY-CTL
TY-ACIN
VD-SMT
VD-IO
S-SMT2
S-IO
Install Tray Unit (Including machine modification)
SHEET
36/73
WKGB-10104-03
Installing Tray Unit
(Including machine modification)
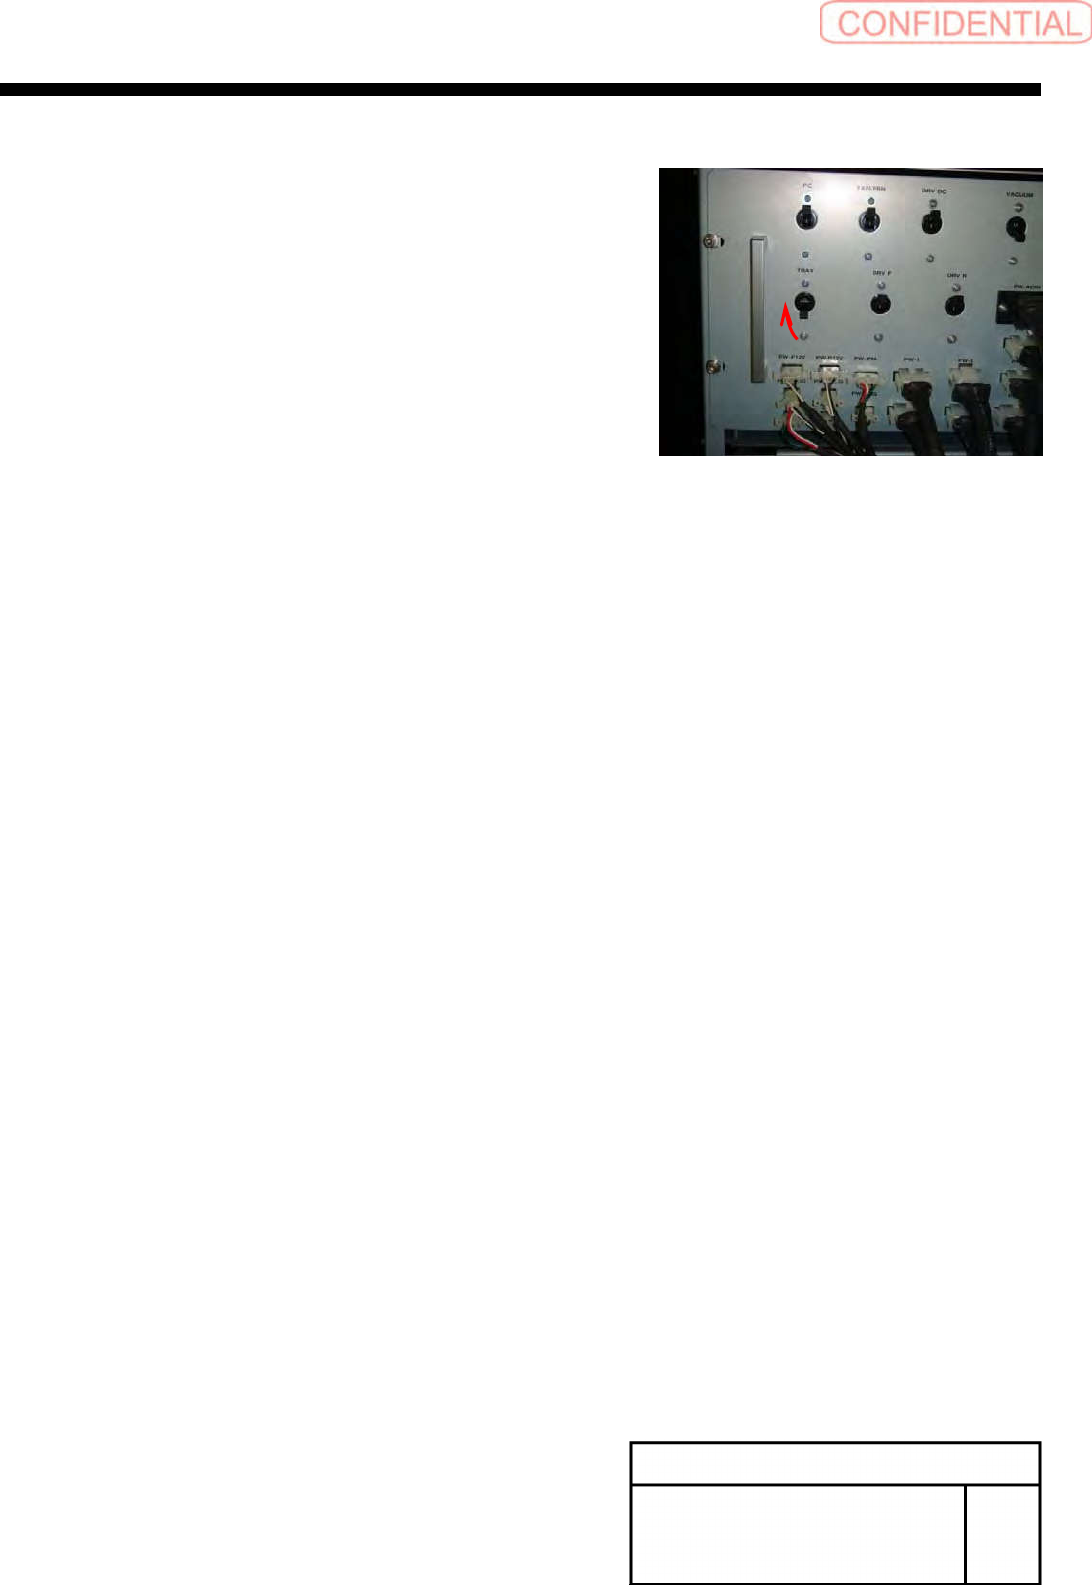
3
Turn ON the TRAY breaker for the rear
power unit.