Anleitung X2 SP 1 und 3.pdf - 第20页
2 Assembly instructions Special design for manual tray on X2 at loca tion 1 or 3 Special Design 04/2007 Edition 20 : If no second nozzle chang er is present, mount the car rier for the second nozzle cha nger first. 2 2 2…
Special Design 2 Assembly instructions Special design for manual tray on X2 at location 1 or 3
04/2007 Edition
19
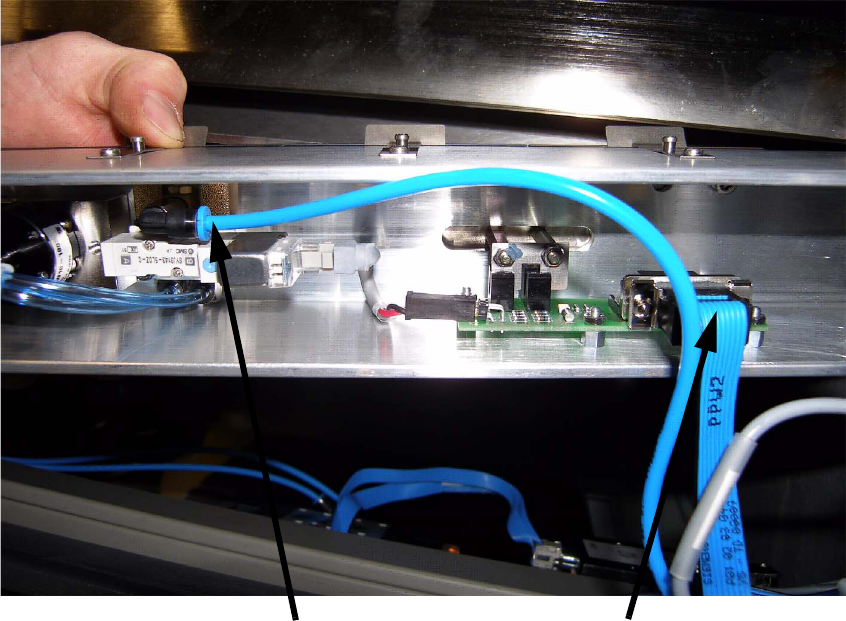
: Turn the nozzle changer around and disconnect the air hose and the cable, then remove the
nozzle changer.
: The disconnected air hose has to be sealed properly.
: Secure cables and hoses inside the machine.
2
2
2
2
2
2
2
2
2
2
2
Cable
Air hose
2 Assembly instructions Special design for manual tray on X2 at location 1 or 3 Special Design
04/2007 Edition
20
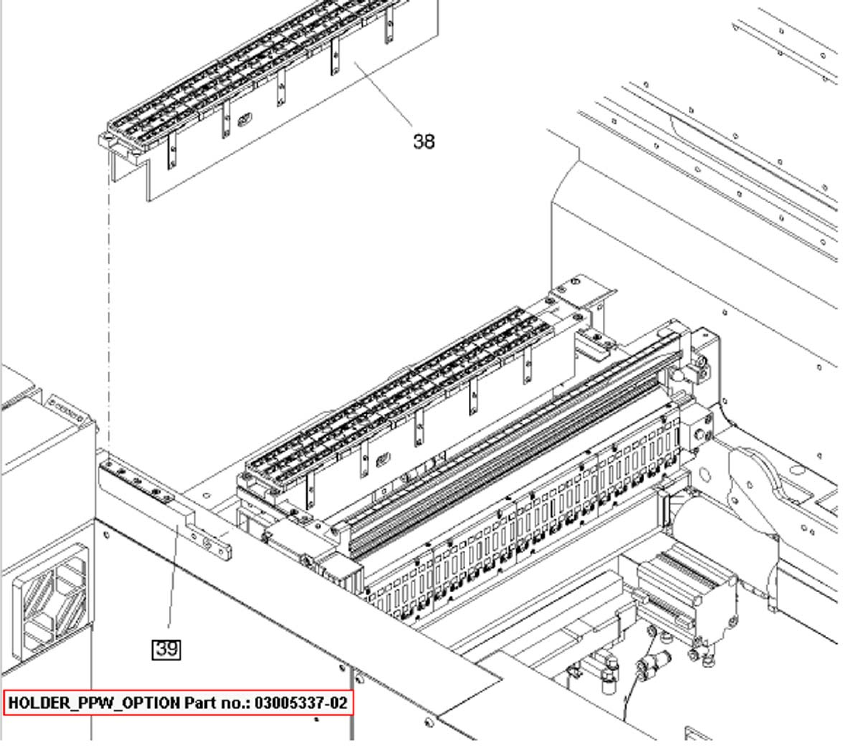
: If no second nozzle changer is present, mount the carrier for the second nozzle changer first.
2
2
2
2
2
2
2
2
2
2
2
2
Special Design 2 Assembly instructions Special design for manual tray on X2 at location 1 or 3
04/2007 Edition
21
2
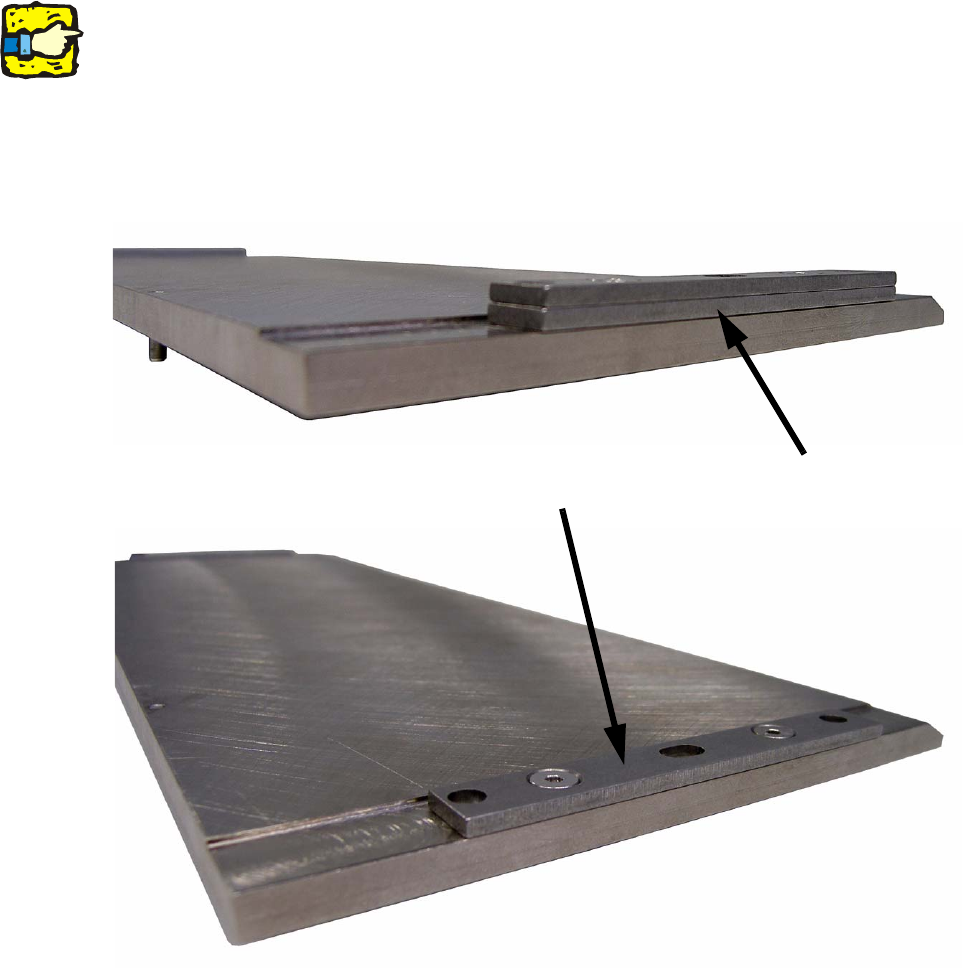
The following restrictions on the tray height (including component) apply if one or two contact
plates are installed beneath the tray holder: 2
– 1 plate 3.5 mm to 16 mm
– 2 plates 0.0 mm to 13.5 mm.
There is a risk of a head crash if these restrictions are not applied. 2
2
2
2
2
2
2
2
2
2 contact plates
1 contact plate