00197490-03_SM_CP20-P-M2_EN保养维护.pdf - 第52页
6 Pressure control valve (PRV) 6.2 Replacing the membrane and other small parts on the PRV 52 Service Manual SIPLACE SpeedStar (C&P20 P / C&P20 M2) 03/2018 Fig.69: O-ring on vacuum sensor ► Remove the vacuum sen…
6 Pressure control valve (PRV)
6.2 Replacing the membrane and other small parts on the PRV
Service Manual SIPLACE SpeedStar (C&P20 P / C&P20 M2) 03/2018 51
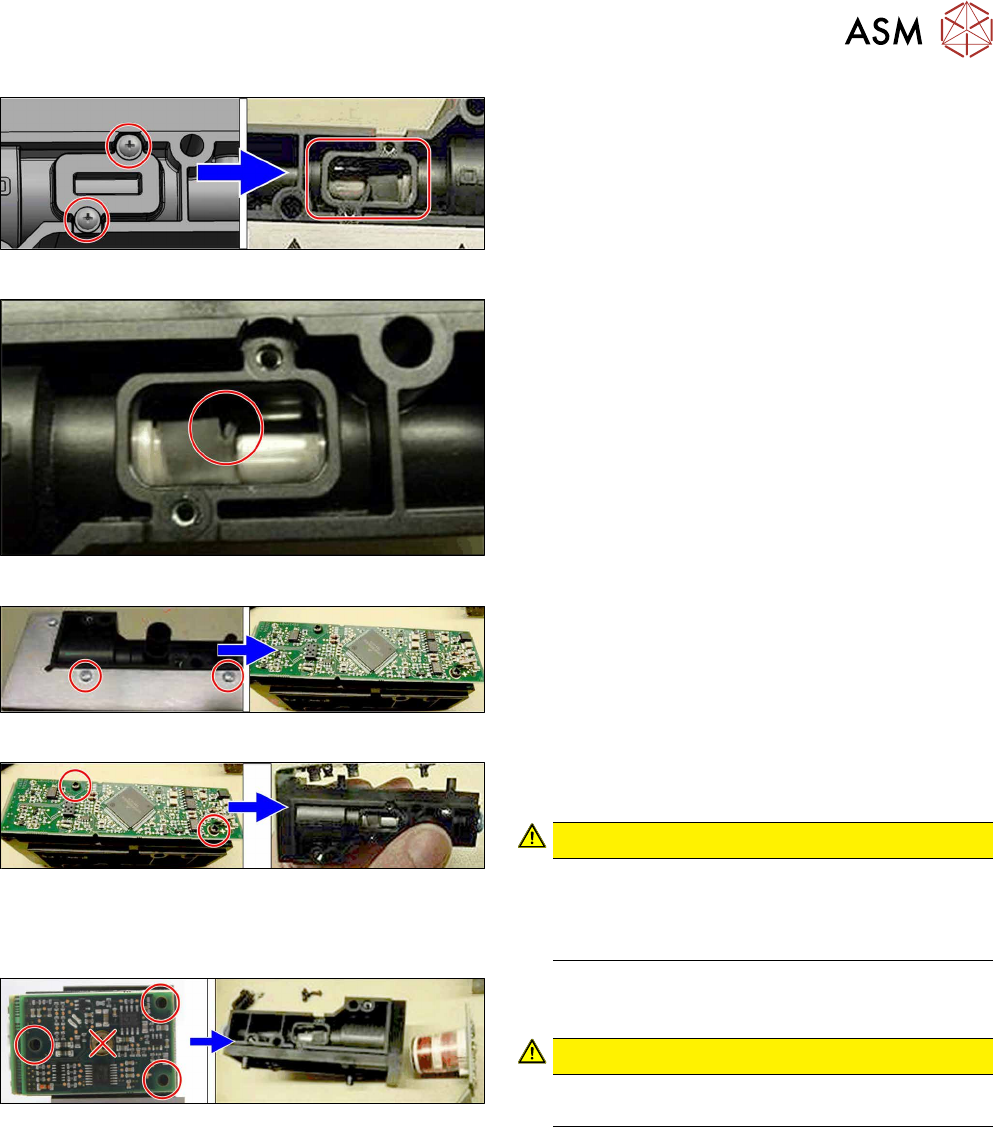
Fig.64: Removing the cover
► Remove the two screws and take the cover off
the PRV membrane.
Fig.65: Checking the membrane
► Carefully check the membrane for any damage.
ð If no damage can be found, close the cover
window again.
You do not need to replace the membrane in
this case.
ð If there is any damage, proceed with the next
step.
Fig.66: Removing the cover plate
► Remove the three screws fastening the cover
plate and remove the cover plate.
Fig.67: Top board
► Remove the two screws and swing the board
slightly upwards.
CAUTION!
Make sure that you do not swing the board up
too far. If you do, this could cause the flexprint
cable to break.
Take care not to damage the sensor O-ring.
.
Fig.68: Side board
► Remove the three screws and then remove the
board.
CAUTION!
Never loosen or remove the screw in the
middle!
.
6 Pressure control valve (PRV)
6.2 Replacing the membrane and other small parts on the PRV
52 Service Manual SIPLACE SpeedStar (C&P20 P / C&P20 M2) 03/2018
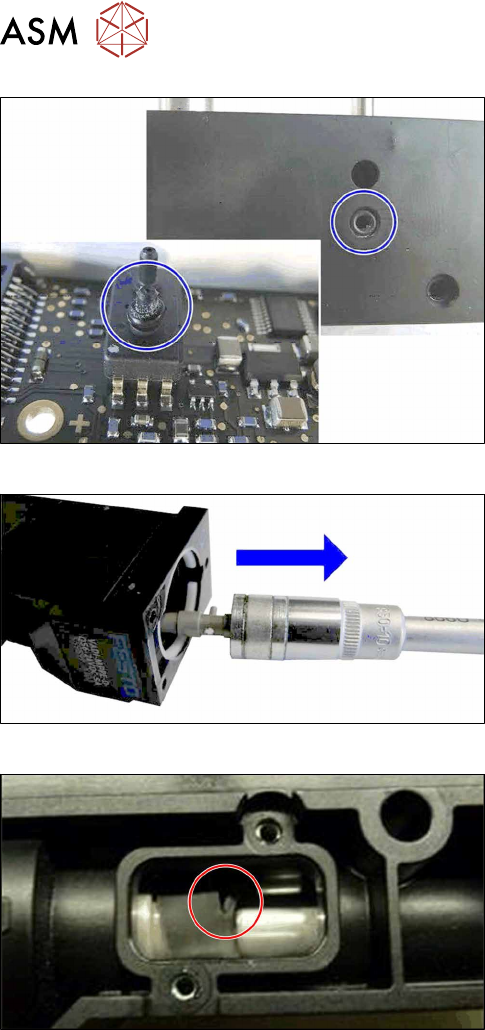
Fig.69: O-ring on vacuum sensor
► Remove the vacuum sensor O-ring.
Fig.70: Removing the plunger
► Remove the plunger with the help of a size 10
wrench.
Fig.71: Removing the membrane
► Remove the old, damaged membrane and its
residues.
6 Pressure control valve (PRV)
6.2 Replacing the membrane and other small parts on the PRV
Service Manual SIPLACE SpeedStar (C&P20 P / C&P20 M2) 03/2018 53
Installation
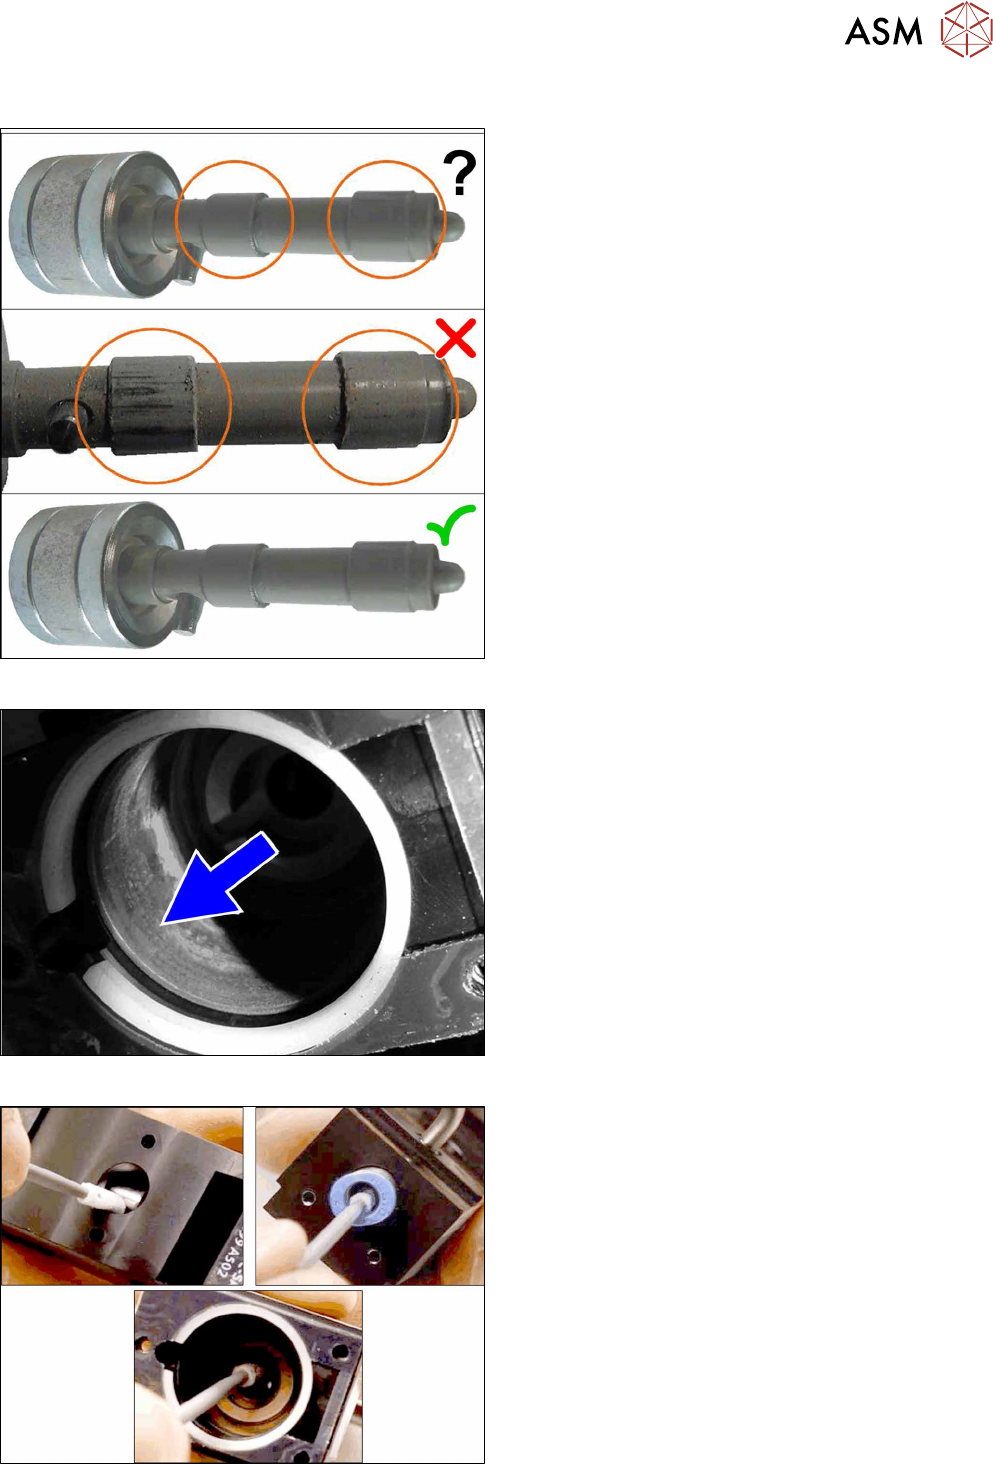
Fig.72: Checking the plunger
► Check the plunger for damage.
► If the plunger is damaged, replace the whole
PRV.
► If the plunger is ok, proceed with the next step.
Fig.73: Checking the PRV inside
► Check the inside of the PRV for damage.
► If the inside of the PRV is damaged, replace the
whole PRV.
► If the inside is not damaged, proceed with the
next step.
Fig.74: Cleaning
► Clean the seat of the plunger tip and the venturi
nozzle until the cotton swab is no longer dirty
when it comes out.
Use a cotton swab coated with isopropyl.