00195963-03_MM SWS-EN.pdf - 第62页
The proce dure for S eg ment 2 is simi lar to Segment 1: Tur n Segm ent 2 from Flip Unit to Tip p ositionand c over th e Noz zletip or the Suction Plat e . Change t o Menu Manu al op erations IO s [1] and cho ose fol…
61
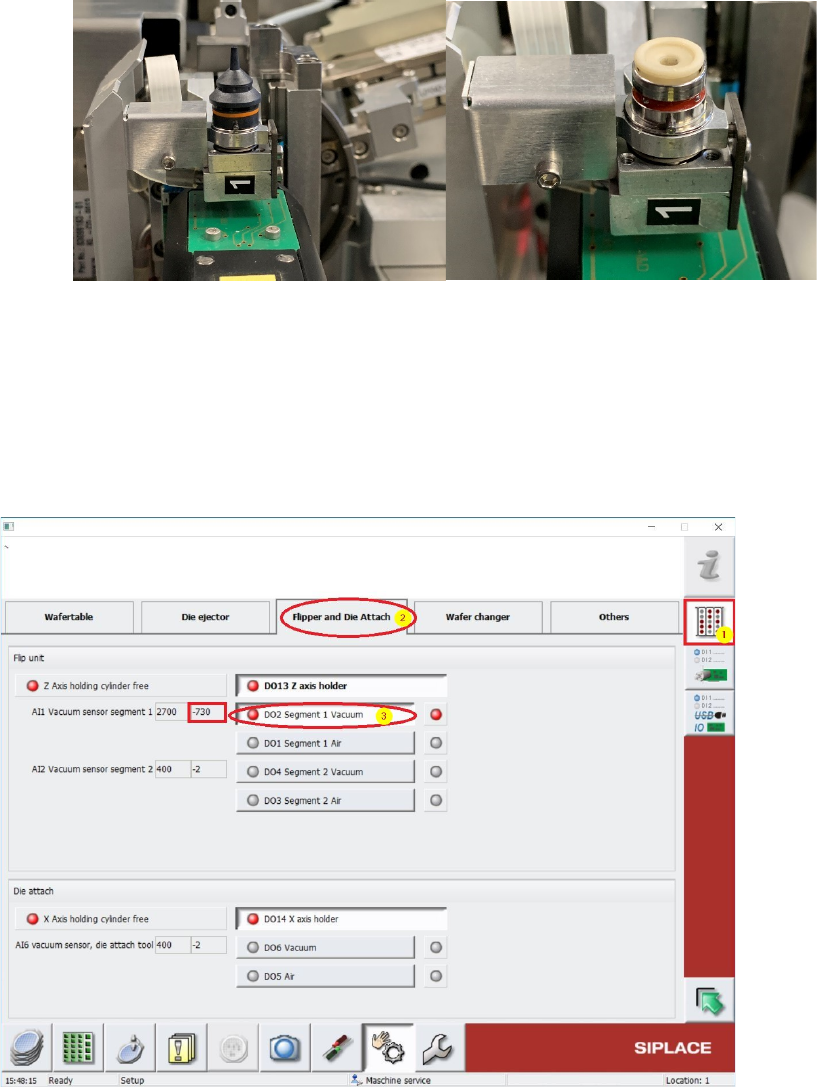
Turn Segment 1 from Flip Unit to Top position and cover the Nozzletip or the Suction Plate.
Change to Menu Manual operations IOs [1] and choose folder Flipper and Die Attach [2]
(see screenshot below).
Use button [3] to switch on the Vacuum D02 Segment 1 Vacuum (see below). The Vacuum
must be recognized at the Nozzletip or the Suction Plate.
Beside this Button, under “AI1 Vacuum sensor segment 1” the vacuum value can be read out.
This Value should be nearly the same like the previously noticed Main vacuum value. If this value is
lower, there is some vacuum leakage and all the tubings and seals (e.g. Vacuum plate) must be
controlled and exchanged in case.
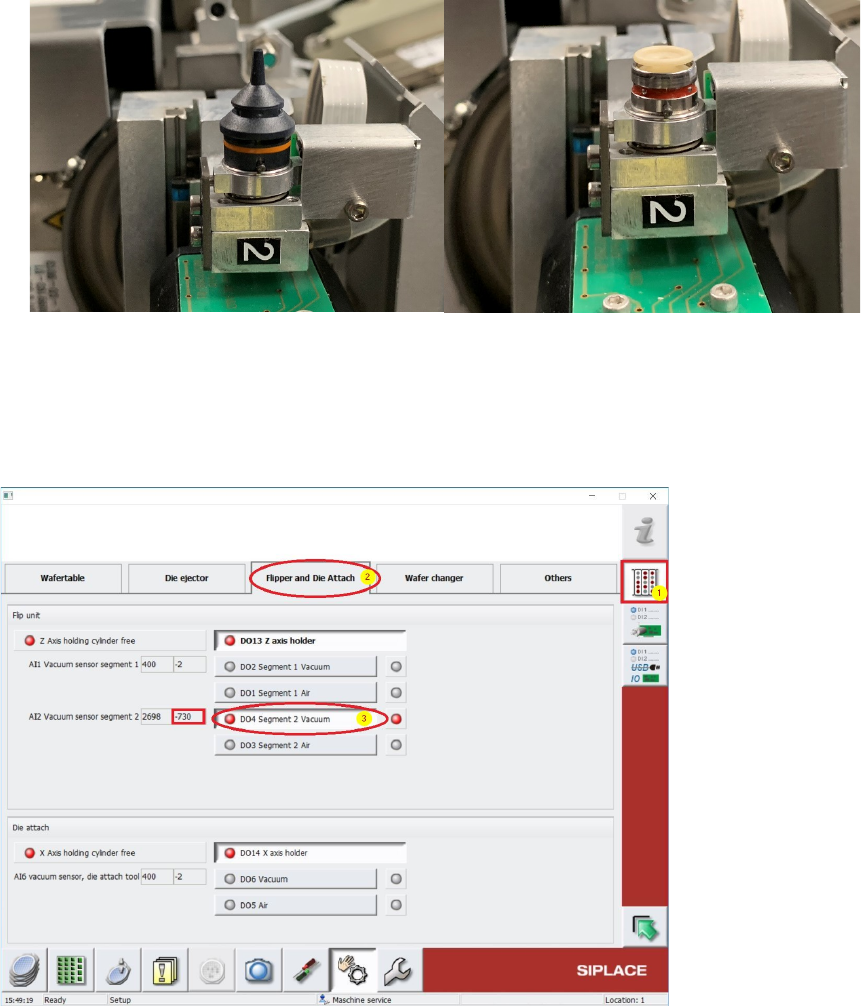
The procedure for Segment 2 is similar to Segment 1:
Turn Segment 2 from Flip Unit to Tip positionand cover the Nozzletip or the Suction Plate.
Change to Menu Manual operations IOs [1] and choose folder Flipper and Die Attach [2]
(see screeshot below).
Use button [3] to switch on the Vacuum D04 Segment 2 Vacuum (see below). The Vacuum
must be recognized at the Nozzletip or the Suction Plate.
Beside this Button, under “AI2 Vacuum sensor segment 2” the vacuum value can be read out.
This Value should be nearly the same like the previously noticed Main vacuum value. If this value is
lower, there is some vacuum leakage and all the tubings and seals (e.g. Vacuum plate) must be
controlled and exchanged in case.
63
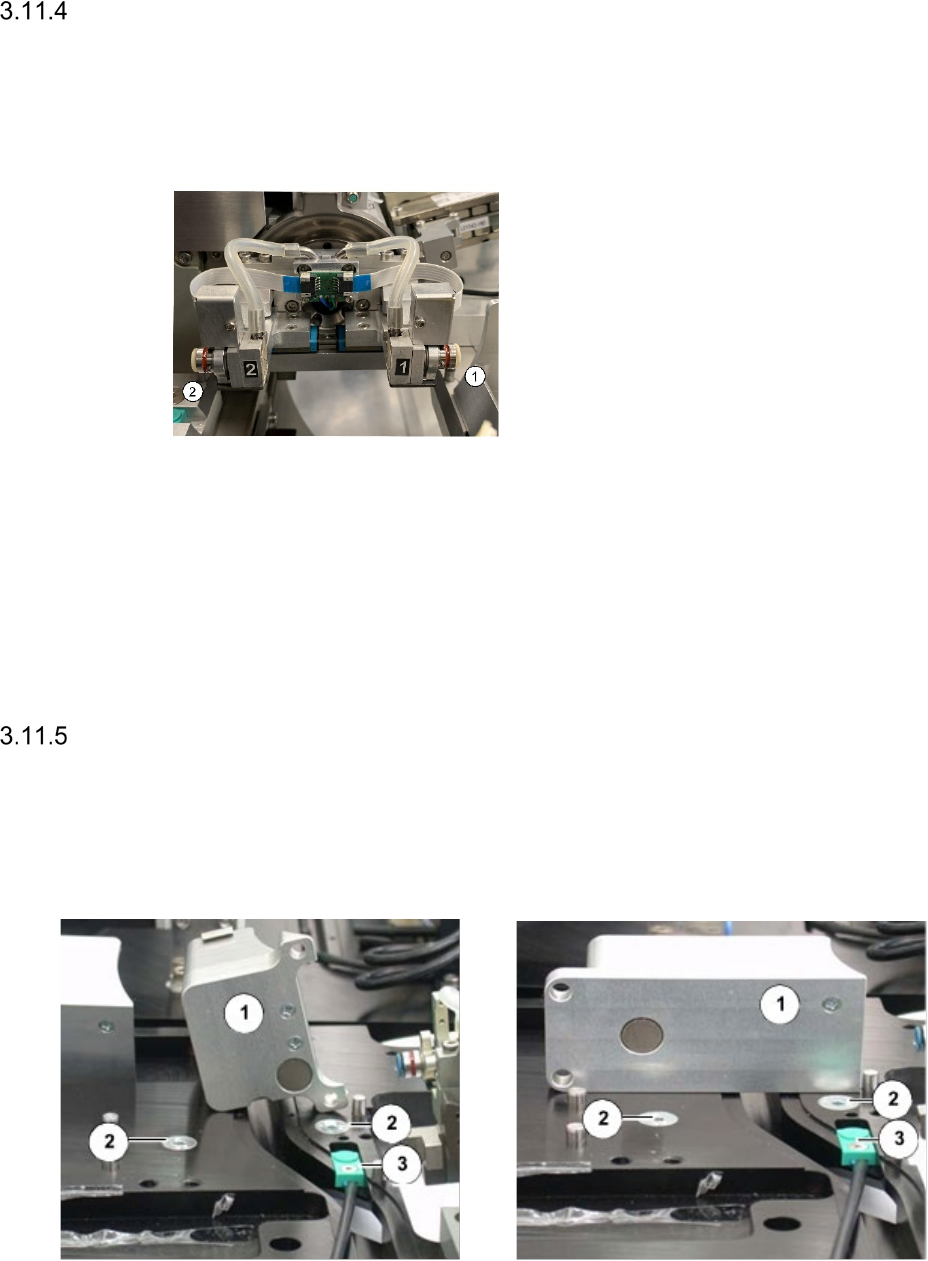
Checking the Suction Plates at the Nozzle Take-Up for Leaks
Interval: 3 months
Equipment: New suction plates, if necessary
Legend
[1] Suction plate
[2] Nozzle
Remove the nozzles from both segments.
Check the blue suction plate for signs of
damage or wear.
If it shows signs of damage, it has to be
changed for a new one.
Loosen the screw thread of the suction plate and lift off the suction plate.
Make sure, that the spacer remains in its position. Otherwise the tightness is not ensured.
Position the suction plate straight, otherwise there is danger of damaging the screw thread.
Fasten the suction plate with a torque of 13 Ncm.
Re-insert the nozzles.
Check reject bins
Interval: 3 month
Equipment: Lint-free cloth
The Reject bin types may be different depending on the SWS-Version.
Reject bin with no Die-Attach-Unit installed Reject bin with installed Die-Attach