Nordson-EFD-725D-725DA-Tech-Support-Guide.pdf - 第3页
5 6 7 8 5. Holding the rod, use one of the 8" adjustable wrenches to loosen the fluid body. 6. Remove the fluid body from the air cylinder . NOTE At this point, the fluid end of the valve can be thoroughly cleaned wit…

Valve Disassembly
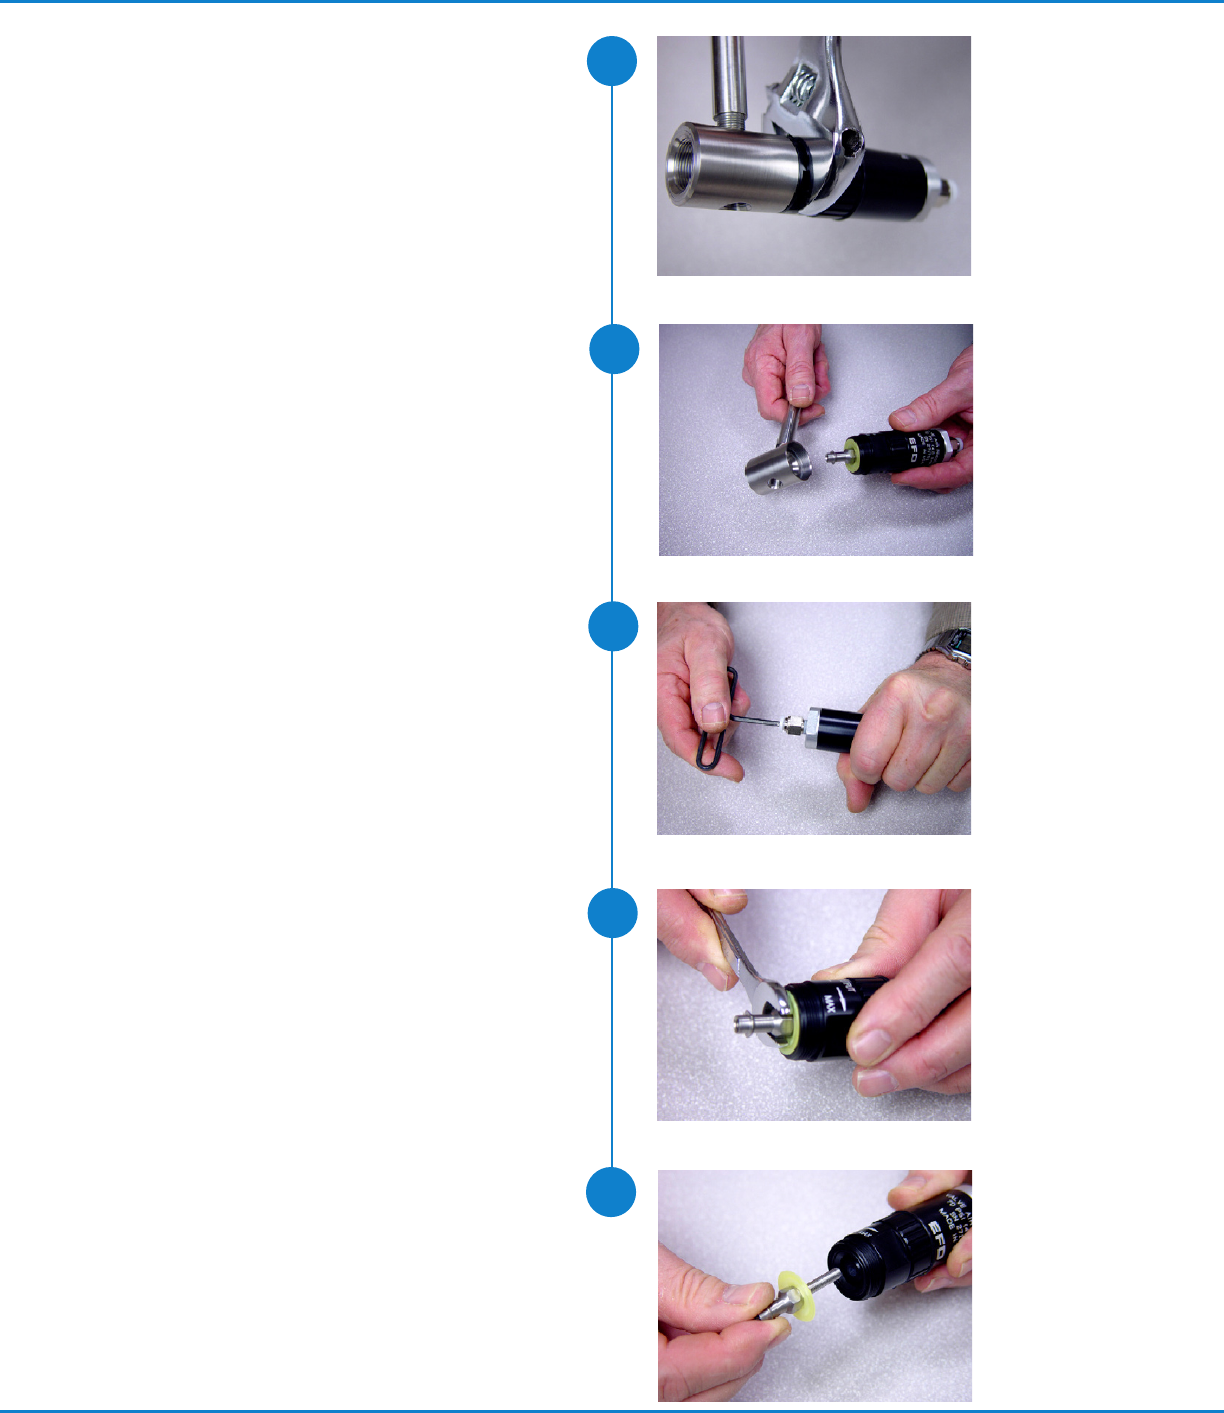
1. Turn the stroke adjustment collar to the
maximum position.
2. Install the 1/8 NPT rod in the fluid body
mounting hole or fluid inlet.
3. Holding the rod, use an 8" adjustable
wrench to remove the fluid body cap.
4. Using the flat tip screwdriver, remove the
sealing head and screw.
1
2
3
4
725D / 725DA Dispense Valve | Tech Support Guide
2 www.nordsonefd.com info@nordsonefd.com +1-401-431-7000 Sales and service of Nordson EFD dispensing systems are available worldwide.
5
6
7
8
5. Holding the rod, use one of the 8"
adjustable wrenches to loosen the fluid
body.
6. Remove the fluid body from the air
cylinder.
NOTE
At this point, the fluid end of the valve
can be thoroughly cleaned without further
disassembly.
For diaphragm replacement or complete
valve rebuild, proceed to Step 7.
7. Insert the 1/8" hex wrench through the
air inlet fitting, loosen the shaft locking
screw, and turn it out two full turns.
8. Using the 3/8" open-end wrench, loosen
the shaft.
9. Remove the shaft and diaphragm.
9
725D / 725DA Dispense Valve | Tech Support Guide
3www.nordsonefd.com info@nordsonefd.com +1-401-431-7000 Sales and service of Nordson EFD dispensing systems are available worldwide.
10
11
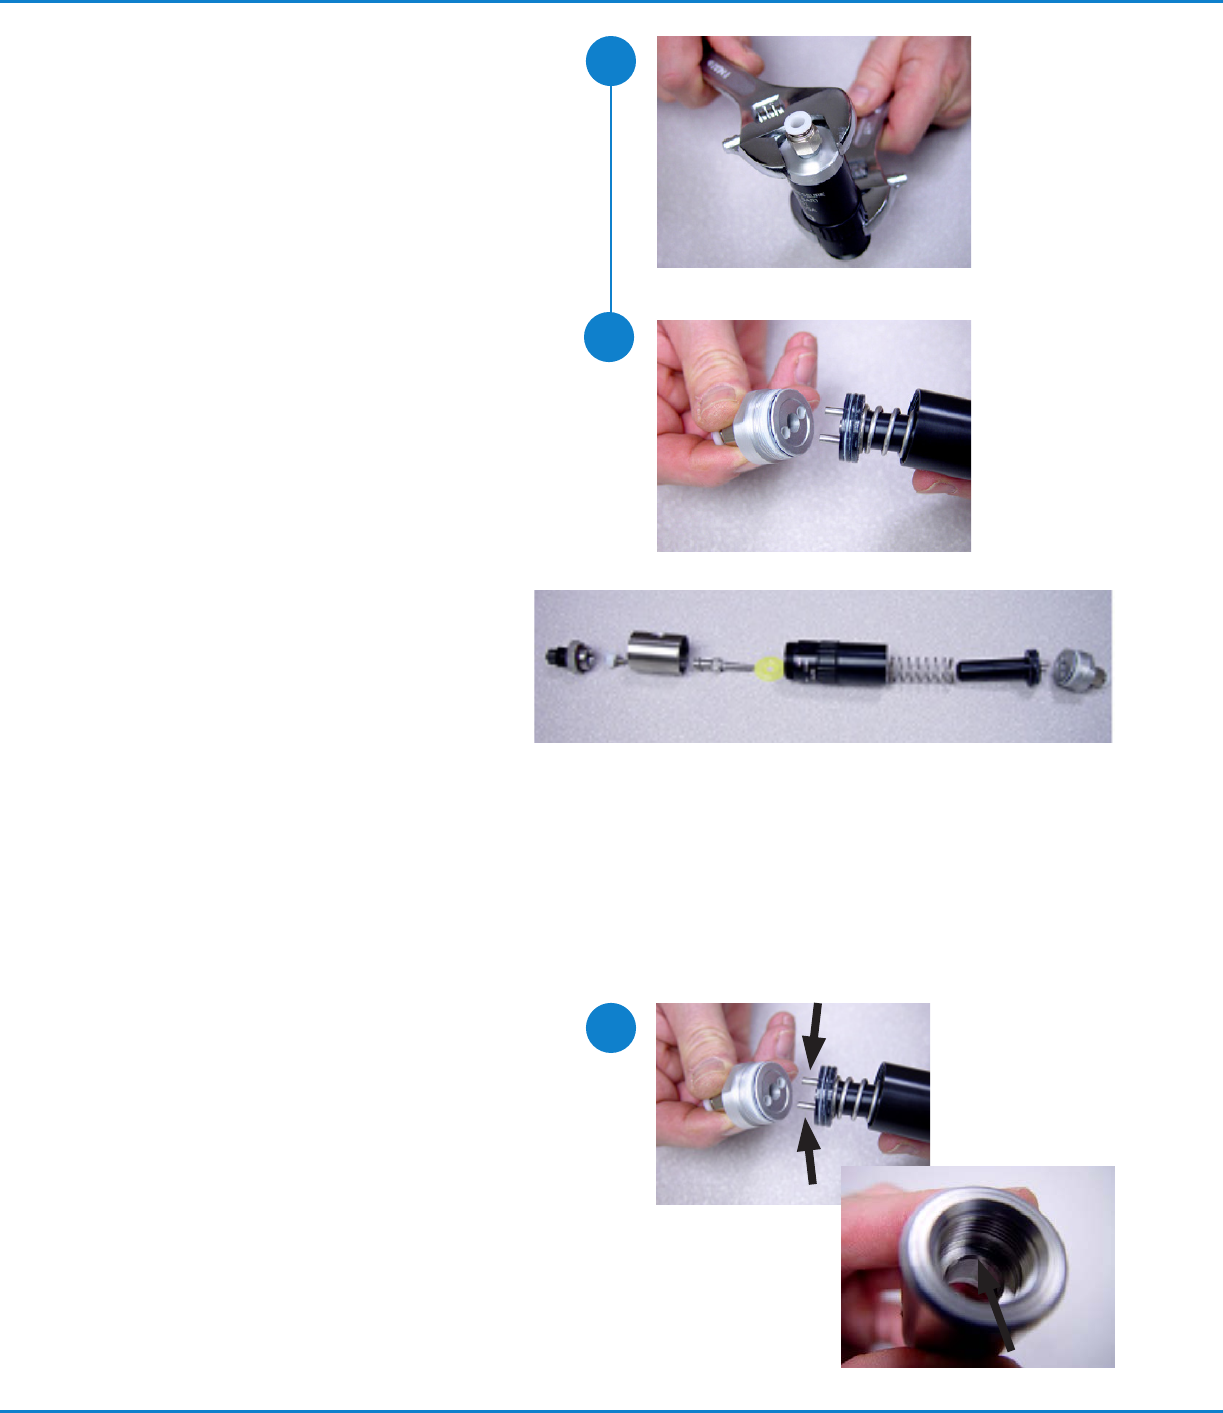
10. Place one 8" adjustable wrench on
the air cylinder flats and the other 8"
adjustable wrench on the cylinder cap
flats, and loosen the cylinder cap.
11. Remove the cylinder cap, piston and
spring from the air cylinder.
The valve is now completely
disassembled, and is ready for cleaning,
inspection and reassembly.
CAUTION
The adjustable air cylinder on the 725DA valve
is not serviceable in the field. Do not attempt
further disassembly. Do not turn the stroke
adjustment collar.
For best results, install all replacement parts included in the repair kit.
Valve Maintenance and Reassembly
1. Clean and inspect all parts
• Clean all parts with a solvent that is
compatible with the fluid being dispensed.
• Inspect all threads.
• Inspect piston pins for straightness.
• Inspect fluid body seat area for pitting.
• Replace all worn or damaged parts.
• Complete parts lists appear on the last page
of these instructions.
1
725D / 725DA Dispense Valve | Tech Support Guide
4 www.nordsonefd.com info@nordsonefd.com +1-401-431-7000 Sales and service of Nordson EFD dispensing systems are available worldwide.