Nordson-EFD-725D-725DA-Tech-Support-Guide.pdf - 第6页
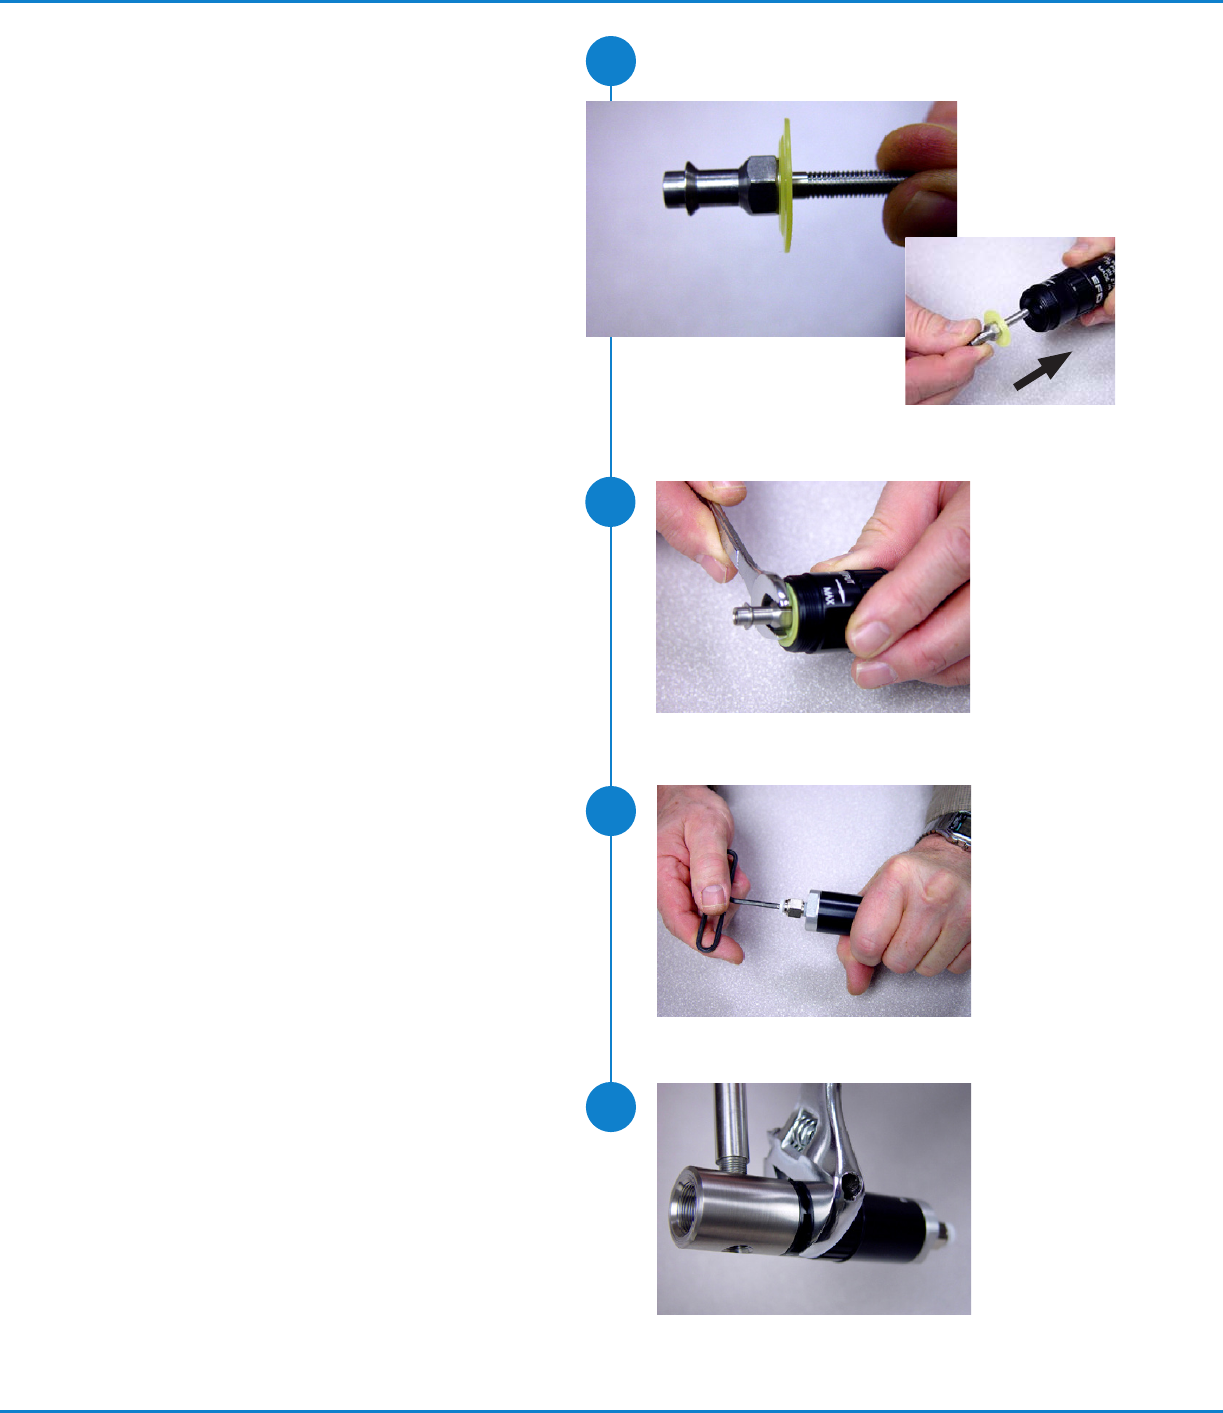
6 6. Install the shaft and diaphragm. • The convex ring of the diaphragm should face away from the air cylinder . 7. Using the 3/8" open-end wrench, tighten the shaft. If a torque wrenc h is available , torque to 1.…
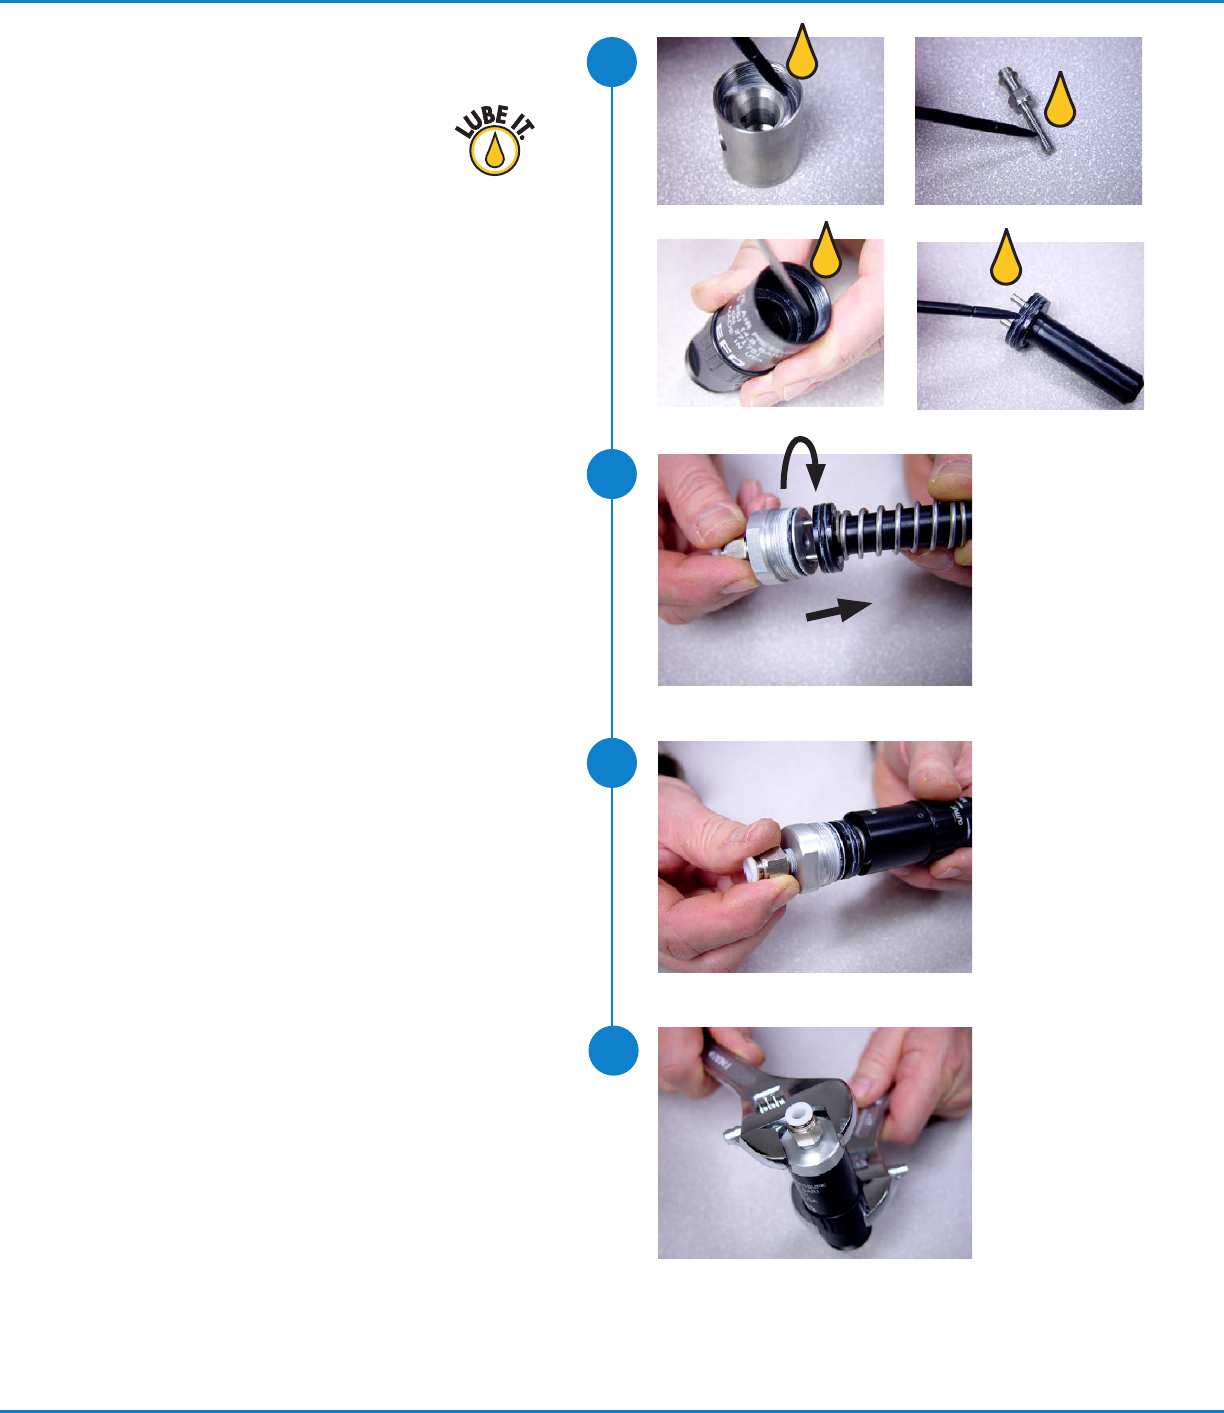
2. Using the lubricant supplied in the repair
kit, apply a film of lubricant to the points
indicated.
3. Assemble the air cylinder cap, piston
and spring.
4. Install the air cylinder cap, piston and
spring by pushing to compress the
spring while turning to engage the
threads.
5. Using the two 8" adjustable wrenches,
tighten the air cylinder cap. If a torque
wrench is available, torque to 10.8 Nm
(8 ft lbs).
5
4
3
2
725D / 725DA Dispense Valve | Tech Support Guide
5www.nordsonefd.com info@nordsonefd.com +1-401-431-7000 Sales and service of Nordson EFD dispensing systems are available worldwide.
6
6. Install the shaft and diaphragm.
• The convex ring of the diaphragm should
face away from the air cylinder.
7. Using the 3/8" open-end wrench, tighten
the shaft. If a torque wrench is available,
torque to 1.69 Nm (15 in lbs).
8. Insert the 1/8" hex wrench through the
air inlet fitting and tighten the shaft
locking screw. If a torque wrench is
available, torque to 2.82 Nm (25 in lbs).
9. Install the fluid body and tighten using
the 1/8 NPT rod and 8" adjustable
wrench. If a torque wrench is available,
torque to 6.78 Nm (5 ft lbs).
7
8
9
725D / 725DA Dispense Valve | Tech Support Guide
6 www.nordsonefd.com info@nordsonefd.com +1-401-431-7000 Sales and service of Nordson EFD dispensing systems are available worldwide.
10
11
12
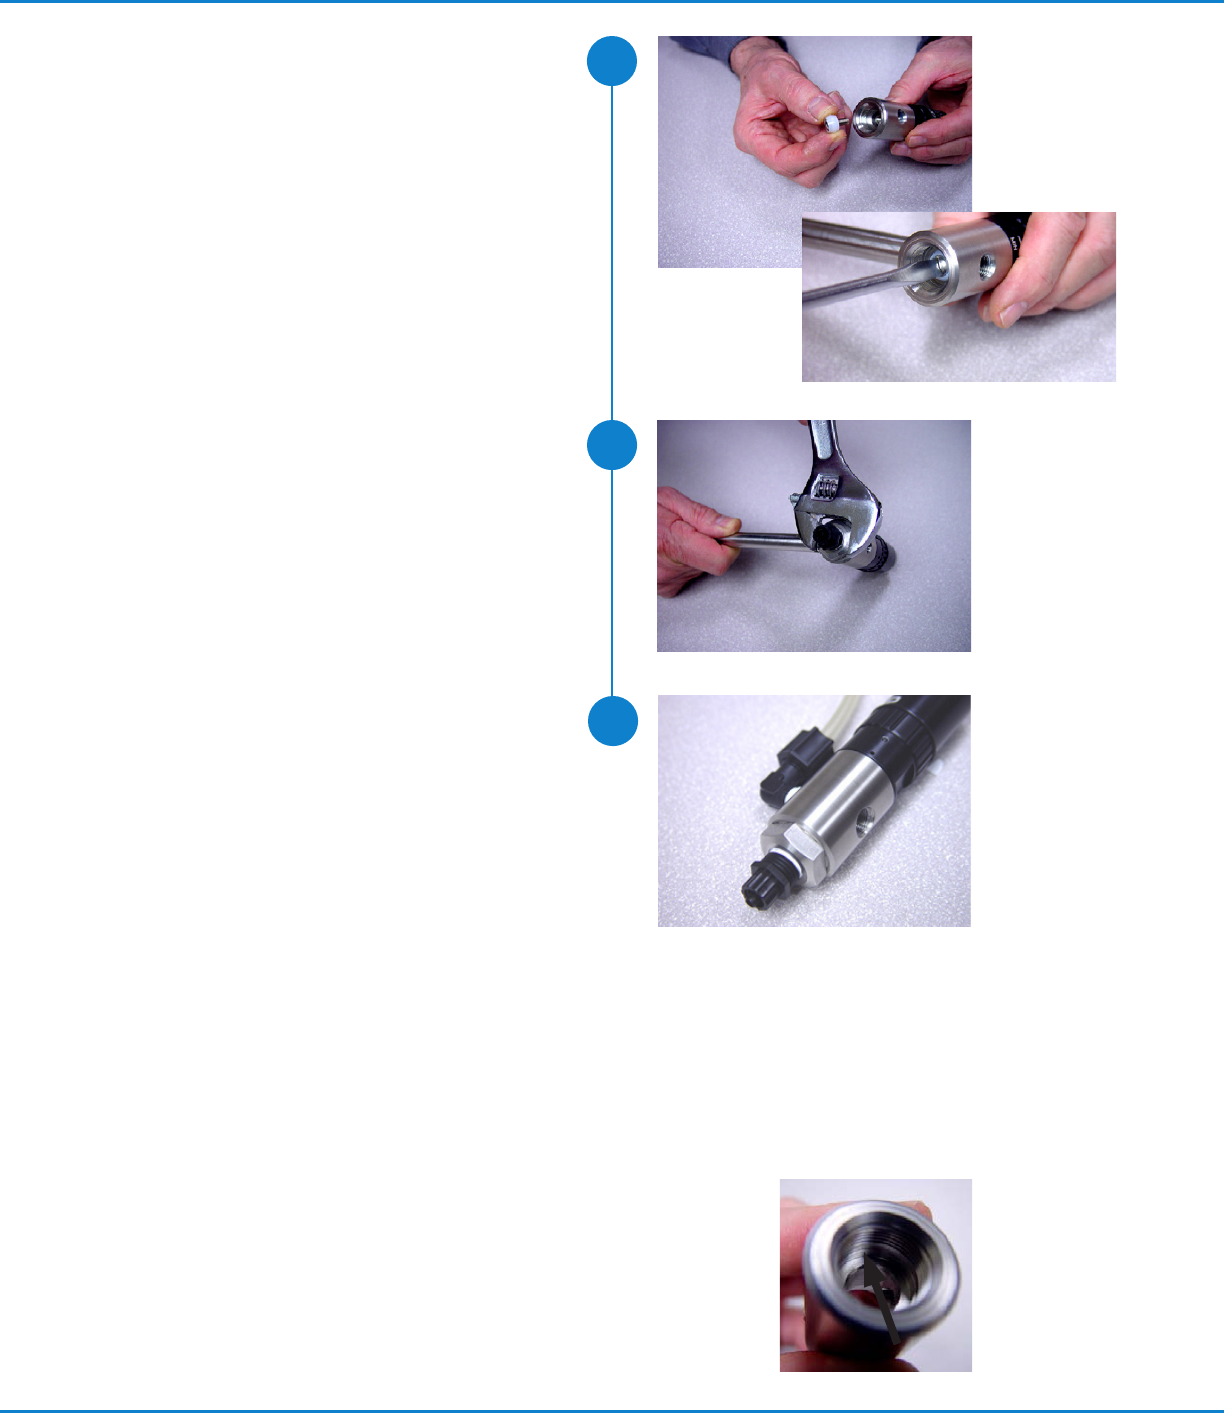
10. Install the sealing head and screw using
the 1/4" flat tip screwdriver. If a torque
screwdriver is available, proper torque is
1.69 nm (15 in lbs).
11. Install and tighten the fluid body cap
using the 1/8 NPT rod and 8" adjustable
wrench. Remove the 1/8 NPT rod.
The valve is now fully assembled and
ready for testing.
12. Pressure test the valve.
• Pressure test the valve by applying 100
psi (7.0 bar) air pressure to the fluid inlet.
• Apply soapy water and check for leaks
at the fluid outlet and the small vent hole
above the diaphragm.
If you have followed all of the above steps and the valve has passed the leak test:
Congratulations on a job well done! You have successfully reconditioned your EFD
725 or 725DA dispense valve and can look forward to many millions of consistent dispensing
cycles.
If the valve leaks after reassembly, proceed as follows:
Leaking at fluid outlet: Check the tightness of the sealing head
screw. If the screw is tight, remove and check the surface of the fluid
chamber seat for pitting. If pitted, replace the fluid body.
Leaking at vent hole: Disassemble the valve and review Steps 7–9 to
make sure the shaft and fluid body are tight.
725D / 725DA Dispense Valve | Tech Support Guide
7www.nordsonefd.com info@nordsonefd.com +1-401-431-7000 Sales and service of Nordson EFD dispensing systems are available worldwide.