00197458-01_UG_EDM_V2.2_en.pdf - 第15页
EDM V2.2 / U ser Guid e Ausgabe 10/2013 E dition 15 4 Working w ith SI PLAC E EDM This c hapter describ es the typica l SIPL ACE ED M workf low . 4.1 EDM Master Service The EDM m aster s ervice is the s erver com ponent …
EDM V2.2 / User Guide Ausgabe 10/2013 Edition
14
EDM will block a shutdown / system reboot in the following cases:
– a Comment dialog is displayed
– the configuration has unsaved changes
– the Clearing Pool is performing a push, merge, accept or reject operation
3.3 Restarting the EDM Services
The EDM Tool provides a Restart EDM Service command. The user access control (UAC) facility
introduced in Windows Vista requests administrators with restricted access to grant enhanced
permissions before the service is restarted by the operating system. A regular user has the option
of logging in as an administrator temporarily to restart the EDM service.
EDM V2.2 / User Guide Ausgabe 10/2013 Edition
15
4 Working with SIPLACE EDM
This chapter describes the typical SIPLACE EDM workflow.
4.1 EDM Master Service
The EDM master service is the server component of EDM. It replies to queries from EDM line
services and distributes the data in the central SIPLACE Pro database among the lines.
In return, the EDM Master Service accepts change notifications and collects them in the EDM
database. The Clearing Pool can be selectively bypassed (see section 5.1.7).
4.2 EDM Client
The EDM Client enables user interaction on the line. It implements customer specific data
distribution. This user interface implements pull mode and forced pull mode. The push mode
workflow, on the other hand, is based on the EDM Data Transfer Manager and is described in
section 4.3.
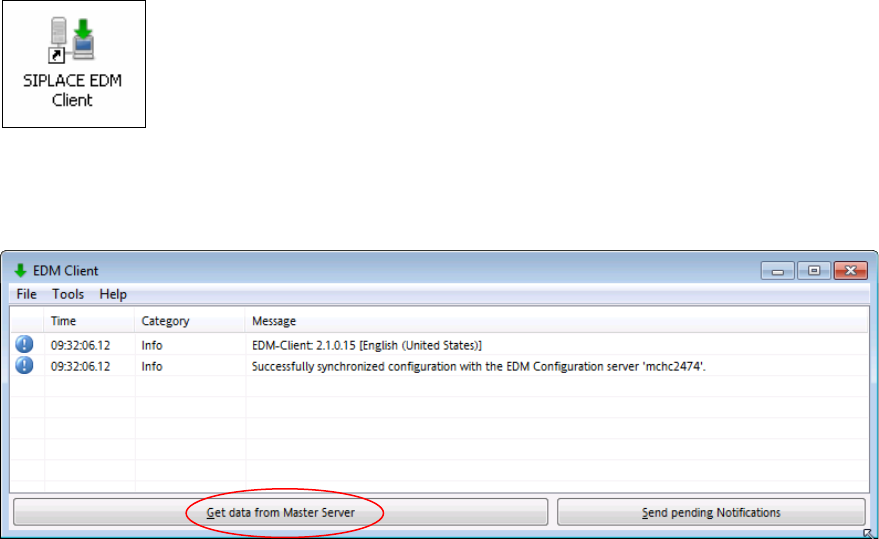
4.2.1 Getting Data from the Master (Pull Mode)
► Double click the icon on your desktop to start the EDM Client.
The EDM Client opens:
Figure 4-1: EDM Client
► Click the Get data from Master Server button.
EDM V2.2 / User Guide Ausgabe 10/2013 Edition
16
The following dialog box opens
(the templates must have been configured on the master beforehand):
Figure 4-2: Selecting application template
► Select the appropriate template from the list.
► Click OK to proceed.
Further information about EDM Templates can be found in section 5.1.6.
The following dialog box opens:
Figure 4-3: Selecting objects
► Select the object you require by checking the check box for the object.
► The filter bar at the bottom of the selection window and the context menu of the selection
window (click the right-hand mouse button) support you when selecting the objects you wish to
pull.
► Confirm your selection by clicking OK.