00196428-0102_AI_Reconfig_Kit_X-Serie_CPP_DE+EN.pdf - 第107页
Head Reconfiguration Kit 2 Assembly Instructions Head Reconfiguration Kit CPP fo r the SIPLACE X Ser ies Issue 03/2010 2.7 Installing the CPP Placement H ead 107 X Adjust the po tentiometer (A) by 2 turns clockwis e a nd…
2 Assembly Instructions Head Reconfiguration Kit CPP for the SIPLACE X Series Head Reconfiguration Kit
2.7 Installing the CPP Placement Head Issue 03/2010
106
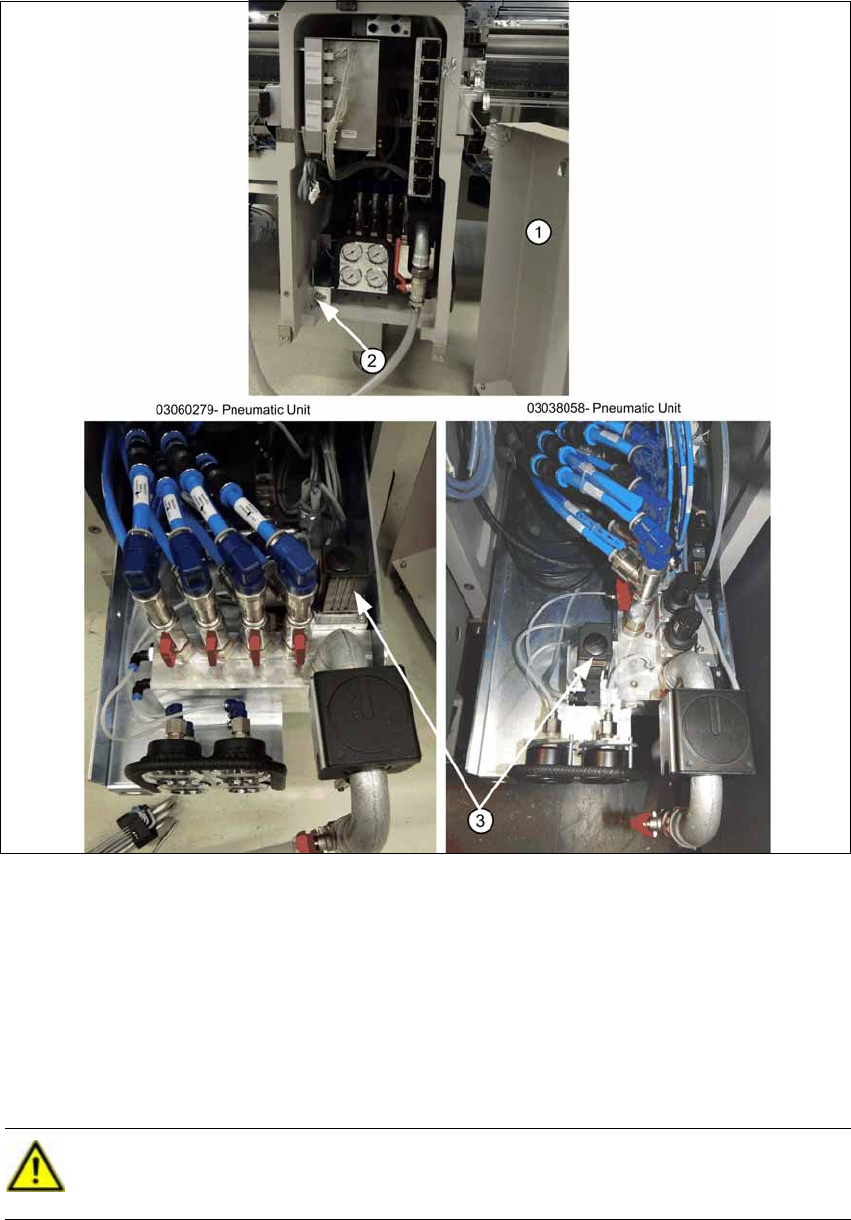
X Open the door (1) above the compressed air supply.
X Disconnect the machine from the compressed air supply.
X Release the module (2) and pull the pneumatic supply out of the machine by about 400 mm.
X Release the connector from the pressure regulator valve (3). To do this, you require a screwdri-
ver.
X Release the cover over the pressure regulation valve (3) and lift it off carefully. To do this, you
require a size 2.5 Allen key.
CAUTION:
The cover is connected to the board below by cables. 2
Head Reconfiguration Kit 2 Assembly Instructions Head Reconfiguration Kit CPP for the SIPLACE X Series
Issue 03/2010 2.7 Installing the CPP Placement Head
107
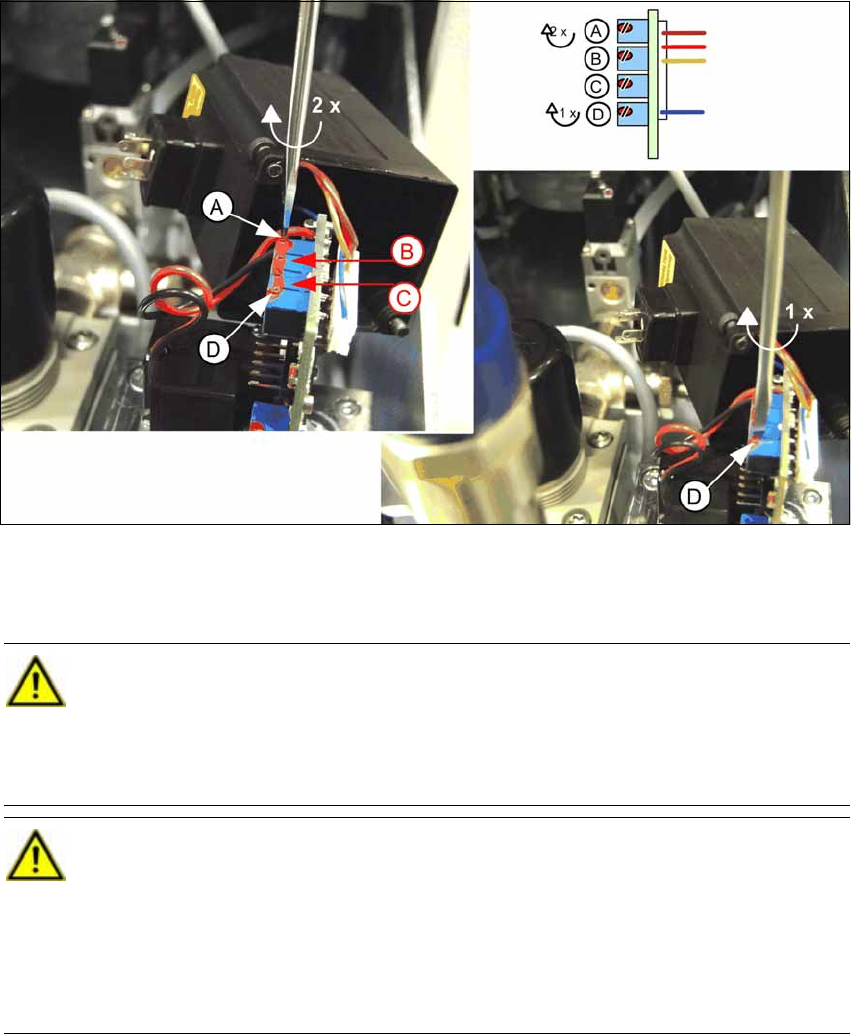
X Adjust the potentiometer (A) by 2 turns clockwise and potentiometer (D) by one turn clockwise.
Use a size 0 screwdriver to do this. The two middle potentiometers (B) and (C) must not be
adjusted under any circumstances..
CAUTION:
The potentiometers are endless rotation potentiometers, i.e. they have no end position.
If the potentiometers are set incorrectly, this setting cannot be restored in the factory.
This can result in sporadic deactivation of the compressed air. In this event, it is only pos-
sible to replace the pneumatic valve by a new one. [03038725-03] 2
CAUTION:
As of FS 03, the correct setting is guaranteed by the manufacturer (expected as of April
2010). This setting is suitable for all head configurations and must not be changed again. 2
At the same time, the pressure valves will be labeled with the SIPLACE item number
clearly indicating FS03. 2
Pressure valves earlier than FS 03 do not bear a label with a SIPLACE item number. 2
2 Assembly Instructions Head Reconfiguration Kit CPP for the SIPLACE X Series Head Reconfiguration Kit
2.7 Installing the CPP Placement Head Issue 03/2010
108
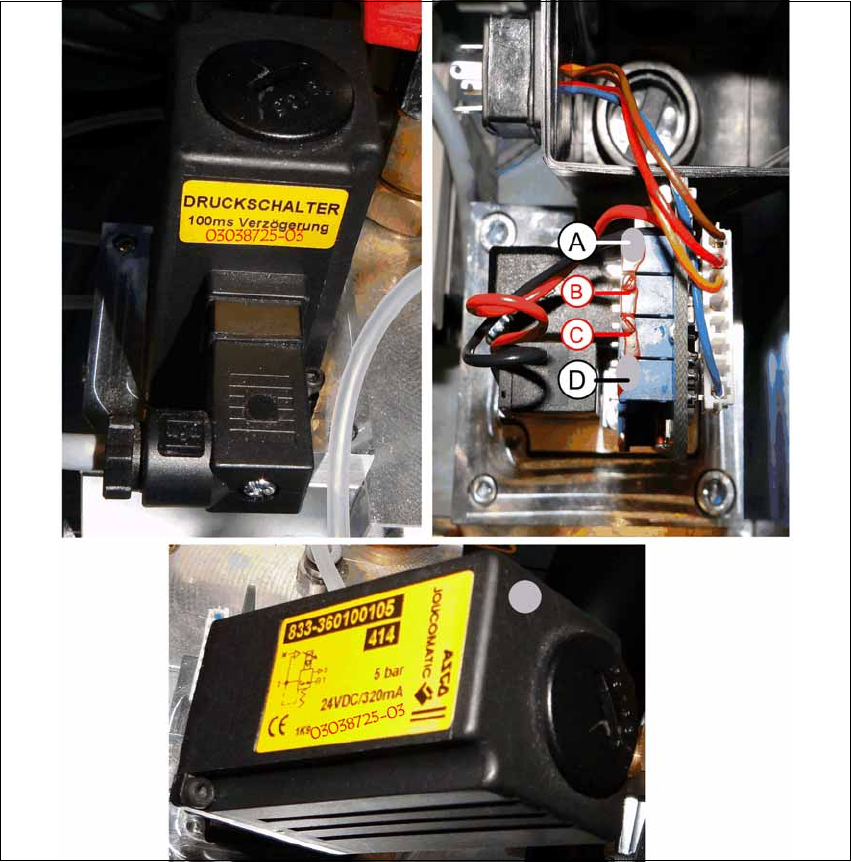
X Mark the adjusted potentiometers (A) and (D) with gray screw locking varnish [00318199-xx].
X Screw the cover back on to the valve and plug in the connector again.
X Also mark the pressure regulation valve with gray screw locking varnish and write the item
number and the new FS 03038725-03 on the existing label.
X Carefully push the pneumatic module back into the machine and secure it with the screw.
X Reconnect the compressed air supply and close the cover over the pneumatic supply.