00198260-01_IM_SQL_Server_2016_EN.pdf - 第38页
SQL Server 2016 / I nstallation Manual 12/2016 Edition 38 SQL Server 2016 Man agement Studio connects to t he SQL instance. Figure 5-13: Selecting Properties of the SQL instance ► On the left side of t he window, click t…
SQL Server 2016 / Installation Manual 12/2016 Edition
37
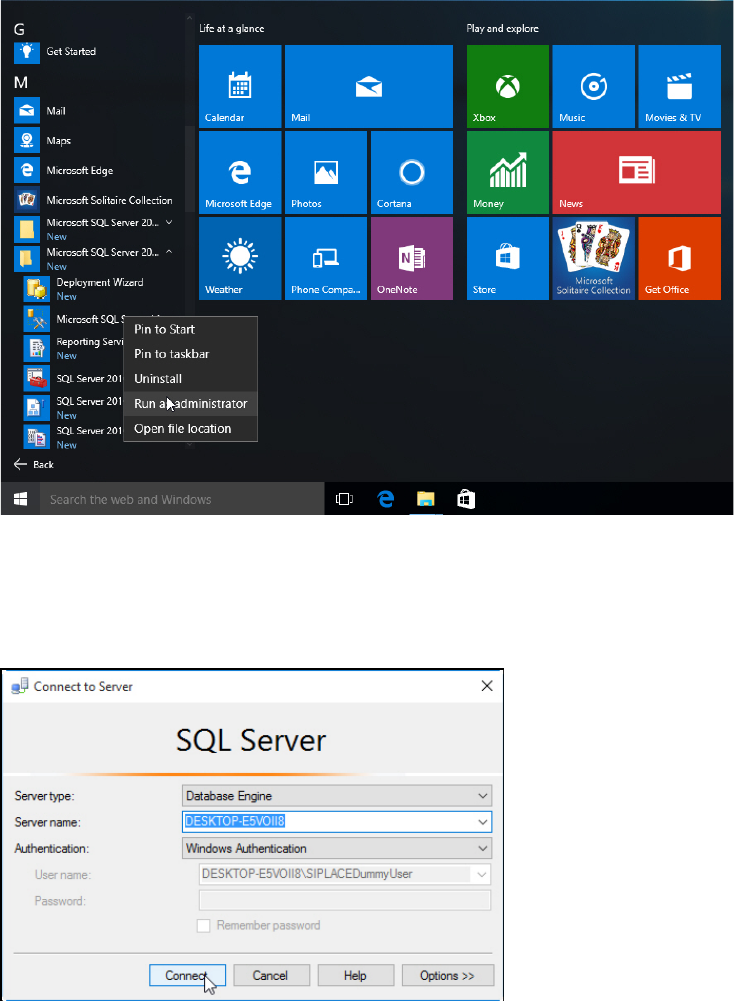
► Right- click the Microsoft SQL Server 2016 Management Studio.
Figure 5-11: Starting SQL Server 2016 Management Studio
► Select Run as administrator.
► Accept any possibly appearing User Account Control message by clicking its Yes button.
SQL Server 2016 Management Studio starts and the Connect to Server window is displayed.
Figure 5-12: Connecting to the SQL instance
► Ensure that the correct SQL instance is entered as Server name:.
The correct naming is <ComputerName>\<InstanceName> for user defined instances. If you
installed a default SQL instance (internal name MSSQLSERVER), you only have to enter the
computer name instead.
► Select the appropriate authentication method. If you have installed SQL correctly giving the
administrators group full permissions, you may use Windows Authentication.
► If you select SQL Authentication, enter the sa user name and the appropriate password.
► Click Connect to connect to the SQL instance.
SQL Server 2016 / Installation Manual 12/2016 Edition
38
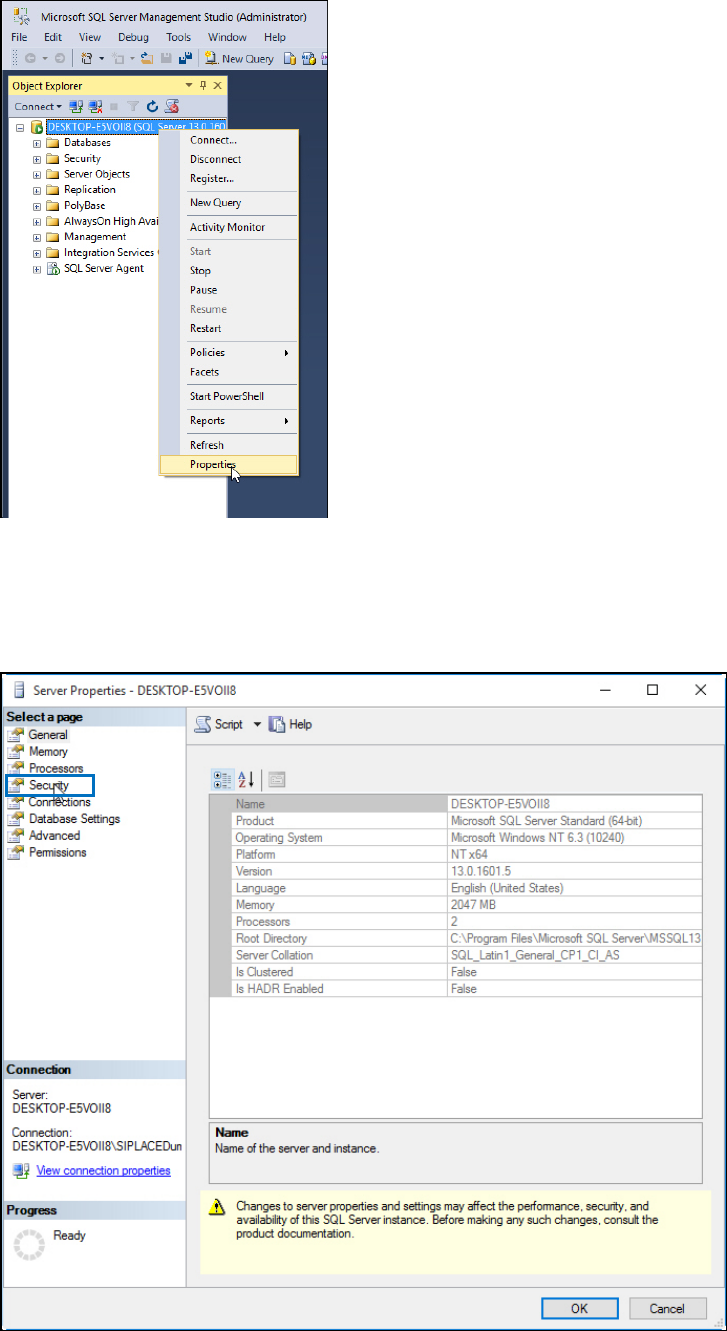
SQL Server 2016 Management Studio connects to the SQL instance.
Figure 5-13: Selecting Properties of the SQL instance
► On the left side of the window, click the SQL instance you have connected to select it.
► Right- click and select Properties.
The Server Properties window is displayed.
Figure 5-14: Server Properties
► Click Security in the Select a page section.
SQL Server 2016 / Installation Manual 12/2016 Edition
39
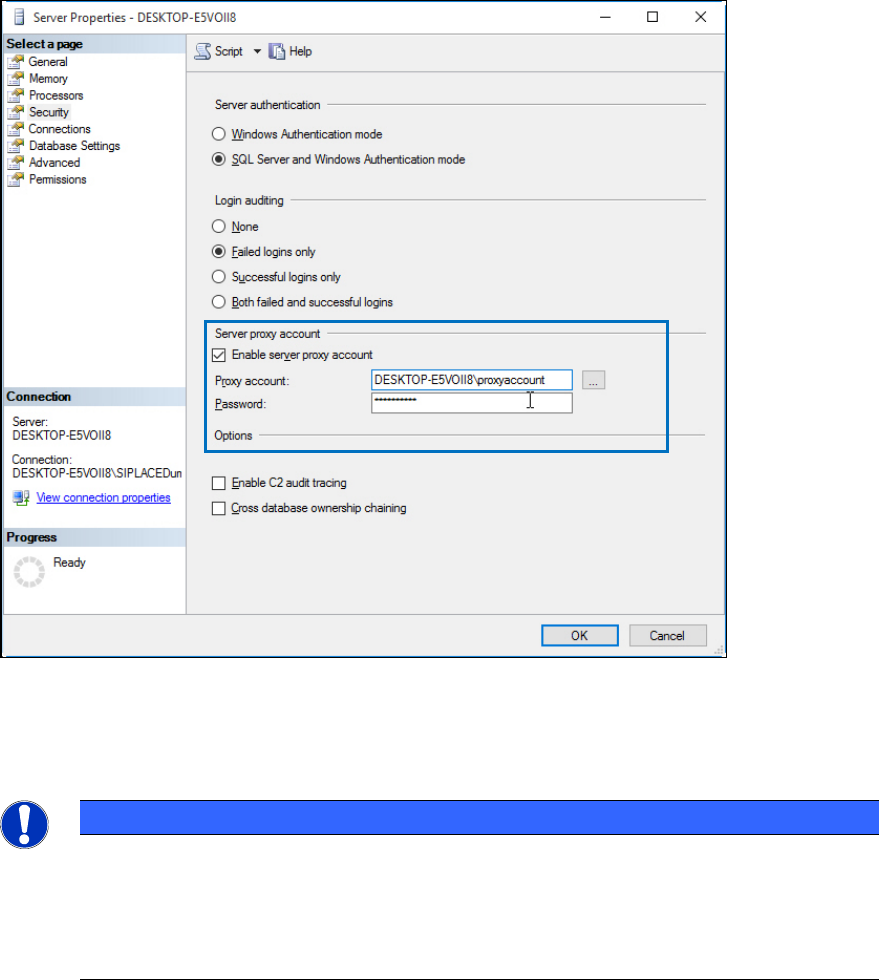
Figure 5-15: Security options – defining proxy account
► Select the Enable server proxy account check box.
► Enter your proxy account information.
NOTICE
See product documentation for details
Since this is only a general SQL installation documentation, we cannot provide further
information on the proxy account to be used! Please refer to the documentation of your
ASM product to get more information if this setting is required and which account you
have to specify.
► Click the OK button.