ISM-1100_INM.pdf - 第8页
Quick reference handbook Barcode Reader software Quick reference handbook Barcode Reader software rev_6 Edition 06/2017 - Reproduction forbidden Page 8 Choosing the “Multiple ree ls options” option, it is possible to che…
Quick reference handbook Barcode Reader software
Quick reference handbook Barcode Reader software rev_6 Edition 06/2017 - Reproduction
forbidden
Page 7
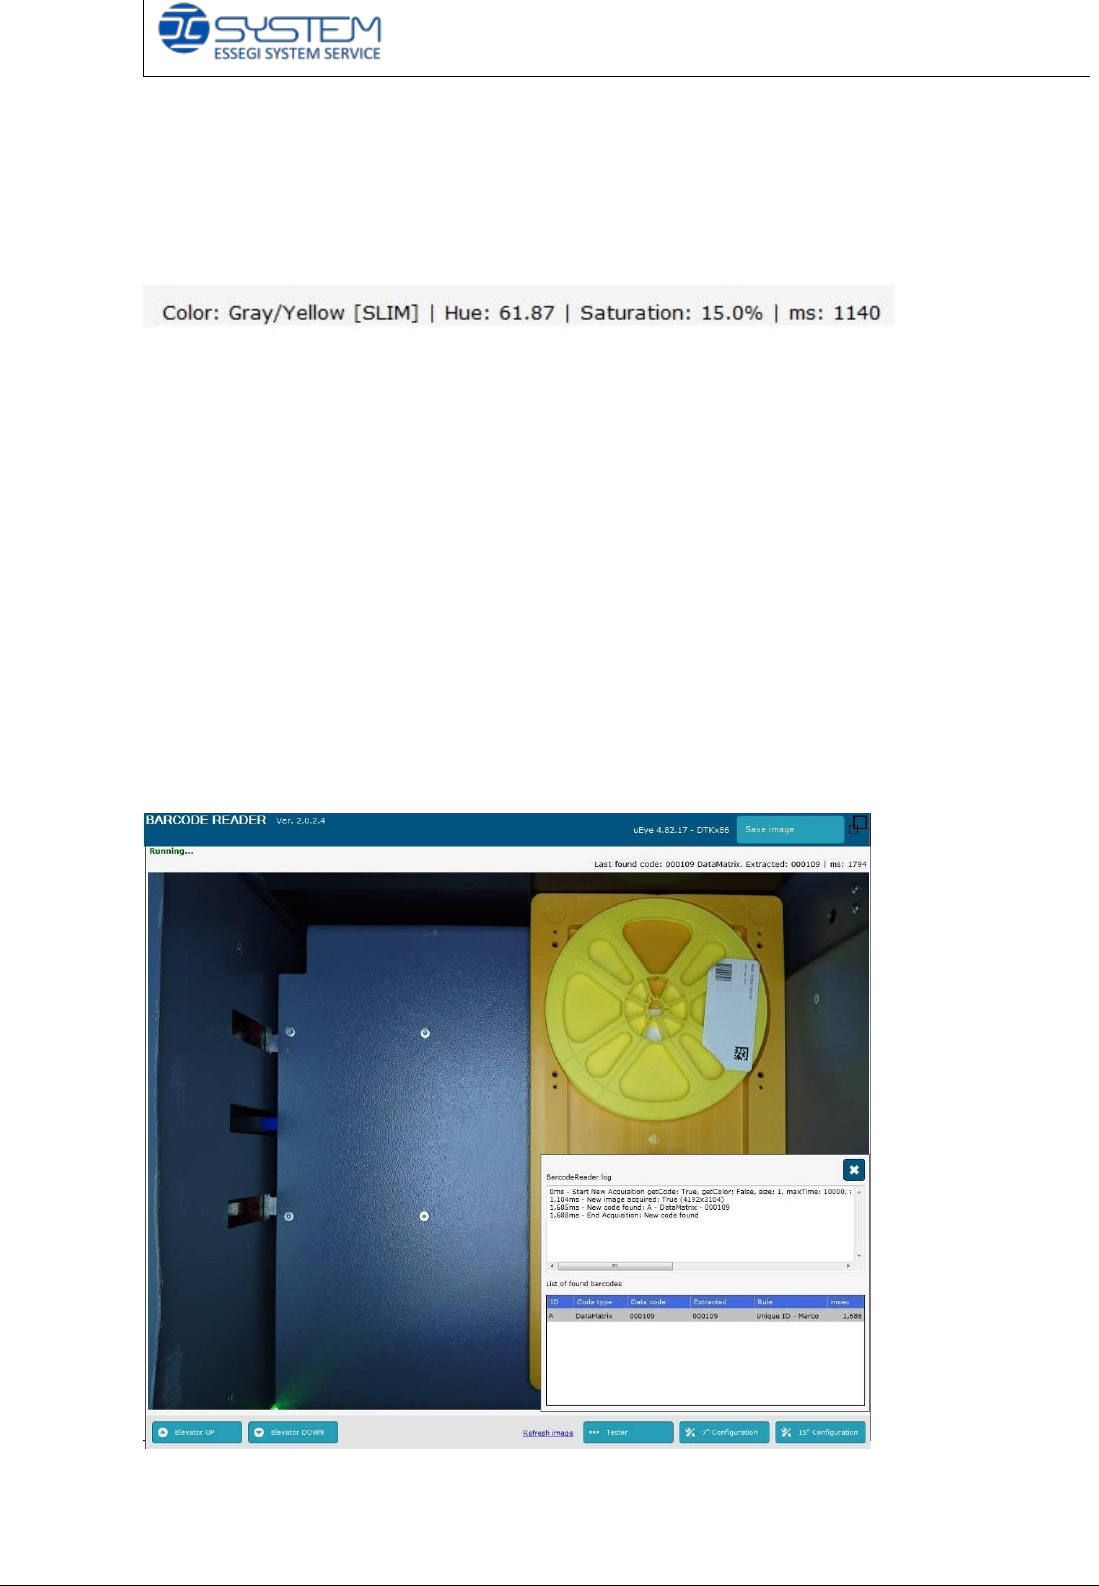
7” or 15” Configuration: it sets up the parameters for reading the code on the
7” reels or 15” reels.
Only for ISM1100/ISM2000, in the upper right corner, these following details will
be shown:
Colour: it indicates the colour of the case and the size
HUE: it indicates the chromatic scale
Saturation: it indicates the saturation of the colour
ms: it indicates how long the camera takes to find the colour in millisecond
In Ultraflex 3600 machine, the cases have the same colour because the material
is ESD and it is always yellow.
In each case, there could be two reels (7”A and 7”B) and in the middle side the
operator can place other material.
To test about the reading of the barcode, you have to use the TESTER button.
After clicking the TESTER button and choosing the area to check, a new window
will appear on the bottom-right side which shows all information about the
barcodes in the selected area.
Quick reference handbook Barcode Reader software
Quick reference handbook Barcode Reader software rev_6 Edition 06/2017 - Reproduction
forbidden
Page 8
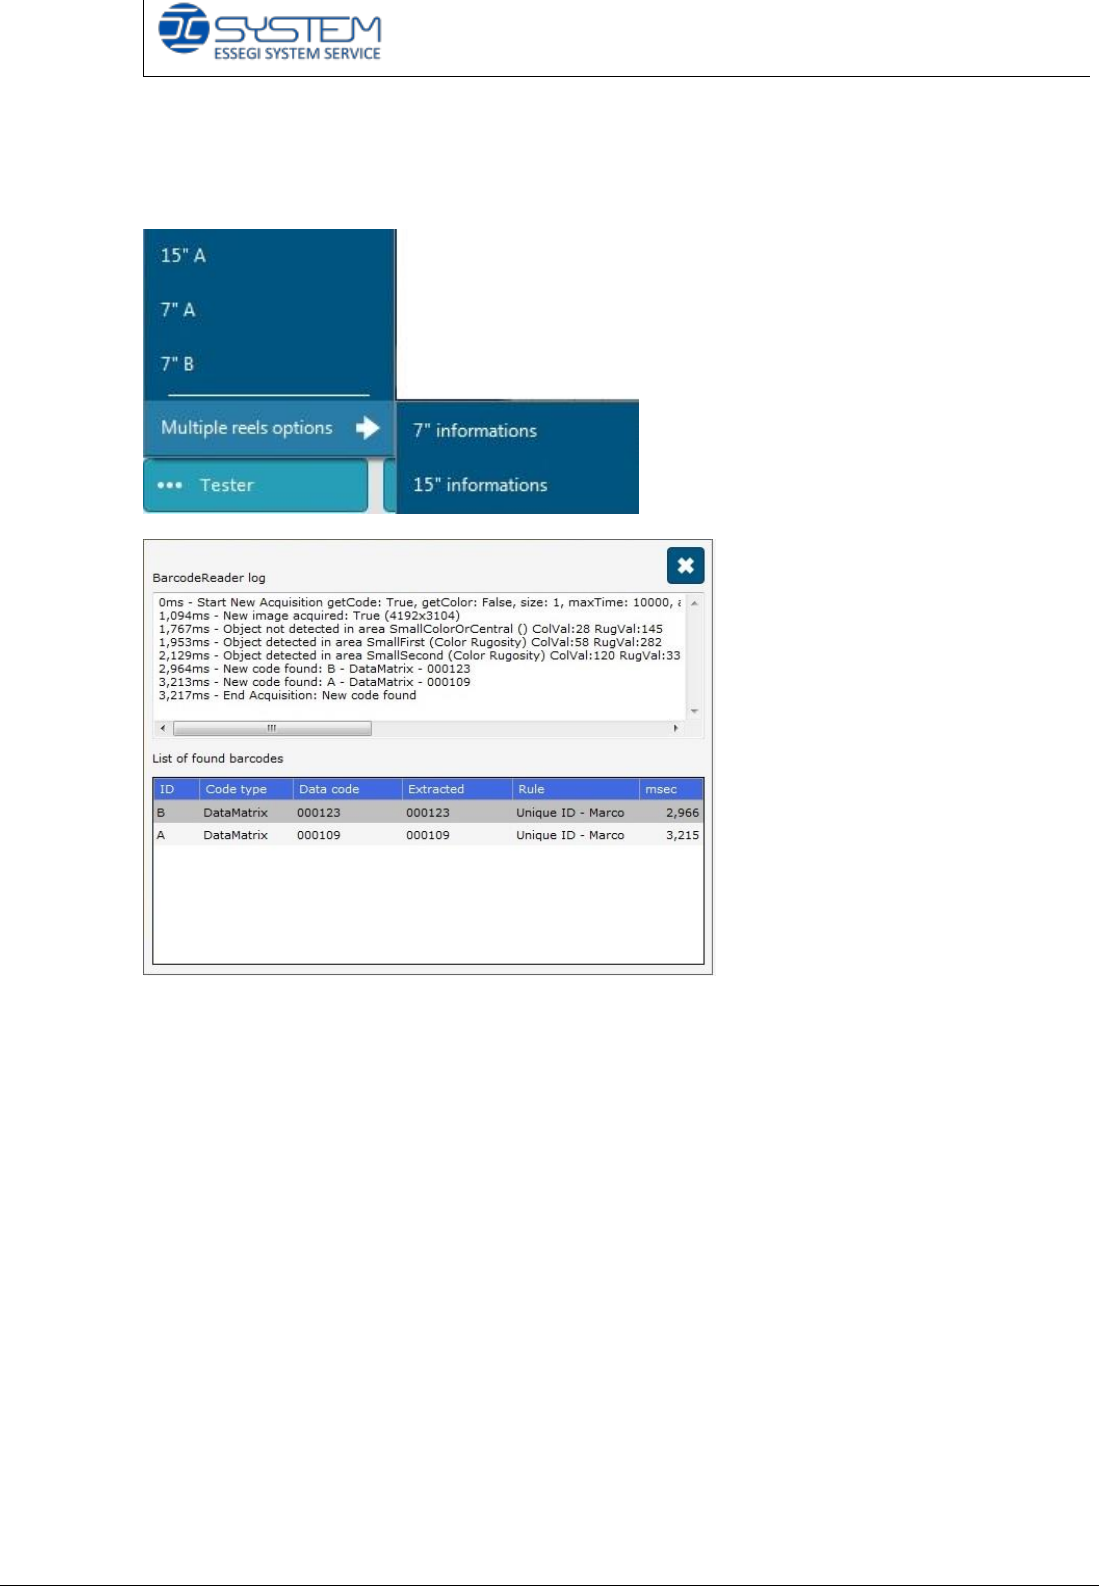
Choosing the “Multiple reels options” option, it is possible to check information
about the reels located in the 7” or 15” areas.
At bottom-right side, there is information about the found barcode regarding:
- ID: area which indicates the position of the barcode.
- Code type: it shows the type of the barcode (Datamatrix, Qrcode, ecc)
- “Data code”: it shows the code found from the barcode.
- “Extracted”: it indicates the extracted code from the rules set in the barcode
settings tab.
- “Rule”: it indicates which type of information associated to the rule
- msec: it shows the time to read the barcode.
Quick reference handbook Barcode Reader software
Quick reference handbook Barcode Reader software rev_6 Edition 06/2017 - Reproduction
forbidden
Page 9
STEP 3
BARCODE CONFIGURATION
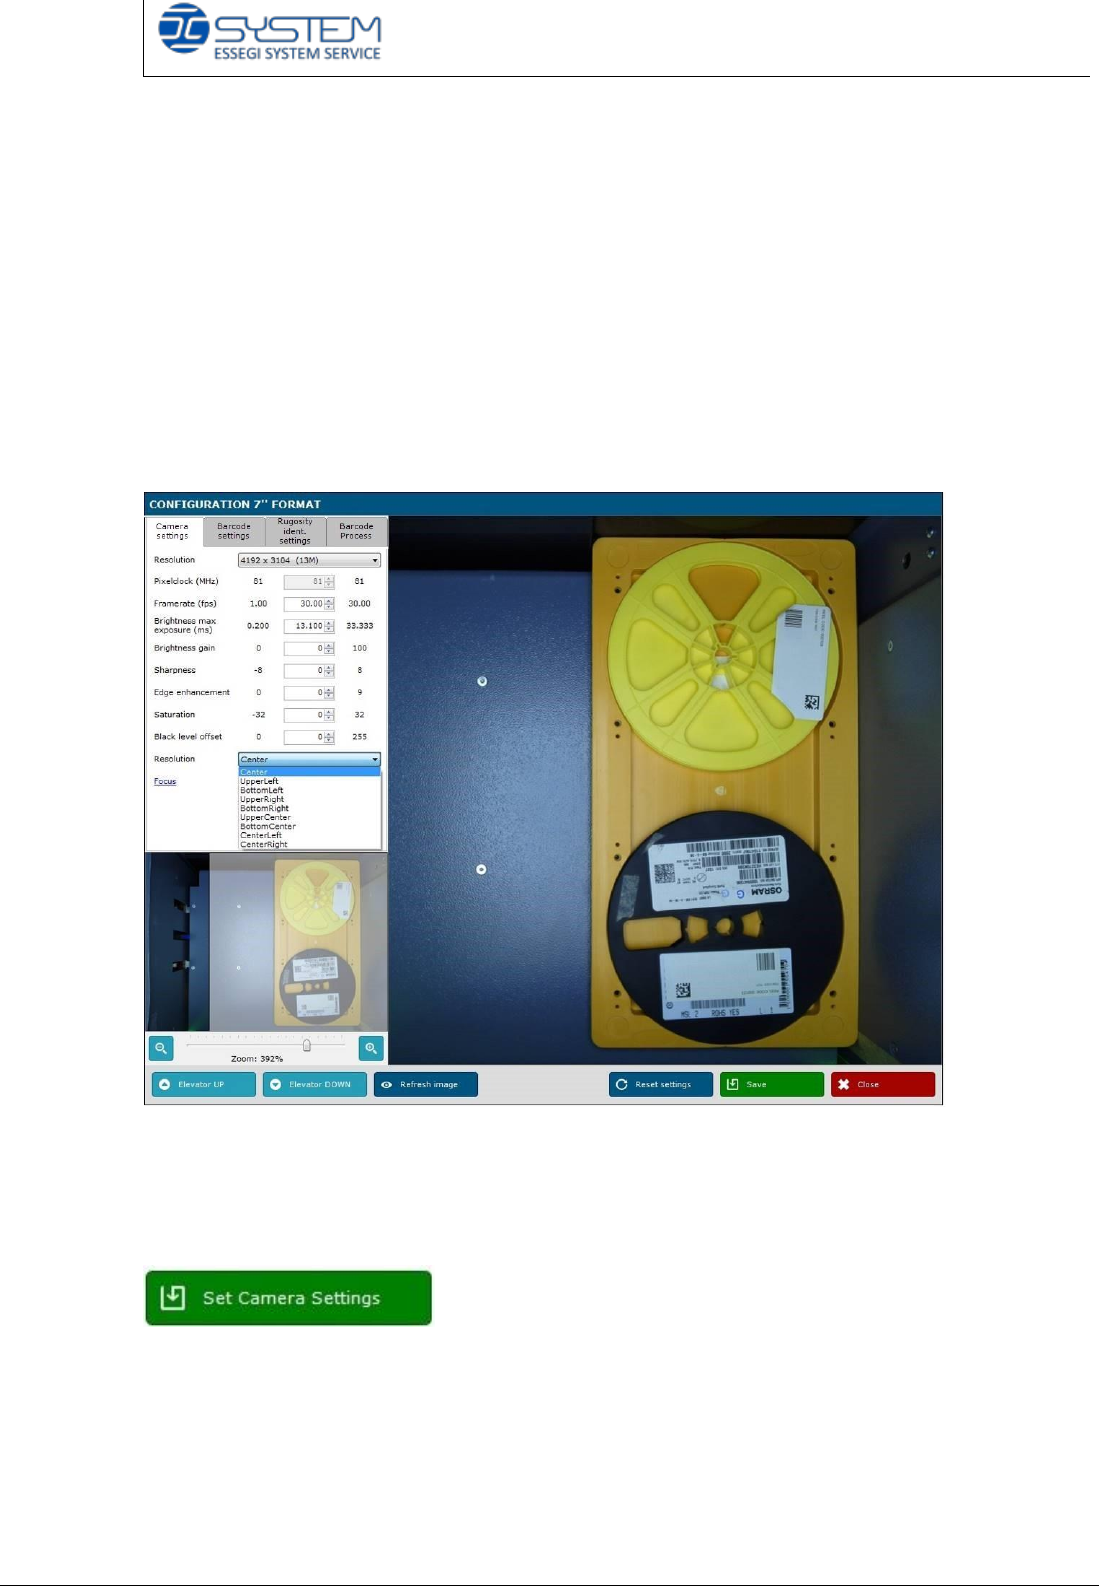
By clicking the button “7 Configuration” or “15 Configuration”, you automatically
open the AutoSMD BarcodeReader software configuration window.
On the right side of this window, there are four tabs:
- Camera settings
- Barcode settings
- Roughness identification settings
- Barcode process.
A little lower on the left side, you can find the “Elevator UP/DOWN” buttons and
the whole image of the reel. To see the specifics about the barcode label, move
the little square on the code required.
The “Set Camera Settings” button is needed to save the camera settings.