00197279-03_SM_Glue-Feeder_EN.pdf - 第38页
Replacing Spare Parts Jet Block (Spare Fluidic) 3.13.1 Removing the Jet Block 38 Service Manual SIPLACE Glue Feeder 3.13 3 . 1 3 J e t B lo c k ( S p a r e F lu id ic ) Jet Block (Spare Fluidic) Required spare parts Spar…
Replacing Spare Parts
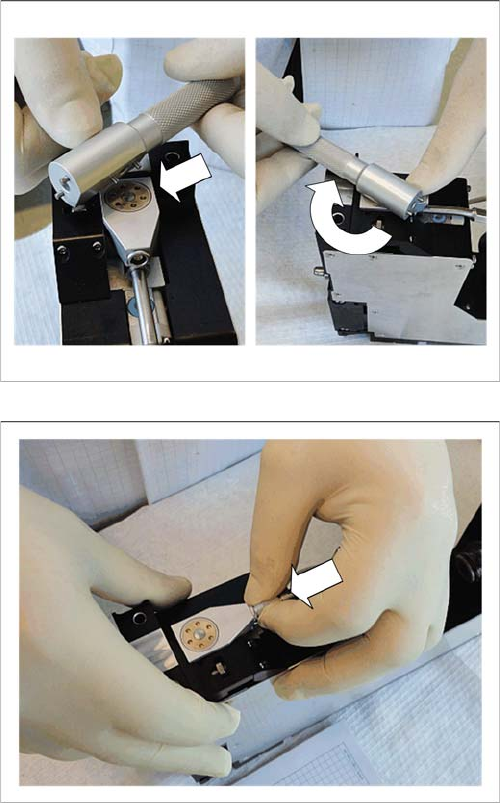
3.12.2 Fitting the Dispenser Nozzle Dispenser Nozzle
Service Manual SIPLACE Glue Feeder 37
► Fit the union nut onto the dispenser nozzle.
► Position the two lugs of the special tool into the two
holes in the union nut.
► Tighten the union nut by turning it clockwise.
► Insert the heating connector into the nozzle heating,
up to the stop.
Replacing Spare Parts
Jet Block (Spare Fluidic) 3.13.1 Removing the Jet Block
38 Service Manual SIPLACE Glue Feeder
3.13
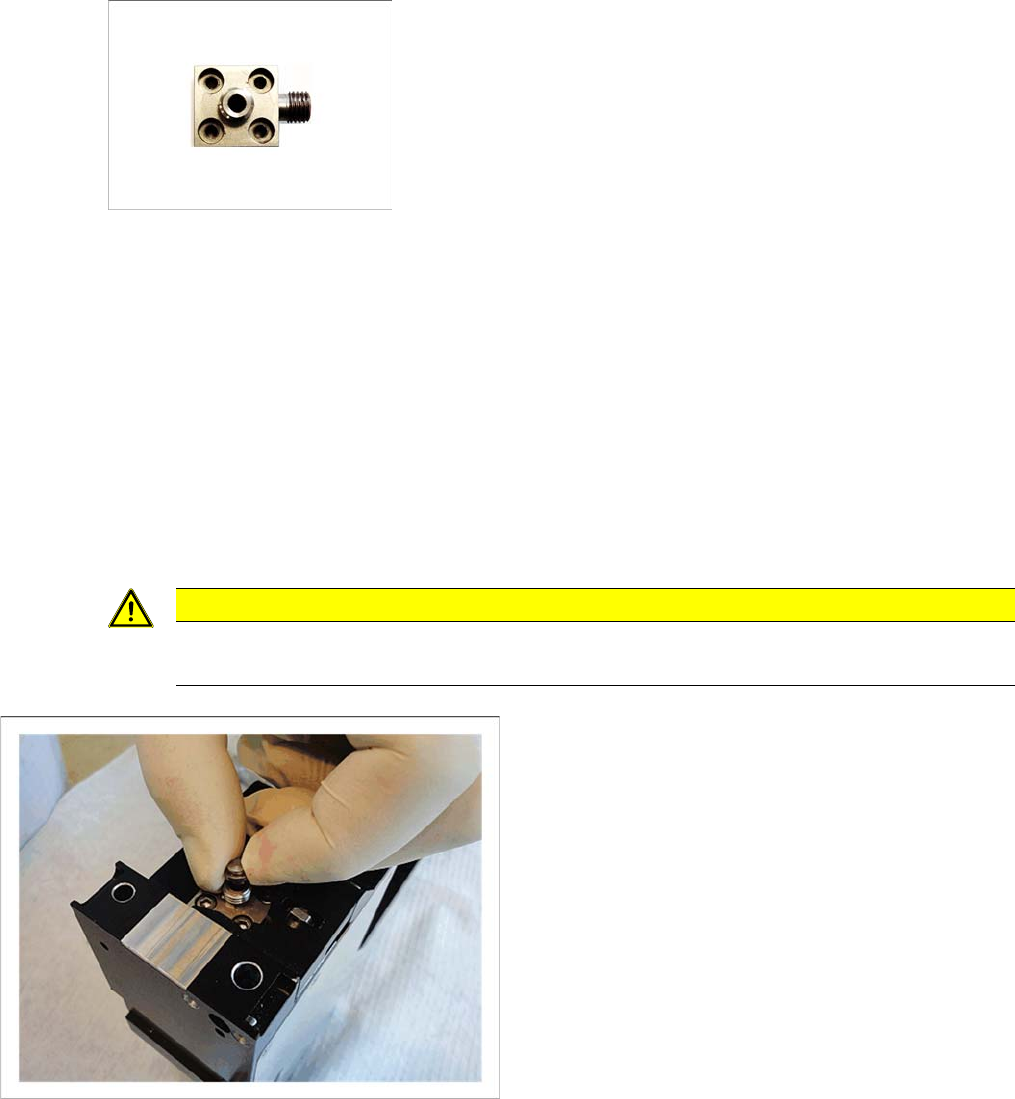
3.13 Jet Block (Spare Fluidic)
Jet Block (Spare Fluidic)
Required spare parts
Spare fluidic, item no. 03094177-xx
Tools and equipment required
▪ Open-ended wrench, size 8
▪ Heating key (on the glue feeder)
▪ Antistatic tweezers, item no. 00377394-01 (service kit)
▪ Allen key size 2.5
▪ Disposable protective gloves
▪ 2 O-rings for plunger
▪ Grease (Barrieta L55/3)
3.13.1
3.13.1 Removing the Jet Block
Removing the Jet Block
CAUTION
Poisonous and hazardous substances
To avoid direct contact with the glue, always wear protective gloves during this work.
► Remove the cartridge pipe, nozzle heating and car
-
tridge into place (see "3.11.1 Removing the Cartridge
Pipe" [ ➙ 29])
► Lift the dispenser nozzle off the jet block.
Replacing Spare Parts
3.13.1 Removing the Jet Block Jet Block (Spare Fluidic)
Service Manual SIPLACE Glue Feeder 39
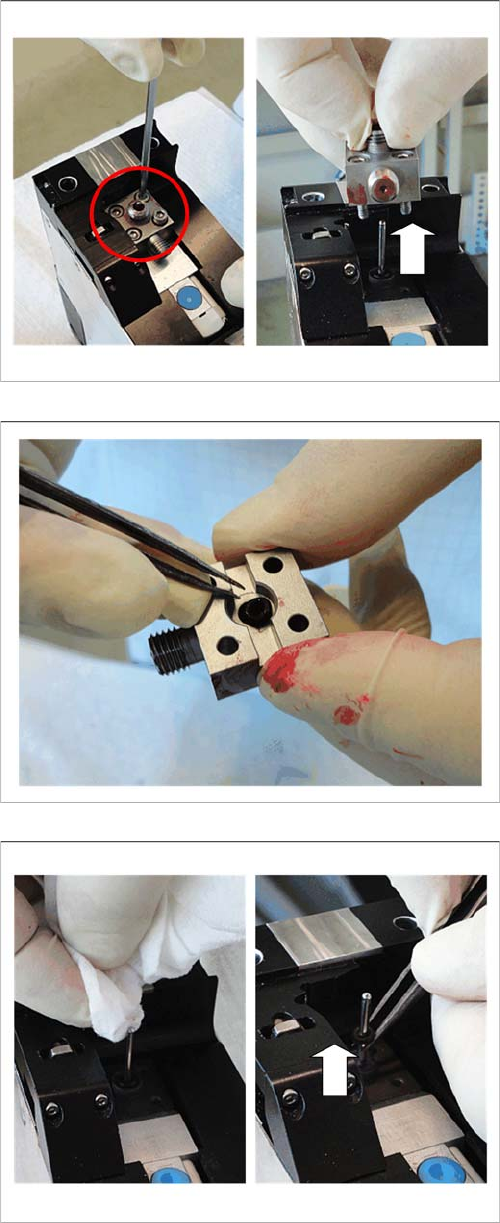
► Loosen the 4 screws which fasten the jet block.
► Carefully lever the jet block vertically up and off the jet
plunger.
► Turn the jet block so that the underside is at the top.
► Use a pair of antistatic tweezers to help you remove
the O-ring.
► Use a lint-free cloth with a little glue remover and
clean the jet plunger.
► Use a pair of antistatic tweezers to pull the O-ring up
and over the jet plunger.