00198503-02_IM_SIPLACE_Pro_15.1_R18-1_EN.pdf - 第50页
SIPLACE Pro 15.1 (R18 - 1) / Installat ion Manual 05/2018 Edition 50 Figure 7-6: Confirming deletion ► Accept the confirm ation message by cli cking Yes . ► After that perform a new installation of SIPLACE Pro, but ensur…

SIPLACE Pro 15.1 (R18-1) / Installation Manual 05/2018 Edition
49
If it exists, perform the following actions:
Figure 7-4: Shutting down component
► - Right-click the component and select Shut down.
Figure 7-5: Deleting component
► Right-click the component and select Delete.
SIPLACE Pro 15.1 (R18-1) / Installation Manual 05/2018 Edition
50
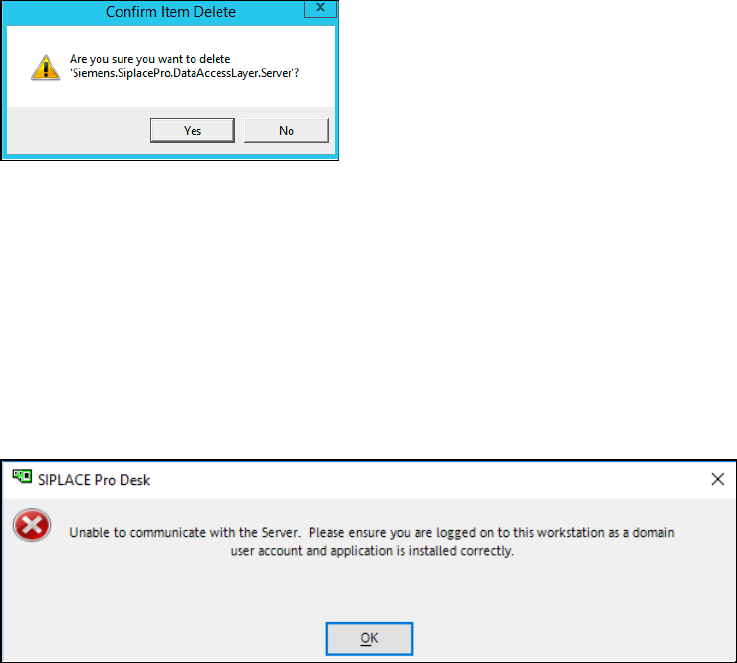
Figure 7-6: Confirming deletion
► Accept the confirmation message by clicking Yes.
► After that perform a new installation of SIPLACE Pro, but ensure you already have stopped
relevant applications and services before, as described above.
7.1.3 Client Server Installation – Client Does Not Open
The following error message may be displayed:
Figure 7-7: Client does not open
There are multiple possible causes for this problem.
► If the account you are currently using is local, please ensure that it also exists on the Server
with the same password.
► Please ensure that the account you have configured during setup for the COM+ component on
the Server also exists on the Client with the same password.
SIPLACE Pro 15.1 (R18-1) / Installation Manual 05/2018 Edition
51
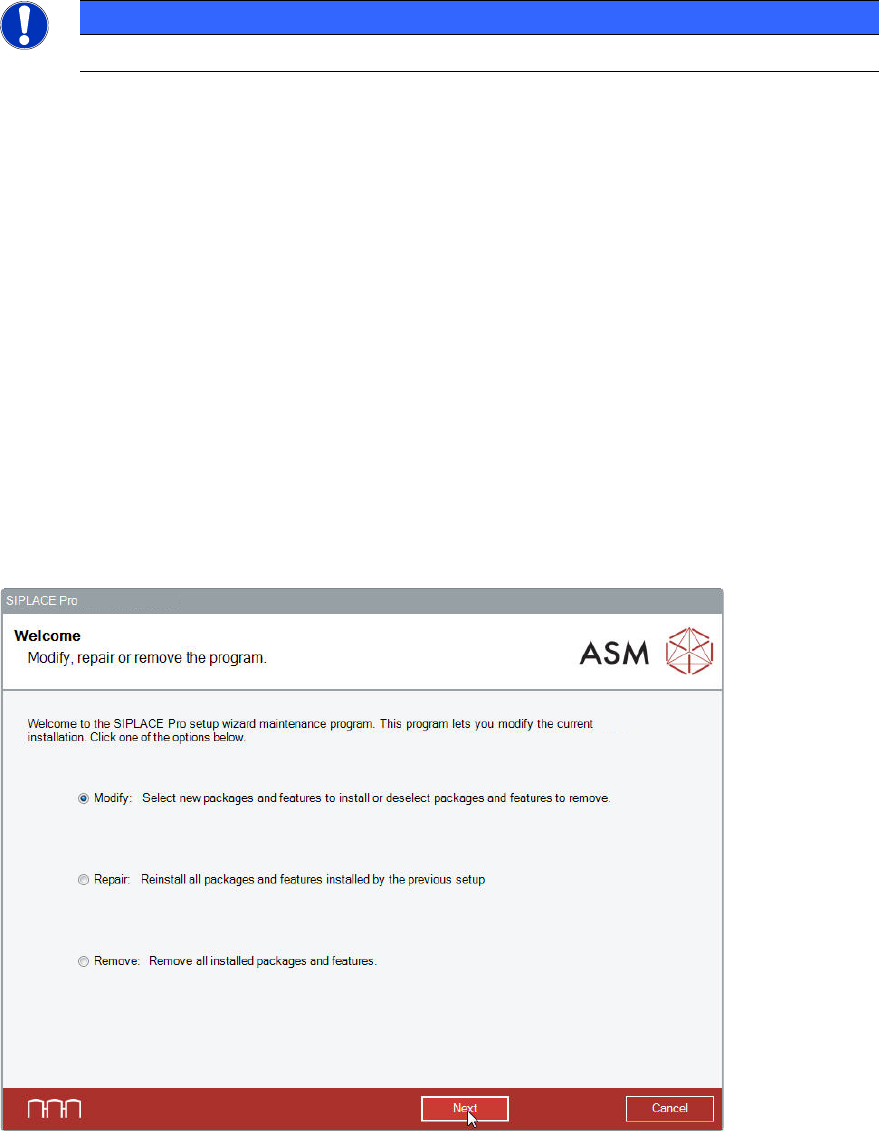
8 Modifying the Installation
The Modify option allows you to change the current installation entries.
NOTICE
You must be logged in as Administrator to change the installation.
8.1 Modifying the SIPLACE Pro Installation
► Log in using an administrative account on the computer.
► Insert the installation media and mount the *.iso file.
► Open Windows Explorer.
► Double-click the BundleInstaller file to modify SIPLACE Pro.
Alternatively, you can start the Modify option as follows:
► Open the Start menu and select Control Panel.
► Select Uninstall a program.
► Click with the right mouse key on the SIPLACE Pro entry in the list of installed programs.
► Select Change from the context menu.
The following dialog is displayed.
Figure 8-1: Modify, repair or remove program