00191471-01.pdf - 第22页
Replacing the Y-Axis Scale Servicing In structions HS-50 01/99 Issue 22 à Put on a pair of pr otective glov es. à S tarting from the right-hand side of the placement system, use the firmer chisel (item 2 in Fig. 3 - 2) t…
Servicing Instructions HS-50 Replacing theY-Axis Scale
01/99 Issue
21
3
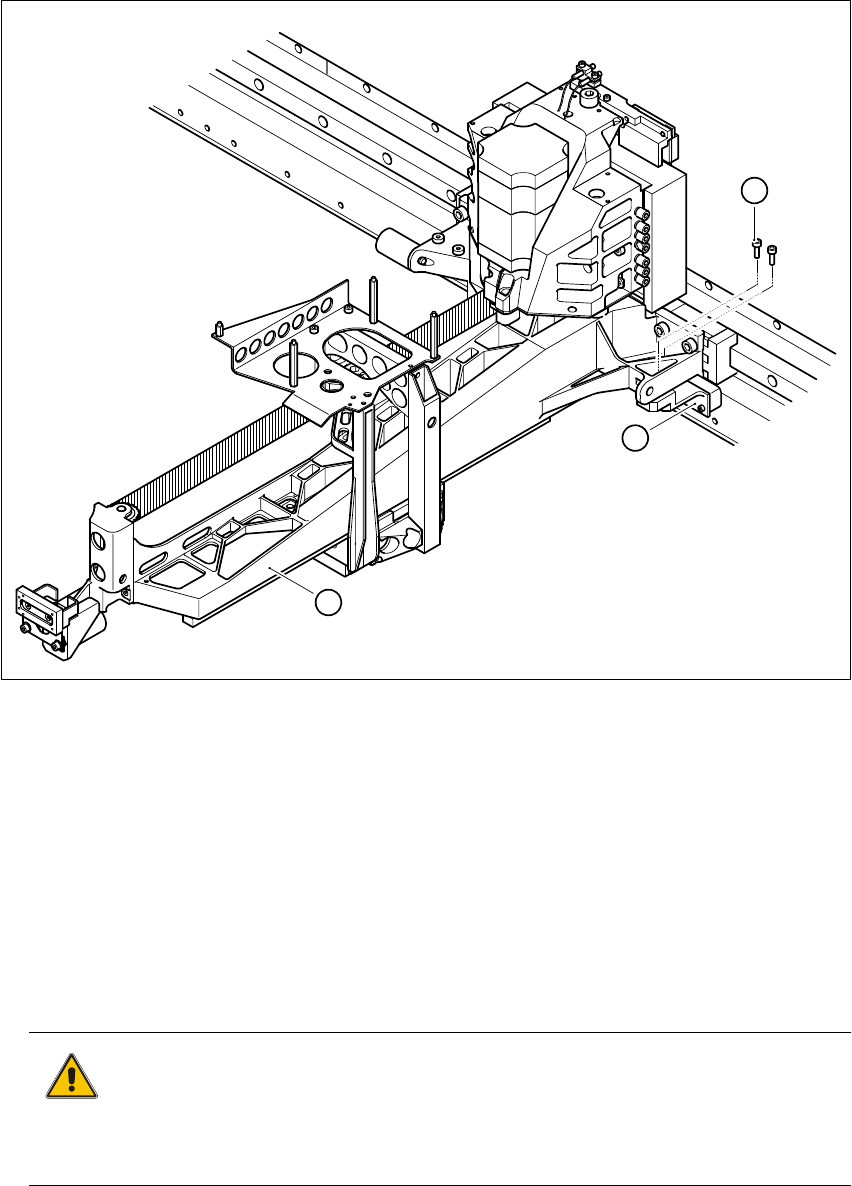
Fig. 3 - 1 Removing the incremental encoder for the y axis
KeytoFig.3-1
(1) Main gantry
(2) 2 x M3 x 10 hexagon socket-head screws
(3) Incremental encoder, y axis
3
à Loosen the two M3 x 10 hexagon socket-head screws (item 2 in Fig. 3 - 1).
à Attach the incremental encoder to the main gantry using cable ties.
CAUTION 3
When you remove the incremental encoder, make sure that you do not damage its scanning
surface. 3
à Push the two main gantries to the left.
3
1
2
Replacing the Y-Axis Scale Servicing Instructions HS-50
01/99 Issue
22
à Put on a pair of protective gloves.
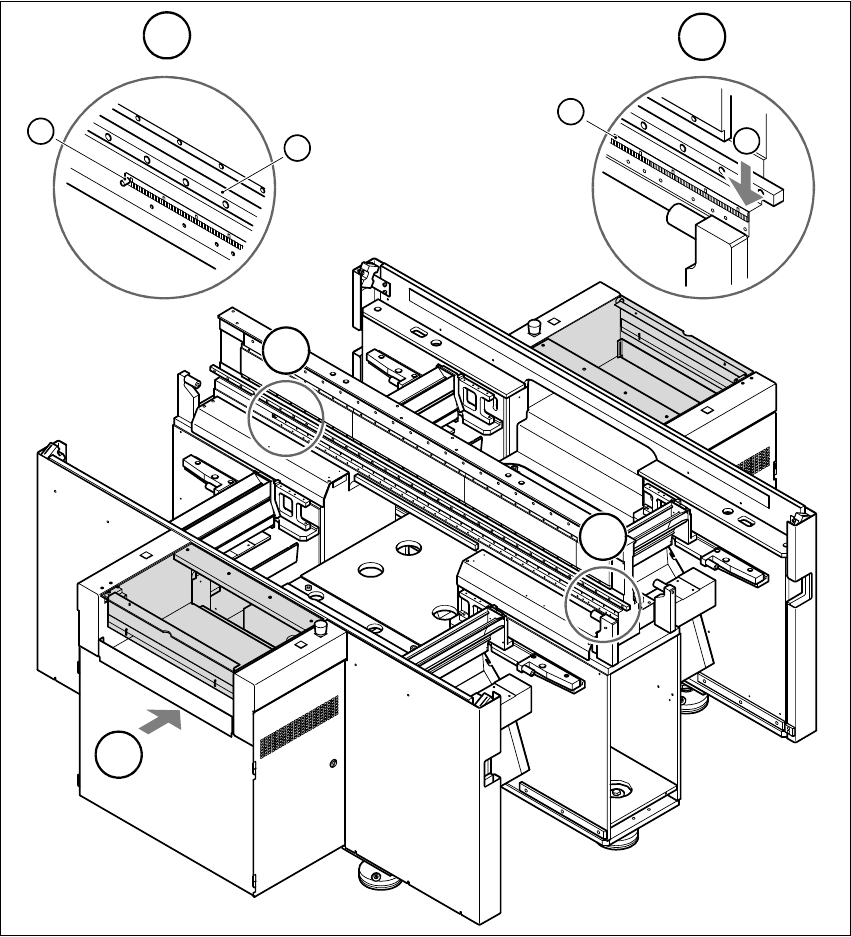
à Starting from the right-hand side of the placement system, use the firmer chisel (item 2 in Fig.
3 - 2) to detach the y axis scale (item 1 in Fig. 3 - 2) from the contact surface. Work along the
scale until you reach the two main gantries on the left-hand side.
3
Fig. 3 - 2 Removing the y axis scale
(1) Scale for the y axis (2) Starting point for firmer chisel
(3) Sleeve (4) Guide rail of y axis recirculating ball screw unit
T PCB transport direction 33
T
B
A
B
3
4
A
1
2
Servicing Instructions HS-50 Replacing theY-Axis Scale
01/99 Issue
23
à Push the two gantries to the right so that you can detach the rest of the scale.
CAUTION 3
When working near the sleeve (item 3 in Fig. 3 - 2), use the firmer chisel carefully so as not
to damage the sleeve. 3
à Remove the scale.
CAUTION 3
Be careful not to catch or twist the scale when you remove it. 3
à Use the firmer chisel to remove glue residues from the contact surface.
à Remove any remaining glue residues with the multiflex pad.
à Clean the contact surface using a lint-free cloth impregnated with ethyl alcohol.
ATTENTION 3
The contact surface has to be totally free of glue residues. 3
3
3