CP45松下驱动器部分.pdf - 第4页
9. Motor & Driver Ver. Date CP45 CP45NEO 00 2004/11 O O 9-2 Fig.9-2-2-1 Communicate w ith Amp Fig.9-2-2-2 Select Amplifier type Fig.9-2-2-3 Connect to Amp.
9. Motor & Driver
Ver. Date CP45
CP45NEO
00 2004/11 O O
9-2
9-2 panasonic Motor Driver(=Amplifier) of Parameter Load/Unload
9-2-1 Connection of Panasonic Motor Amplifier and Computer
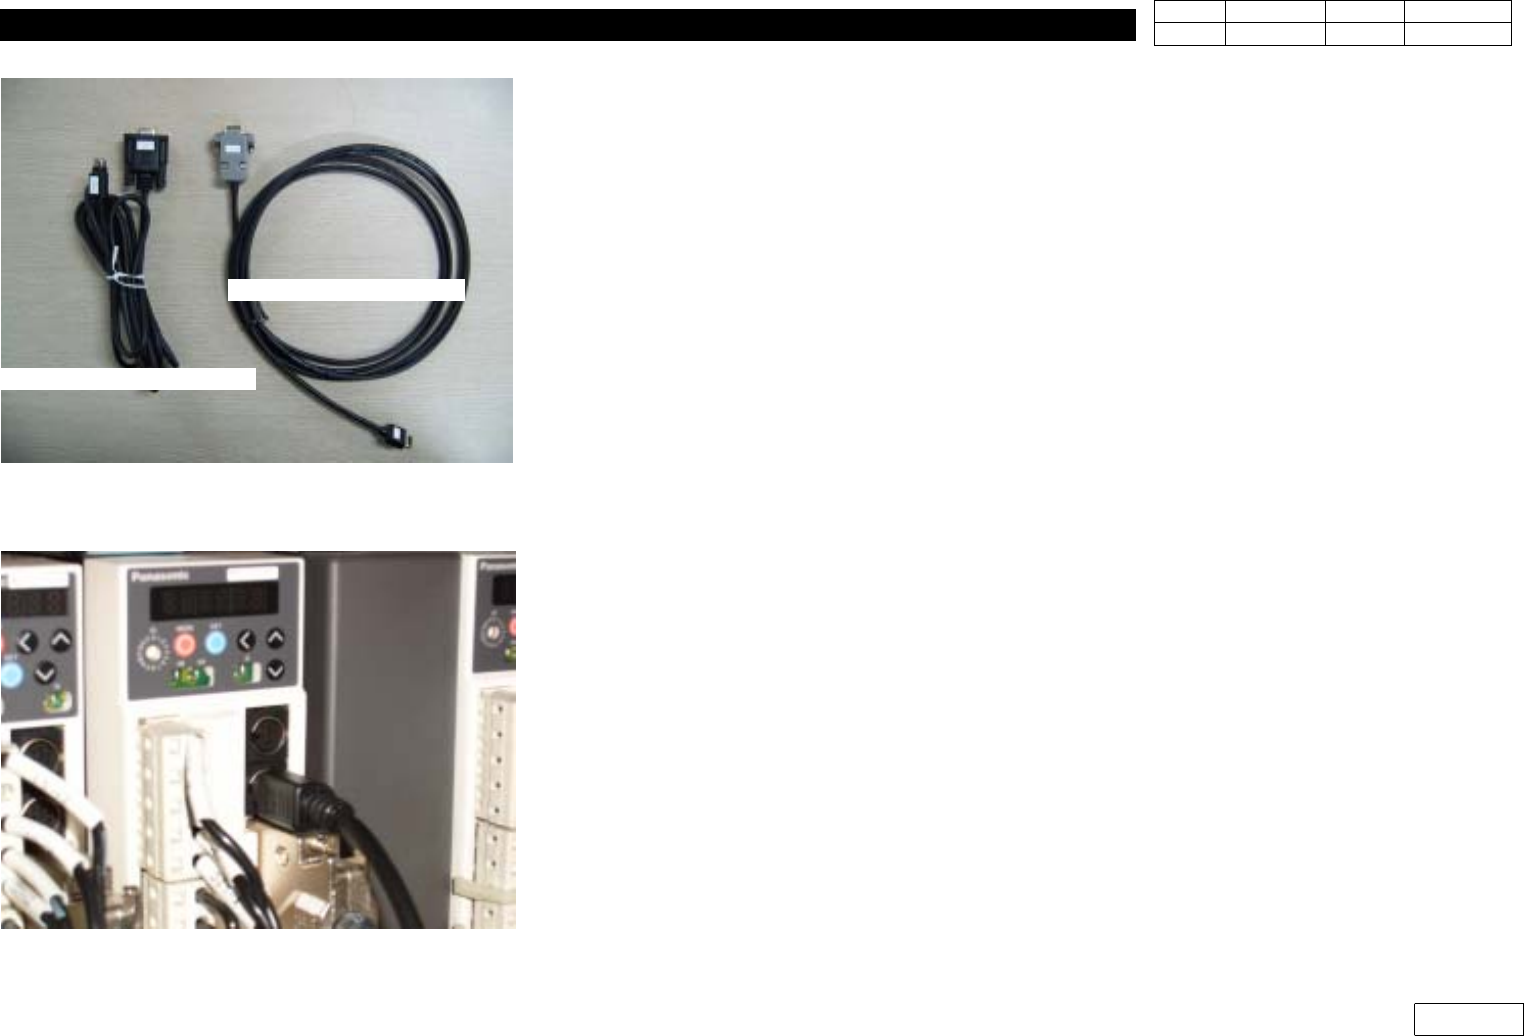
* Tools
a) Notebook Computer
b) Cable for interface
1) Open the Rear Cover of Equipment
2) Turn on All the Power of Equipment or Approve the Power of A pplying Motor Amplifier
3) Prepare Laptop Installed with Panaterm S oftware
4) Prepare Interface Cable and Connect to Laptop as Fig 9-2-1-1(RS232 Port)
5) Connect Cable to the Lower Port of 2 Ports of Applying Amplifier as Fig 9-2-1-2
9-2-2 Software Run and Connection with Amplifier
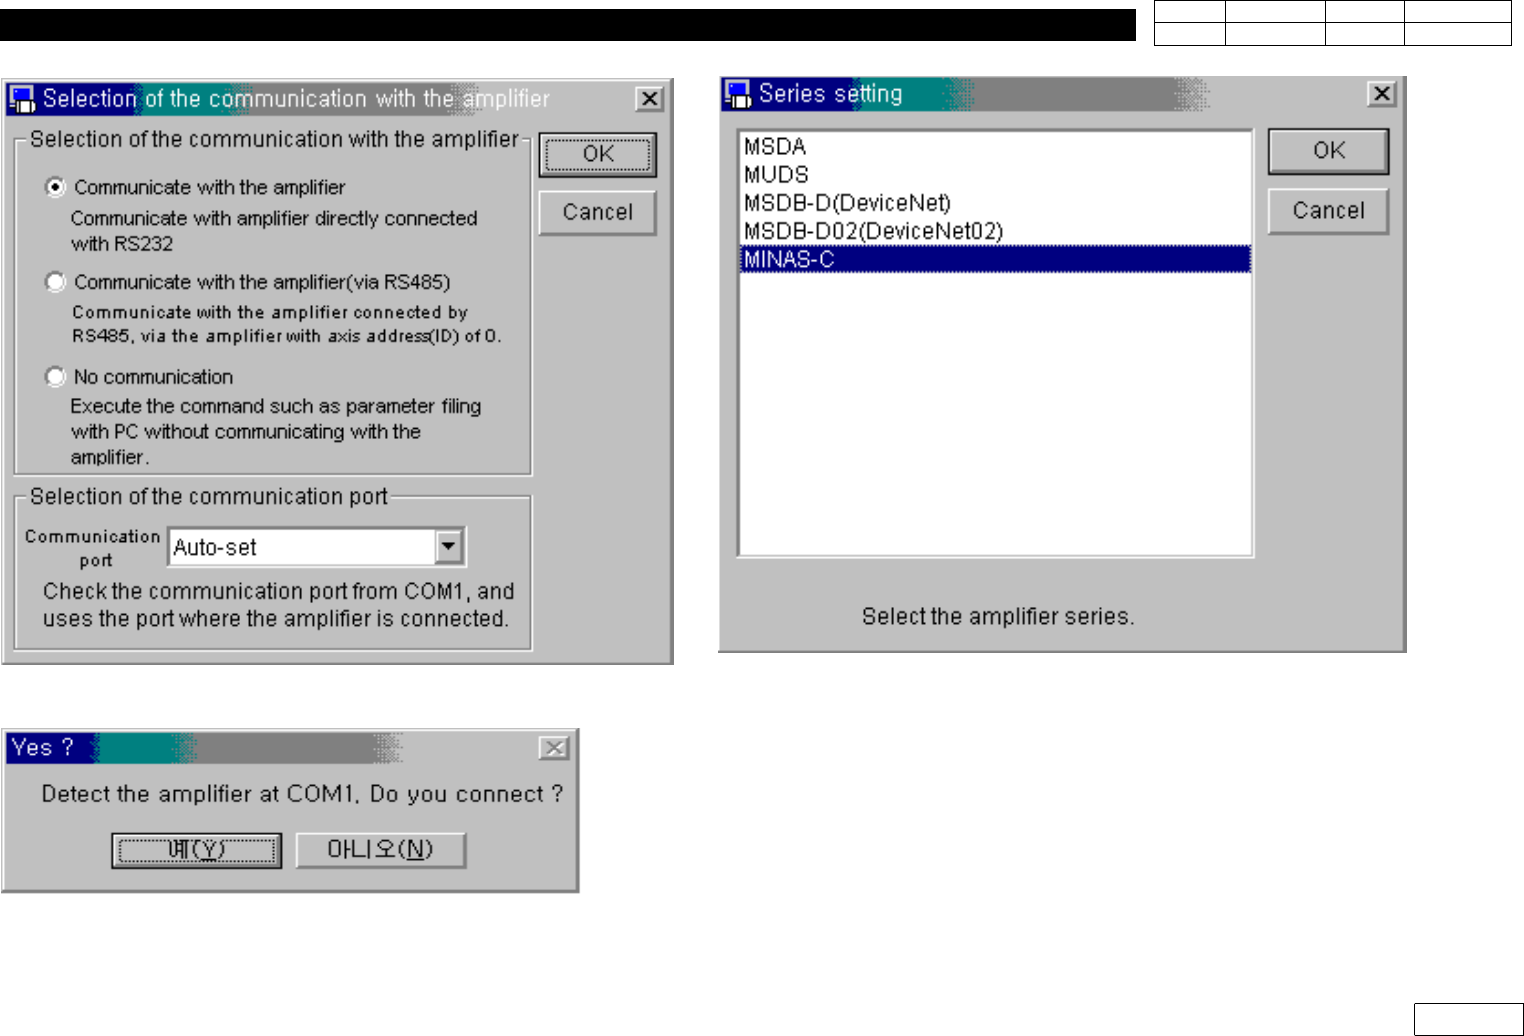
1) Run Panaterm Software of Laptop
2) W hen Message of Fig 9-2-2-1 Appears by Running Panaterm Software,
Select "Communicate with Amplifier directly c onnected with RS232" Part and Click OK
Button
3) When "Series Setting" Appears as Fig9-2-2-2, Select MINAS-C Specification at the Lowest
Part
4) When "Detect the Amplifier at COM1. Do you connect?" Message Appears, Click "Yes"
Fig9-2-1-1 Interface Cable for Pana. Amplifier
Fig.9-2-1-2 Connect I/F cable to Amplifier
Cable for Panasonic
Cable for Q-series
9. Motor & Driver
Ver. Date CP45
CP45NEO
00 2004/11 O O
9-2
Fig.9-2-2-1 Communicate with Amp
Fig.9-2-2-2 Select Amplifier type
Fig.9-2-2-3 Connect to Amp.
9. Motor & Driver
Ver. Date CP45
CP45NEO
00 2004/11 O O
9-2
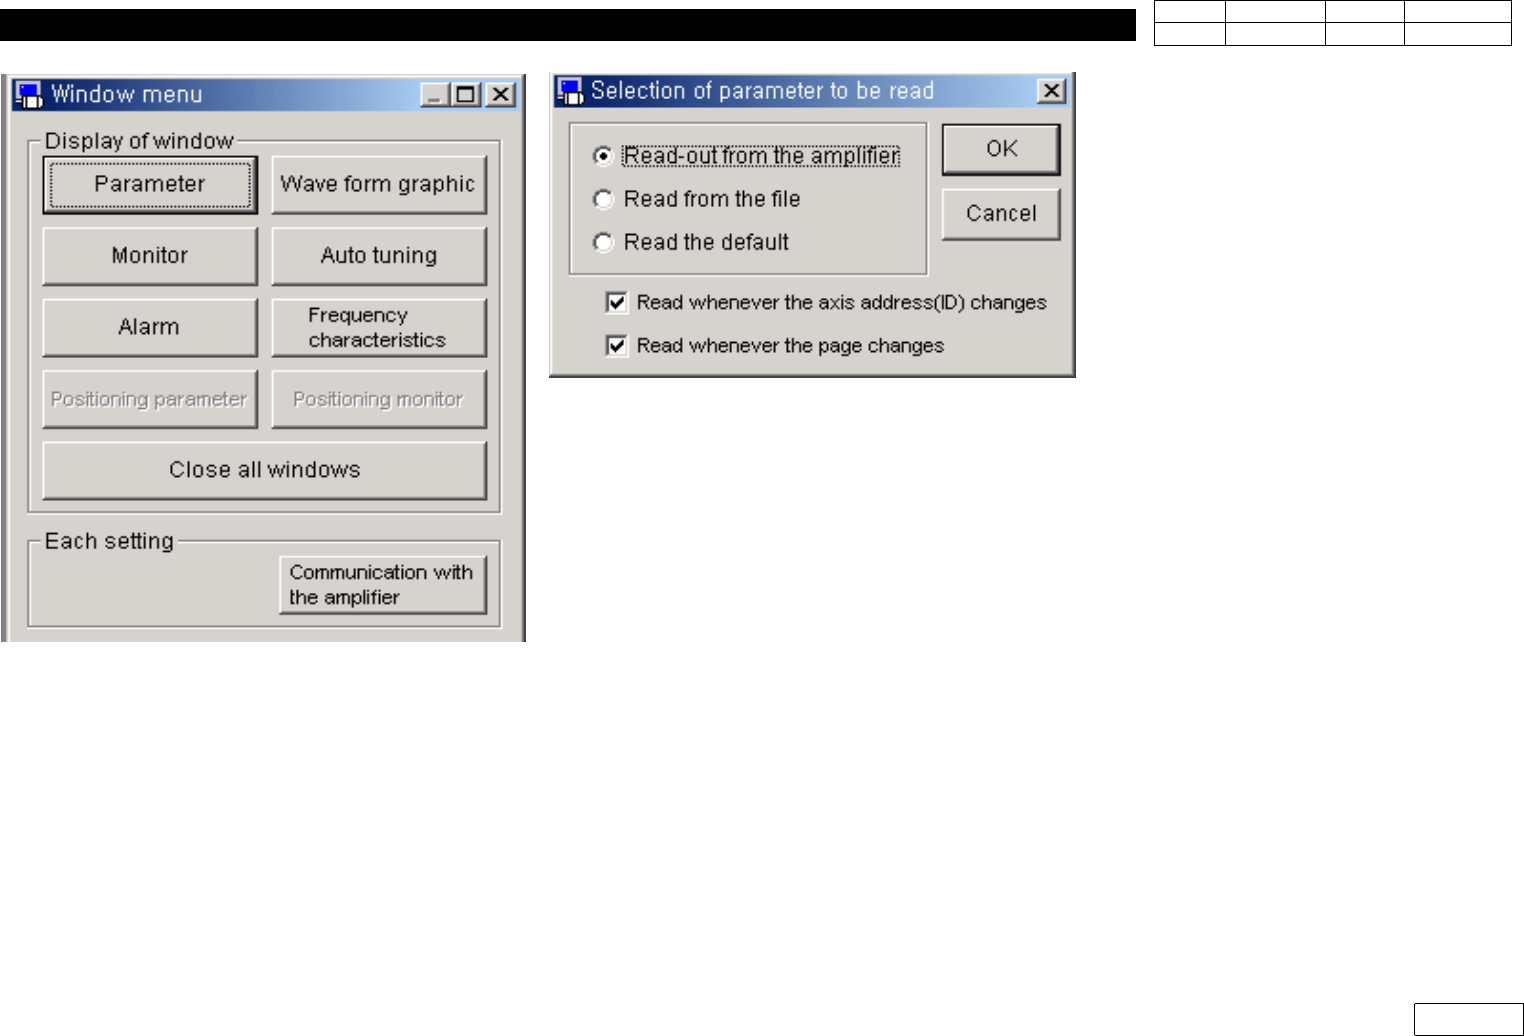
5) Select "Parameter" in Window Mode as Fig 9-2-2-4
(Be Careful not to Use other Button as it is for Expert Use)
6) Select "Read-out from the Amplifier" in "Selection of parameter to be read" Window as
Fig 9-2-2-5
7) Fig 9-2-2-6 Shows the Successful Connection with Existing Amplifier
Fig.9-2-2-4 Select Parameter mode
Fig.9-2-2-5 Select Parameter to be read