00900068-02_SM_ASM_ProcessLens_EN.pdf - 第84页
ASM Proces sLens Single - l ane 03/2020 Edit ion 84 Step 5 1. Click on the centre of the ta rget. The FO V centres to t he tar get. 2. Click Continue . ProcessLens adjusts the light ing, then s tarts the teach proces s. …
ASM ProcessLens Single-lane 03/2020 Edition
83
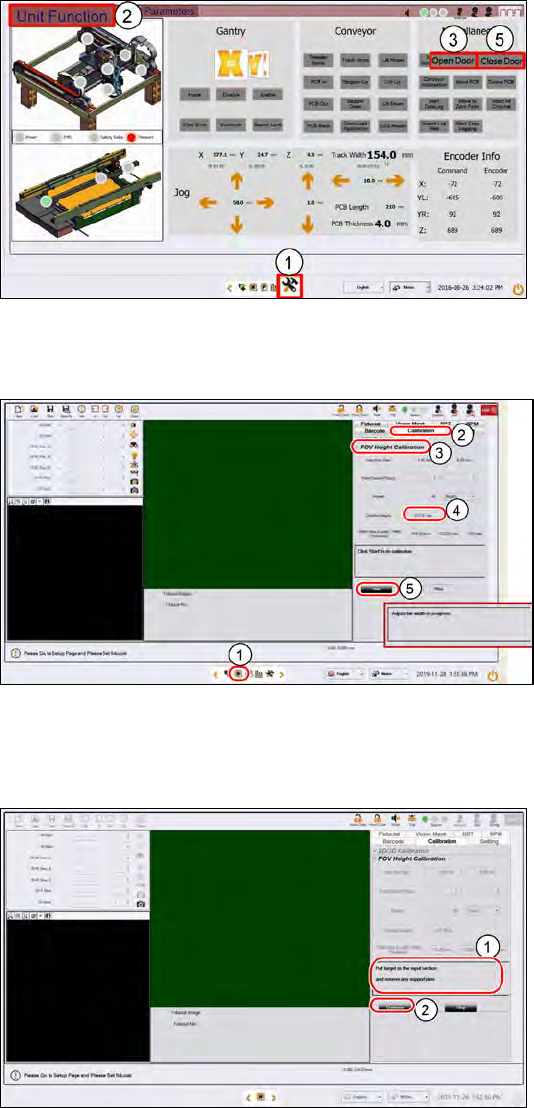
Step 2
1.
Go to the DiagnosticPage.
2.
Click Unit Function.
3.
At Miscellaneous, click Open
Door.
4.
Open the cover, remove all
support pins.
5.
Close the cover. Click Close
Door to lock the cover
Step 3
1.
Click on the Teach page.
2.
Click on Calibration.
3.
Click on FOV Height Calibration.
4.
Input the target´s Certified
height.
5.
Select Start.
The conveyor adjusts to the
width
of the target fixture.
(If there are support pins on
the
conveyor, open the cover and
remove them now.)
Step 4
1.
Place the target on the input
section.
2.
Click Continue.
The target loads to the inspection
section and the camera moves to
the centre of the target.
ASM ProcessLens Single-lane 03/2020 Edition
84
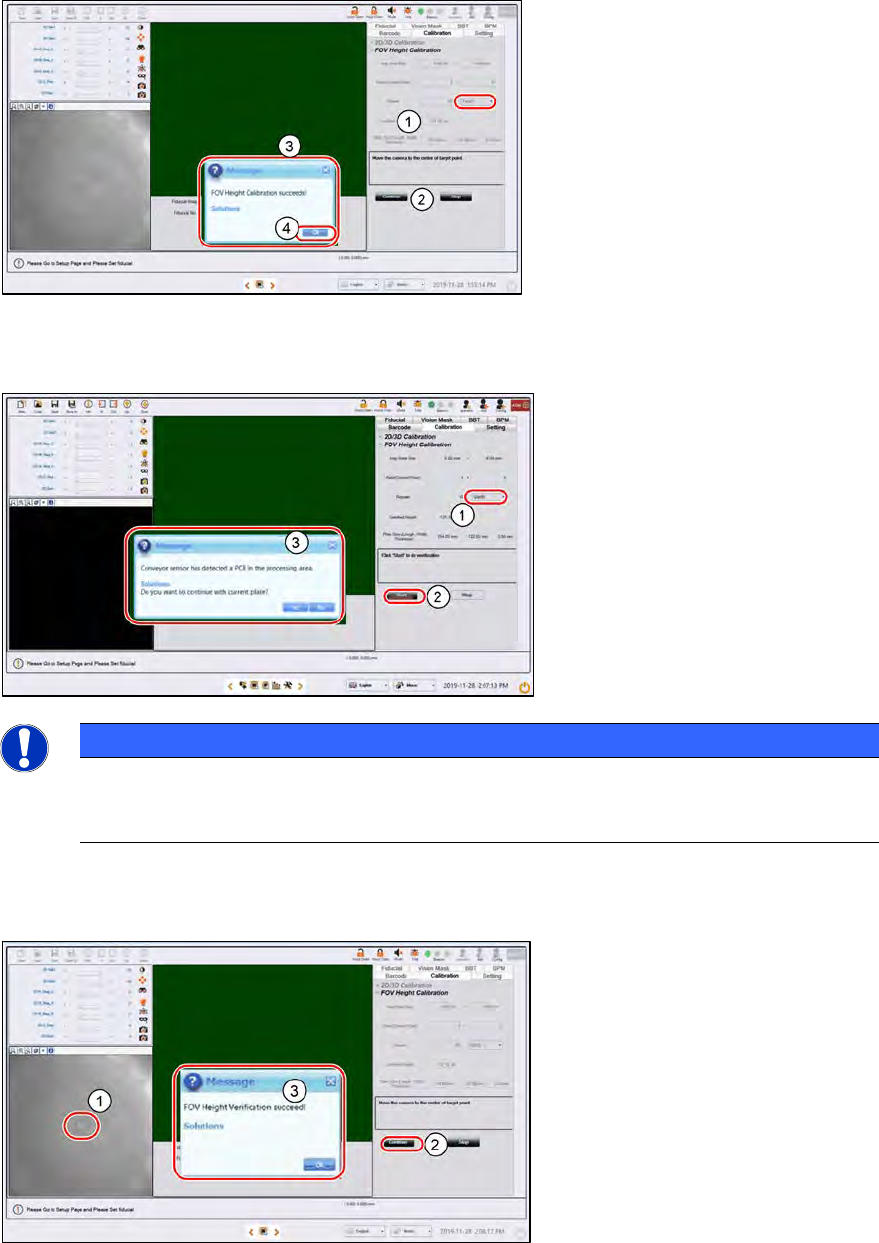
Step 5
1.
Click on the centre of the target.
The FOV centres to the target.
2.
Click Continue. ProcessLens
adjusts the lighting, then starts the
teach process.
3.
After 11.5 minutes, a "FOV
Height Calibration
succeeds!" message pops up.
4.
Click OK.
Step 6
1.
Select Verify.
2.
Click Start.
3.
Click Yes to the next message as
the target is still on the conveyor.
NOTICE
If the calibration fails, stop the process. Remove the target and inspect the target under a
microscope for foreign material. Remove any foreign material with a clean, dry, soft hair
brush.
Step 7
1.
Click on the center of the target.
The FOV center’s to the target.
2.
Click Continue. ProcessLens
adjusts the lighting, and then
starts the verification process.
3.
A "
FOV Height Verification
succeeds!" message pops up.
Click OK.
ASM ProcessLens Single-lane 03/2020 Edition
85
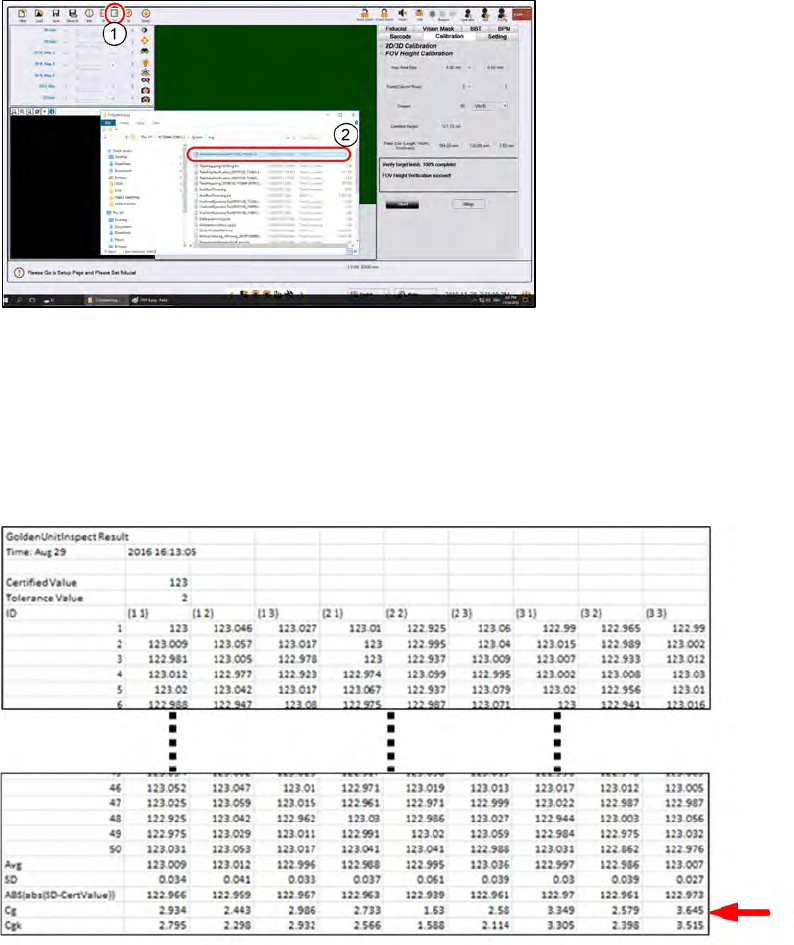
Step 8
1.
Click Out to move the target to
the output section. Remove the
target from the machine.
2.
The results of the FOV Height
calibration test can be found in an
output file in the path
C:\system\
log\GoldenUnitInspect
***timestamp***.csv where
timestamp is the time the
calibration was completed.
Step 9
Keep the results file as proof of the ProcessLens Cg and Cgk performance. Open the file with a
text editor or MS Exel: At the bottom rows, the calculated Cg and Cgk values is listed.
Example of a GoldenUnitInspect***timestamp***.csv output file using a target of
height 123µm.