manual-flexible-arm-fume-extractor-jbc-0035573_ID-255561_EN.pdf - 第4页
100 cm / 39.4 in max. 4 Hangi ng arm no dist ance T o avo id br eak in g the a rm, do n ot exte nd th e ar m more t han 100 cm / 3 9 .37 i n from t he ce nter of it s bas e and d o not go b el ow the min imu m be nd rad …
40 mm
50 mm
60 mm
80 mm
100 mm
130 mm
130 mm
para manuales - negro plano
200 mm
300 mm
www.jbctools.com
STATION 1
Filter
STATION 2
PORT 1
PEDAL 1 PEDAL 2
FAE2
FUME EXTRACTOR
PORT 2
STATION 3 STATION 4
OK
www.jbctools.com
STATION 1
Filter
STATION 2
PORT 1
PEDAL 1 PEDAL 2
FAE2
FUME EXTRACTOR
PORT 2
STATION 3 STATION 4
OK
70 cm / 27.6 in max.
3
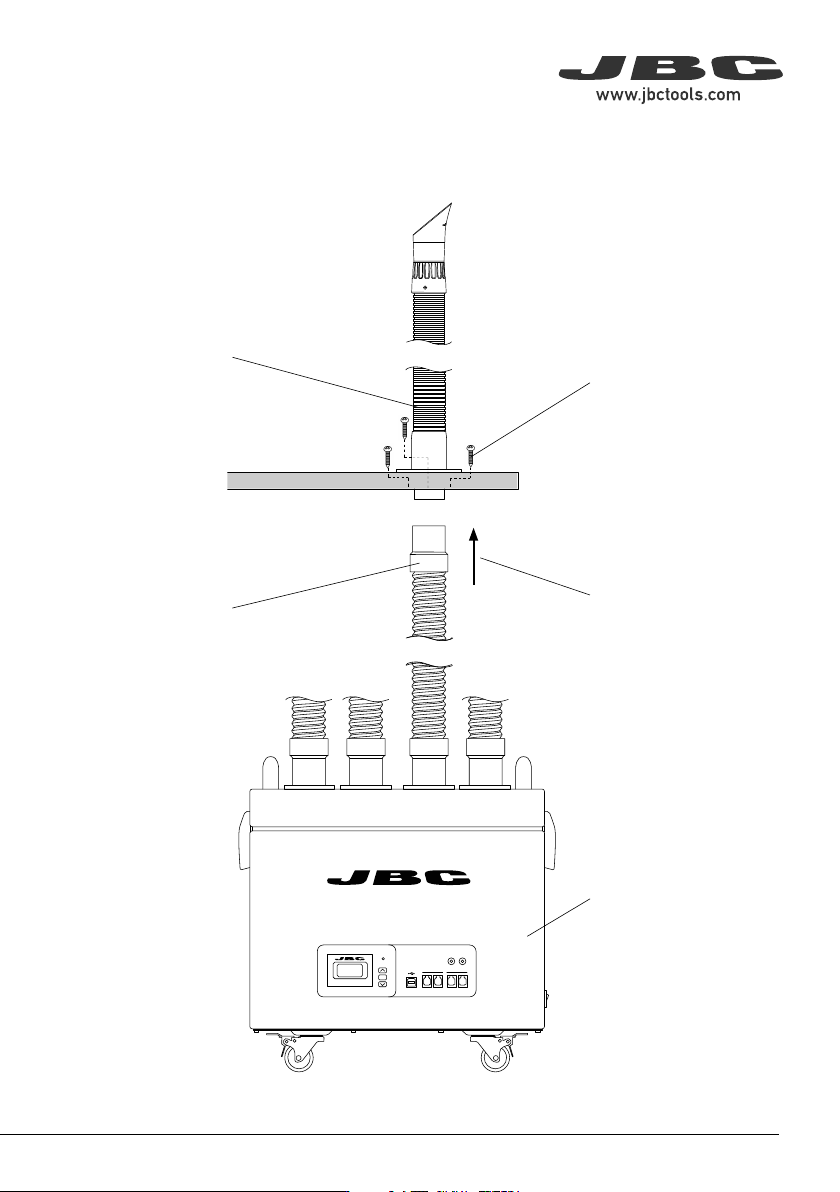
Assembly Example
Connect the flexible hose to
the flexible arm.
FAE2
Fume Extractor
FAE010
Flexible Hose ø50mm
Total length: ~1.6m / ~63in
Fix the flange on your
workbench with the
supplied screws (more
information on page 6).
FAE 022
Flexible Arm ø50mm
Bear in mind the installation
dimensions (see page 5).
100 cm / 39.4 in max.
4
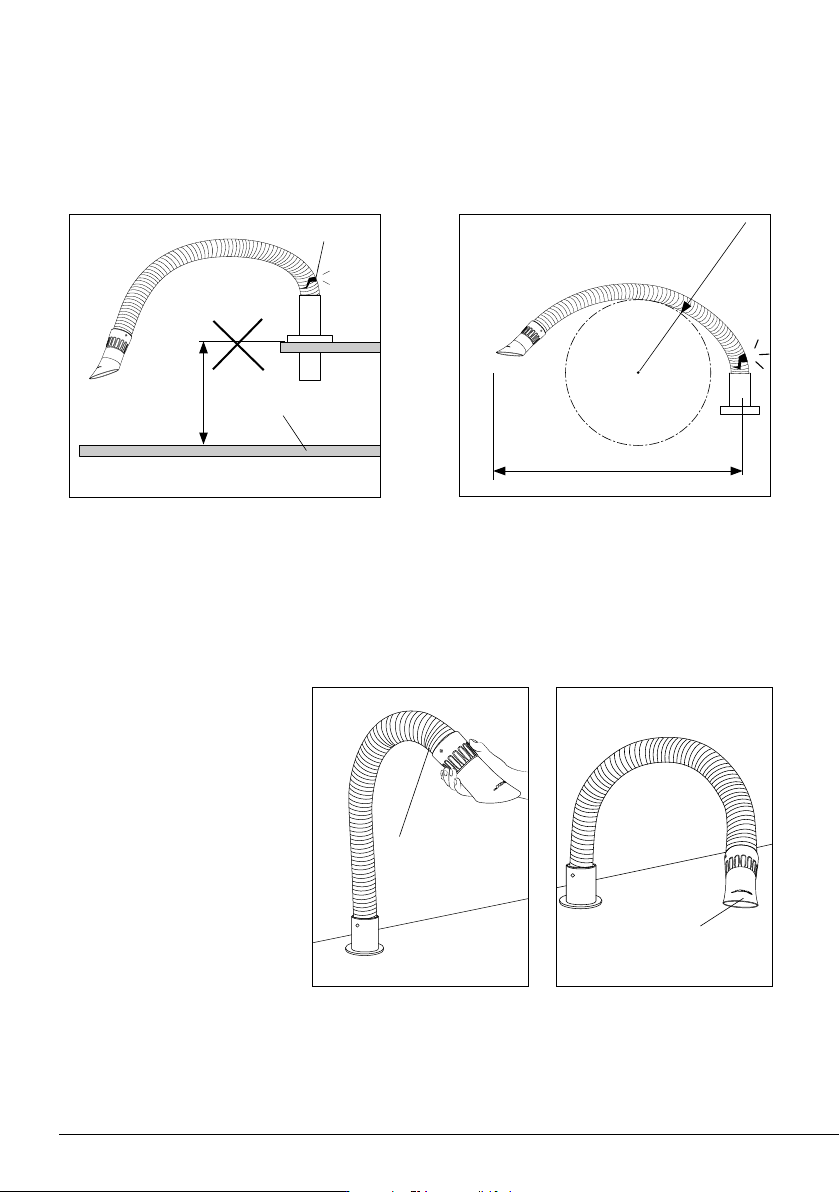
Hanging arm
no distance
To avoid breaking the arm, do not extend the
arm more than 100 cm / 39.37 in from the
center of its base and do not go below the
minimum bend radius of 20 cm / 7.87 in.
workbench
breakage
Do not install the flexible arm on shelves or
higher levels than the work bench. Forced
bending radii can cause the arm to break.
How to use
min. bending
radius
20cm
7.87in
Max. operating distance
1.00m / 39.37in
Arm Installation
Arm Positioning
Thanks to the flexibility of
the arm, its position can be
adapted to the particular
working environment and
conditions.
... or with the nozzle resting on
the workbench.
The arm can be used in an
upright position with the nozzle
hanging over the workplace ...
Nozzle resting
on the workbench
40 mm
50 mm
60 mm
80 mm
100 mm
130 mm
130 mm
para manuales - negro plano
200 mm
300 mm
70 cm / 27.6 in max.
www.jbctools.com
STATION 1
Filter
STATION 2
PORT 1
PEDAL 1 PEDAL 2
FAE2
FUME EXTRACTOR
PORT 2
STATION 3 STATION 4
OK
70 cm / 27.6 in max.
www.jbctools.com
STATION 1
Filter
STATION 2
PORT 1
PEDAL 1 PEDAL 2
FAE2
FUME EXTRACTOR
PORT 2
STATION 3 STATION 4
OK
5
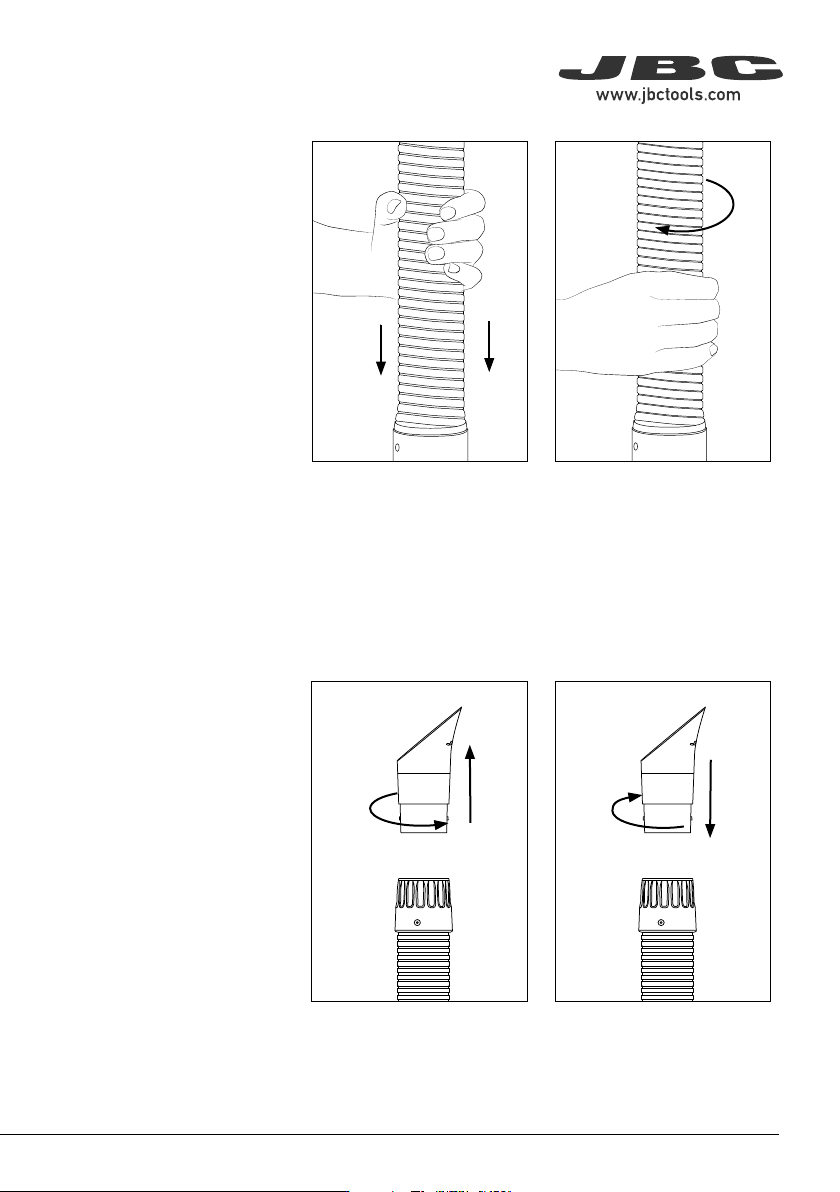
To plug the windings back in,
align them with each other and
firmly push them together.
If the flexible arm loses
firmness, it must be re-
compressed.
To increase compression, turn
the arm slightly clockwise.
Once the arm is compressed,
readjust its position.
To install a new nozzle, turn
the nozzle bayonet clockwise
to lock it in place.
Nozzle Replacement
Windings Compression
Note: In case of breakage, the
windings can be plugged back
into each other.
Nozzle and tube are connected
to each other by means of a
bayonet lock. This makes it
easy to replace the nozzles.
Disassemble the nozzle by
holding the tube with one
hand. With the other hand turn
the nozzle counter-clockwise
and pull it out.