manual-flexible-arm-fume-extractor-jbc-0035573_ID-255561_EN.pdf - 第6页
6 ma x . ø 2mm ma x . ø 0.0 7 9in ~ ø 58mm ~ ø 2.283in ~ ø 7 4m m ~ ø 2.9 1 3i n Work bench Drilled central hole Pilo hole (3x) Dimensions Scheme for F AE022 Fixing T o a ss emb le th e flexi ble a rm FAE020 (…
40 mm
50 mm
60 mm
80 mm
100 mm
130 mm
130 mm
para manuales - negro plano
200 mm
300 mm
70 cm / 27.6 in max.
www.jbctools.com
STATION 1
Filter
STATION 2
PORT 1
PEDAL 1 PEDAL 2
FAE2
FUME EXTRACTOR
PORT 2
STATION 3 STATION 4
OK
70 cm / 27.6 in max.
www.jbctools.com
STATION 1
Filter
STATION 2
PORT 1
PEDAL 1 PEDAL 2
FAE2
FUME EXTRACTOR
PORT 2
STATION 3 STATION 4
OK
5
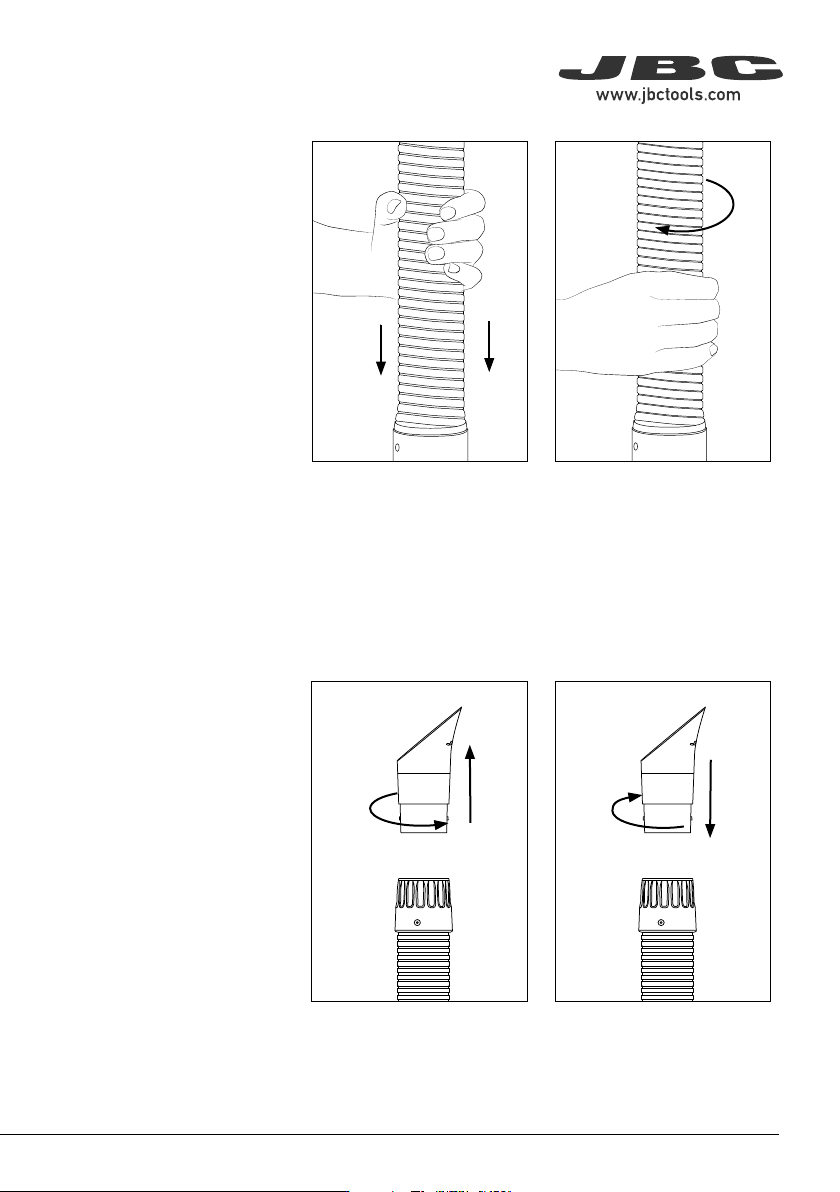
To plug the windings back in,
align them with each other and
firmly push them together.
If the flexible arm loses
firmness, it must be re-
compressed.
To increase compression, turn
the arm slightly clockwise.
Once the arm is compressed,
readjust its position.
To install a new nozzle, turn
the nozzle bayonet clockwise
to lock it in place.
Nozzle Replacement
Windings Compression
Note: In case of breakage, the
windings can be plugged back
into each other.
Nozzle and tube are connected
to each other by means of a
bayonet lock. This makes it
easy to replace the nozzles.
Disassemble the nozzle by
holding the tube with one
hand. With the other hand turn
the nozzle counter-clockwise
and pull it out.
6
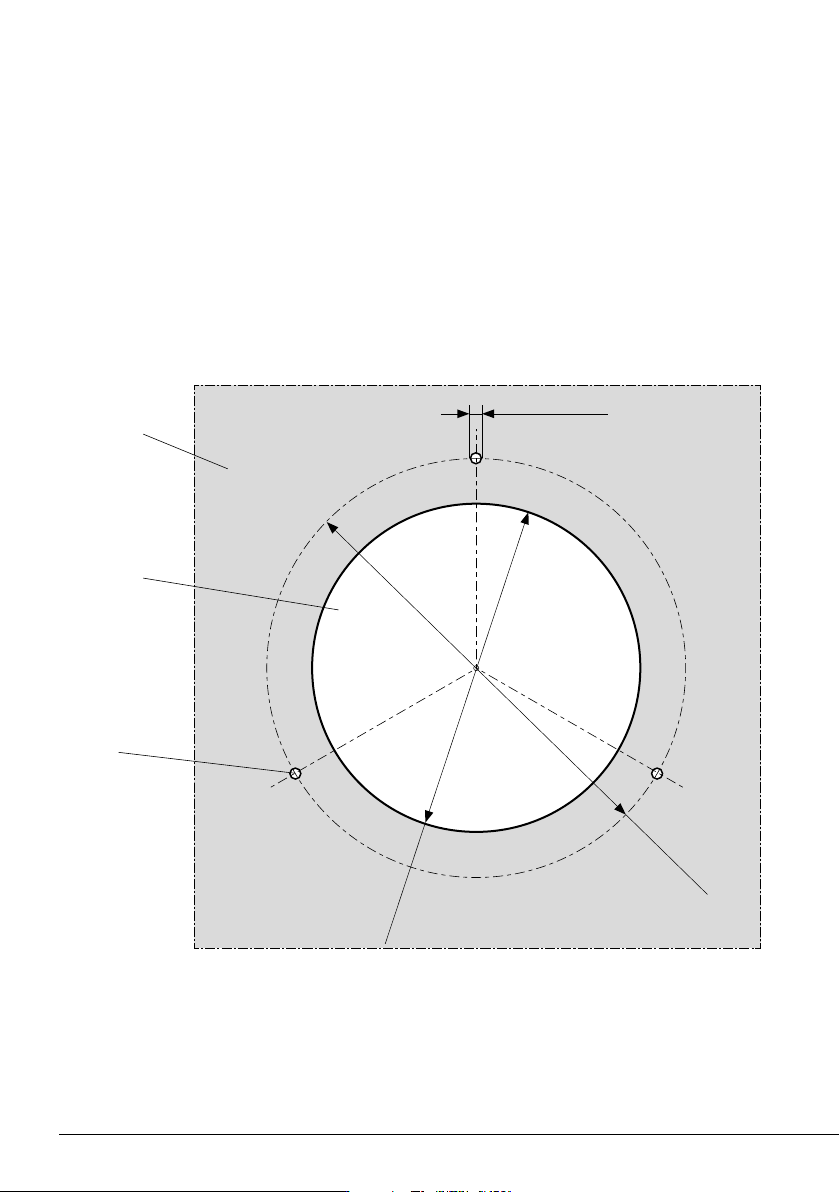
max. ø2mm
max. ø0.079in
~
ø
58mm
~
ø
2.283in
~
ø
74mm
~
ø
2.913in
Work bench
Drilled central
hole
Pilo hole
(3x)
Dimensions Scheme for FAE022 Fixing
To assemble the flexible arm FAE020 (Ø50) for the first time, follow these instructions:
- First, make the large central hole in your workbench as shown in the drawing below.
- Place the FAE020 flange in the opening and mark the points for the three pilot holes.
- Take out the flange and drill the three holes at the marked spots. See the hole diameter on the
dimension scheme:
40 mm
50 mm
60 mm
80 mm
100 mm
130 mm
130 mm
para manuales - negro plano
200 mm
300 mm
Notes
7