OM-1833-001w_SL.pdf - 第37页
1504-001 2. Attachment and Detachment of T ape 2. Attachment and Detachment of T ape Table End Cutting Position Table End Cutting Position • For T ape Width: 8 mm, Feed Pitch: 1 mm Cut the tape at the back end of the thi…

OM-1833
1-16
1504-001
2. Attachment and Detachment of Tape
2. Attachment and Detachment of Tape
Table End Cutting Position
Table End Cutting Position
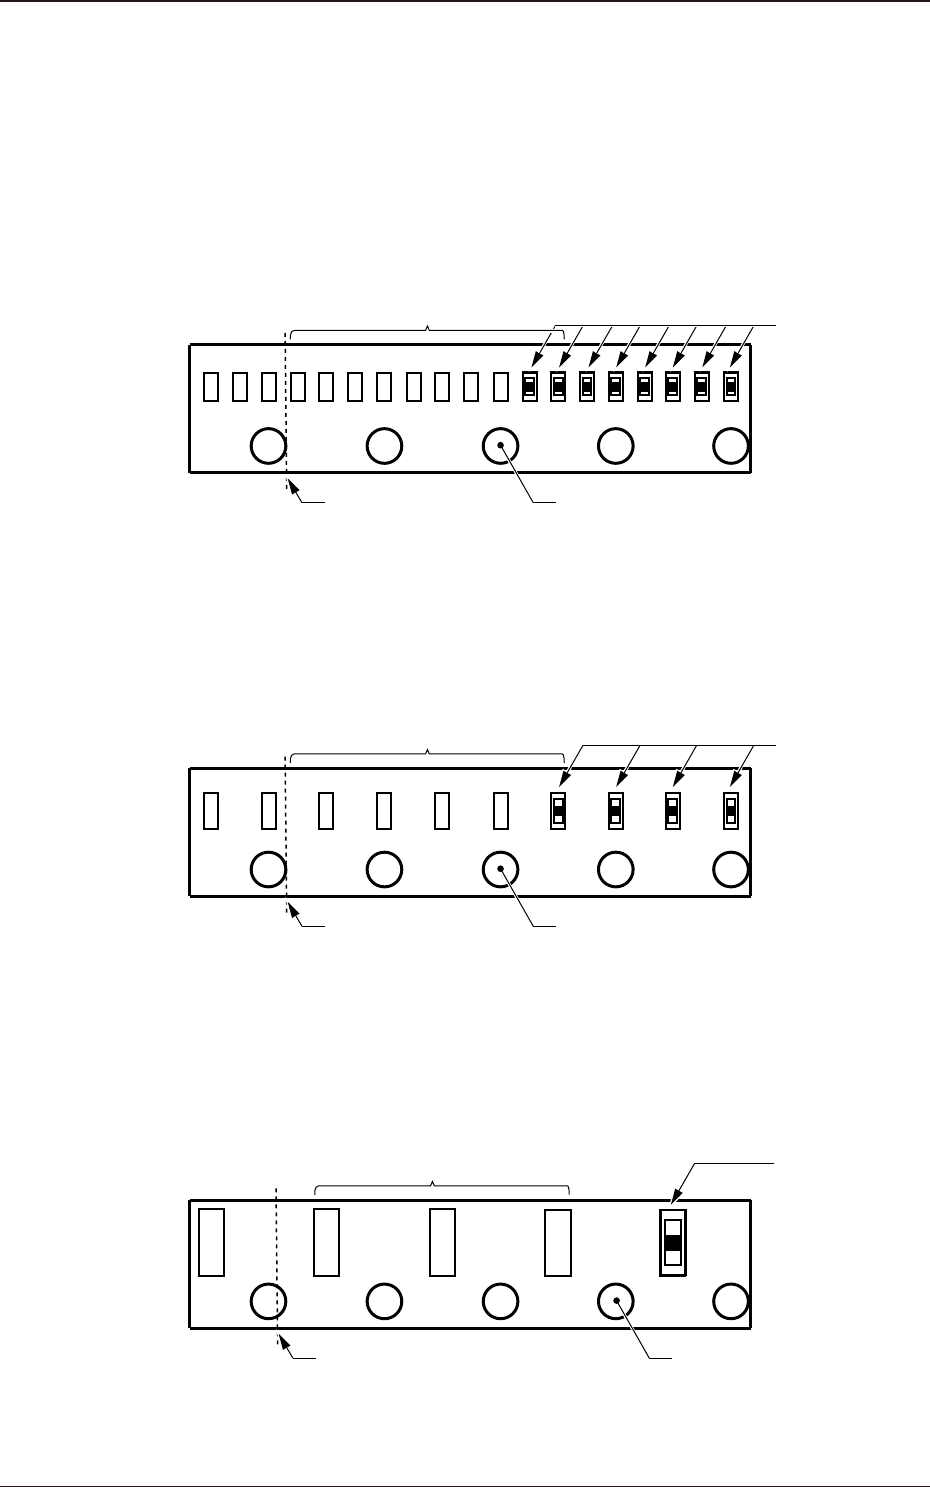
•
For Tape Width: 8 mm, Feed Pitch: 1 mm
Cut the tape at the back end of the third perforation from the one ahead of the
last pocket where a component has been put.
Pockets where a
component has
been put
123
Cutting Position
(Back end of the perforation)
Perforation ahead of the
last pocket where a component has been put
No. of Empty Pockets: 8 to 10
Fig. B1
•
For Tape Width: 8 mm, Feed Pitch: 2 mm
Cut the tape at the back end of the third perforation from the one ahead of the
last pocket where a component has been put.
Pockets where a
component has
been put
123
Cutting Position
(Back end of the perforation)
Perforation ahead of the
last pocket where acomponent has been put
No. of Empty Pockets: 4 to 5
Fig. B2
•
For Tape Width: 8 mm, Feed Pitch: 4 mm
Cut the tape at the position of 1/4 of the fourth perforation from the one ahead
of the last pocket where a component has been put.
Pockets where a
component has
been put
123
Cutting Position
(1/4 position of the perforation)
Perforation ahead of thelast
pocket where a component has
been put
No. of Empty Pockets: 3
4
Fig. B3
OM-1833
2-1
1504-001
2. Attachment and Detachment of Tape
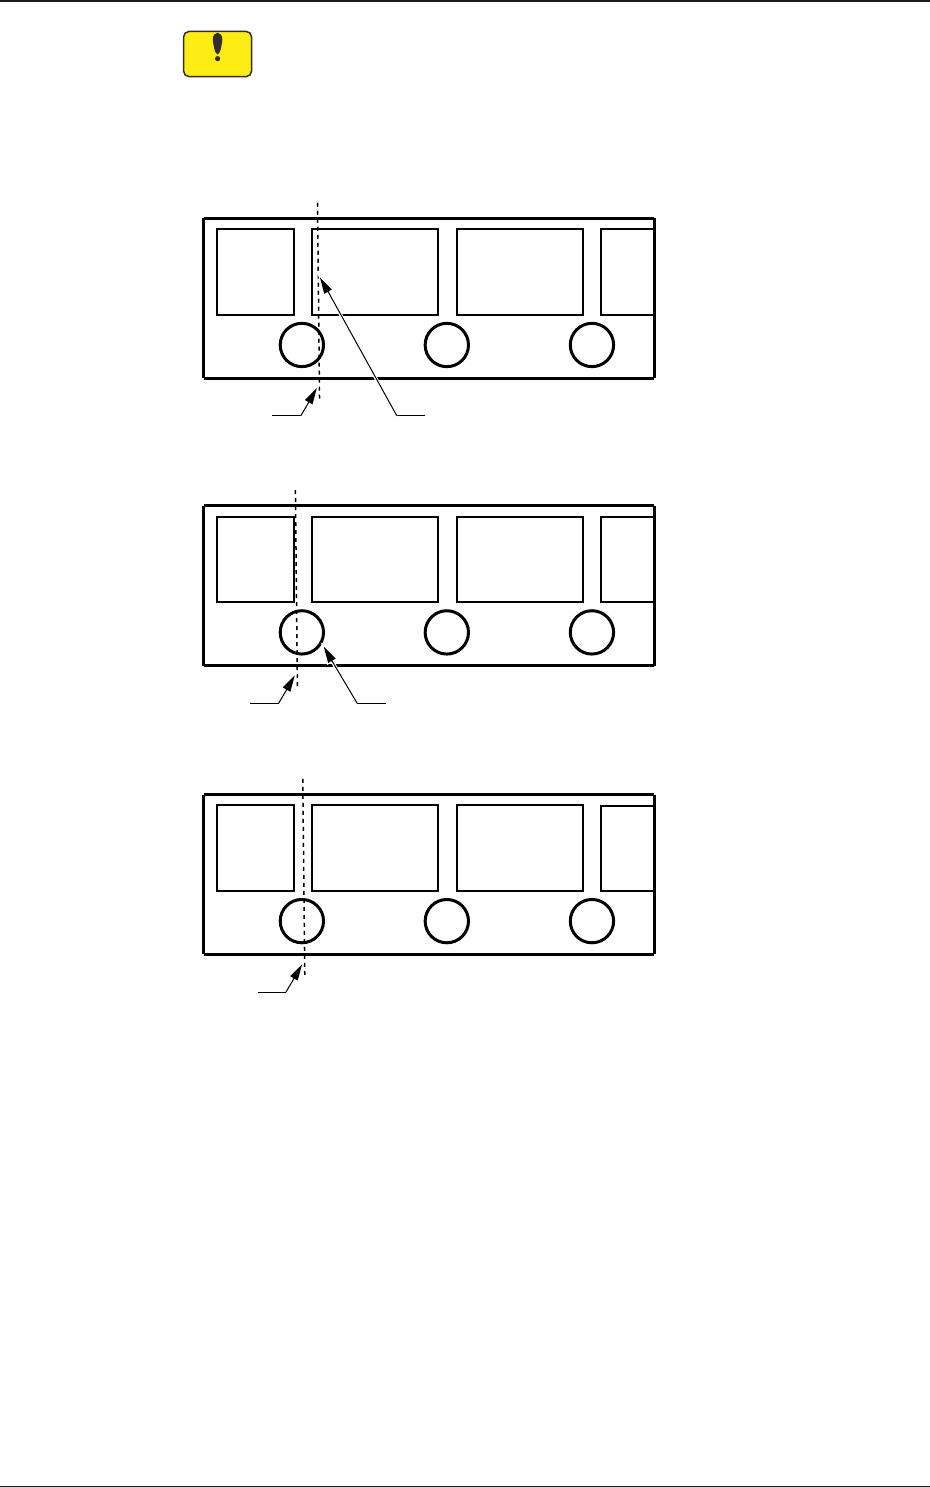
Notice
In the case that a pocket is cut when the tape is cut off at a specied
position, cut the tape so that the pocket is not cut. Also, do not cut the
tape at a position where more than half of a perforation is left. When the
tape is cut off where the pocket is cut, or more than half of a perforation
is left, it might cause a malfunction.
Cutting
Position
The pocket is cut.
NG
OK
Cutting
Position
More than half of a perforation is left.
NG
Cutting
Position
Fig. B4
OM-1833
2-2